


04 Nov Helicon Focus for Focus Stacking in Macro Photography – a Review and Tutorial
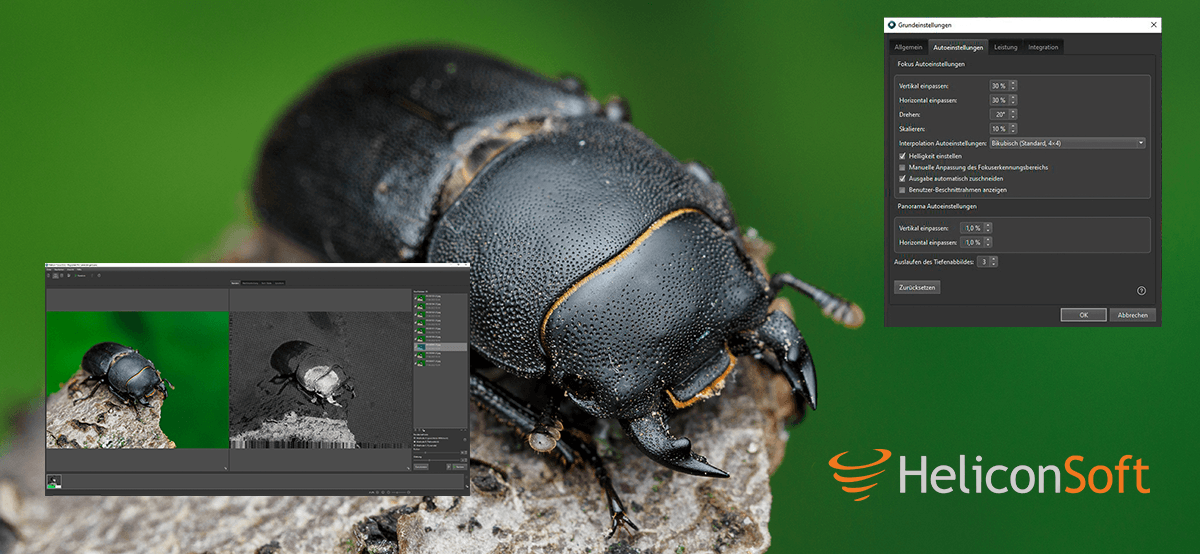
In macro photography, shooting at high magnifcations, we are often required to take focus stacks.
To counter the extremely thin depth-of-field of single images, a bracket of photos with a shifted focus layer is aligned and merged to create a final image with enhanced depth-of-field.
While this can also be done fully manual, there are also softwares that automate this process – just like Helicon Focus.
I am using Helicon Focus for all of my focus brackets, except those that are so off regarding alignment, that I have to mask and merge them completely manual.
It has saved me so incredibly much time, that I even started processing older focus brackets that have been sitting on my HDD for years.
My previous workflow was just not effective enough and left me demotivated quickly, when it came to processing these stacks.
Here´s why I enjoy working with Helicon Focus so much.
What does Helicon Focus do?

Helicon Focus is a software from ukrainian Software developer Helicon Soft, to generate focus stacks for macro photography.
It can be used for other pusposes as well though, thinking of landscape, toy, jewellery and product photograpy and various other types of photography.
The core features are the alignment of a series or sequence of shots with a shifted focus point and plane, and the combination of these shots into one composite image with more depth of field.
If you want to learn more about Focus Stacking in general, check out my articles, here:
It is also possible to finetune the results and retouch the respective masks in the Retouching tab (Copy from source, Clone and Erase) directly, which is very intuitive.
You can download Helicon Focus 8 here – there is a 30-day Trial Version available as well.
Tip: What I also sometimes do and what is particularly helpful if you have non-perfect brackets, is doing partly slabs to create multiple smaller stacks that align, which I then manually merge into a final composite afterwards.
The different merging algorithms
After loading your base images into Helicon Focus through a browser or by drag&drop, you can choose from 3 merging methods: method A, method B and method C.
Method Bl (B legacy) is not visible in the selection, but can be enabled in the settings – I don´t use that though.
Which method you should choose, depends on specific characteristics of the base images.
If the surface features many overlapping and intersecting lines, method C is a good choice.
For shiny and sparkling surfaces it might be better to pick method B.
Method C is also the best pick for large stacks (>100 images).
Here is a short summary taken from the Helicon User Guide:
Method A computes the weight for each pixel based on its contrast and then forms the weighted average of all pixels from all source images. This method works better for short stacks and preserves contrast and color.
Method B selects the source image containing the sharpest pixel and uses this information to form the “depth map”. This method imposes strict requirements on the order of images – it should always be consecutive. Perfectly renders textures on smooth surfaces.
Method C uses pyramid approach to image processing dividing image signals into high and low frequencies. Gives good results in complex cases (intersecting objects, deep stacks), though increases contrast and glare.
To get the best results, render your bracket with different methods and then combine these results with each other again.
It´s best to experiment a bit with the different methods, to get an idea what results to expect and what kind of source material to use them for.
How to create a focus stack in Helicon Focus
After starting the Helicon Focus software you are presented with the main screen with 4 tabs on top: render, edit, text, save.
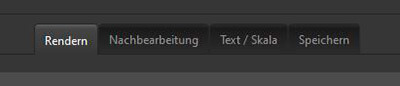
On the right side you have a section for your source images, that will be displayed there as soon as you load the images that make up your focus bracket / stack into the software.
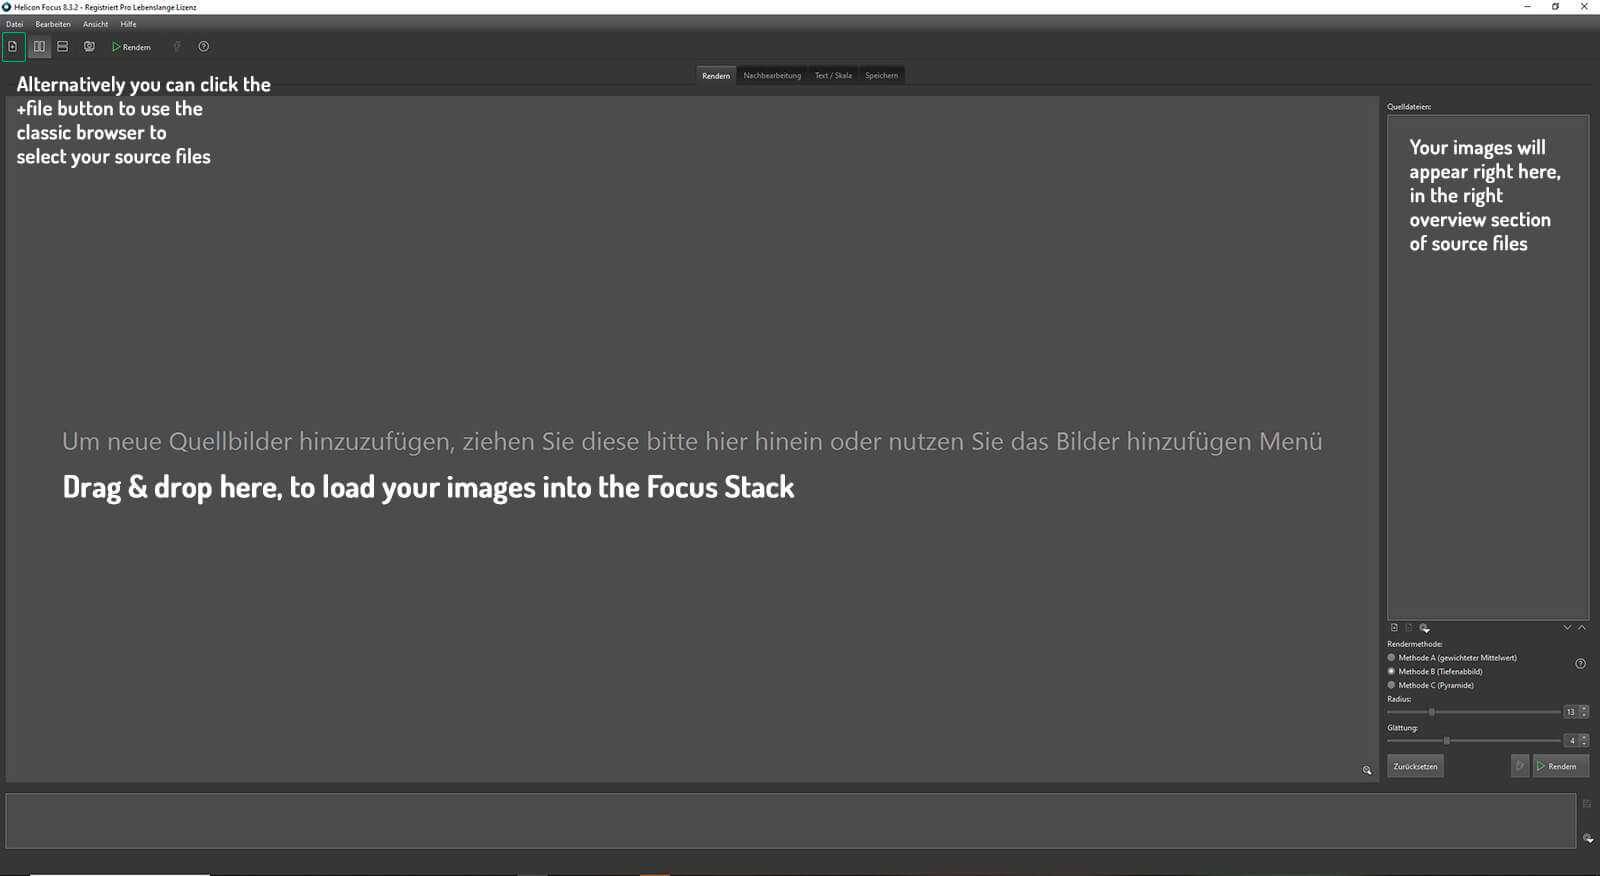
You can load your source files into Helicon by either simply dragging and dropping them into the main window or by clicking the file icon with the plus in the top left corner.
You can also change the layout of the frame display there.
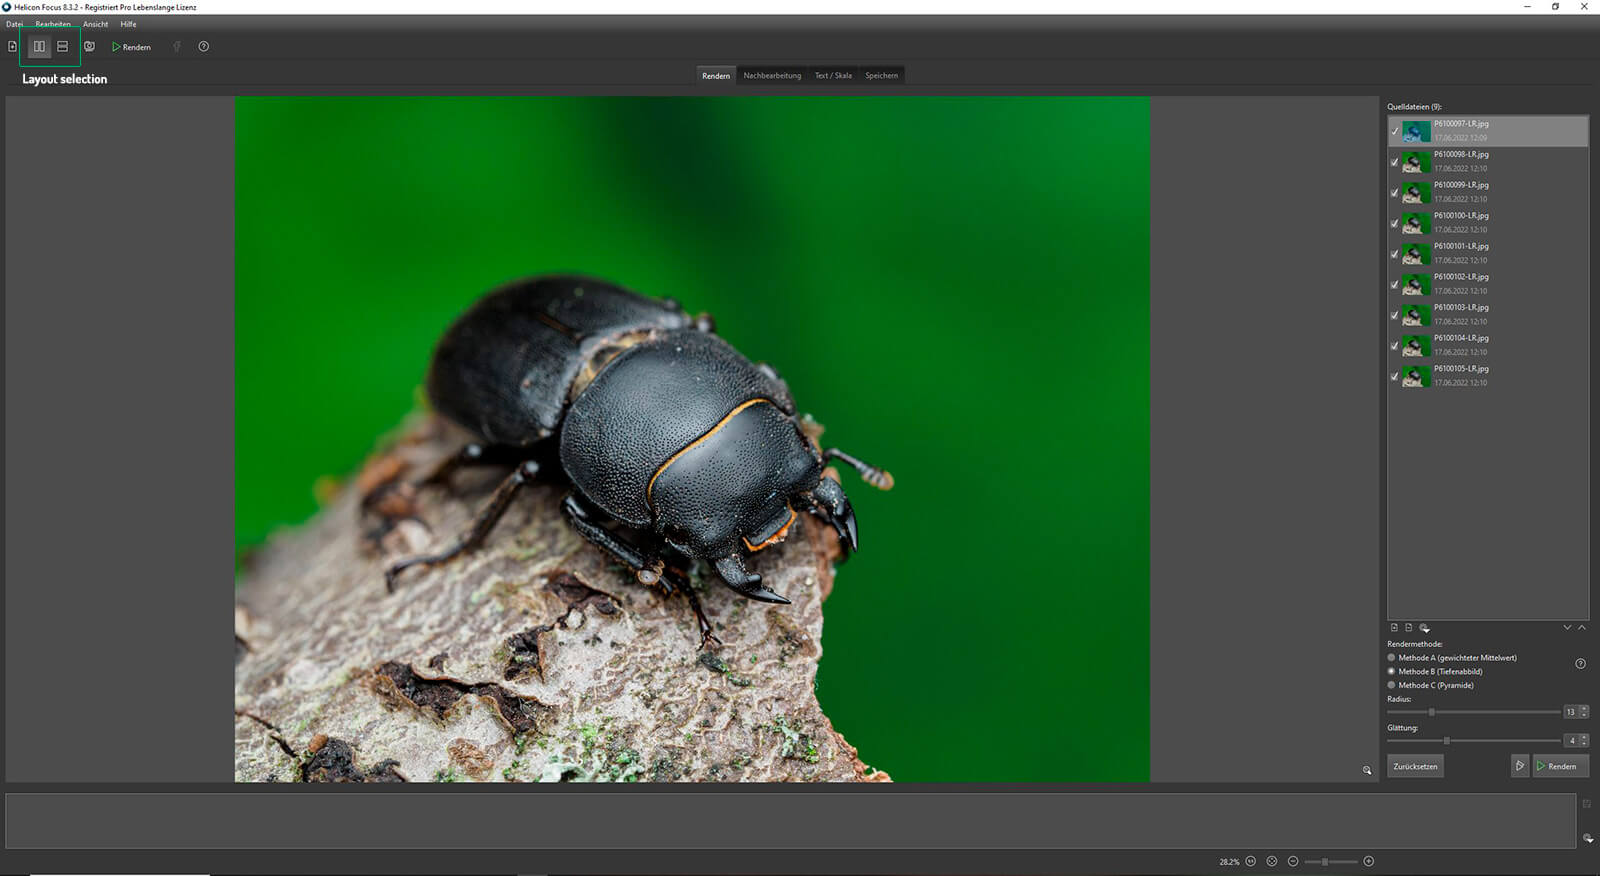
Directly below the display of your source file image series you´ll find the selection of the rendering method (A, B and C) and sliders for radius and smoothing.
Everything that is needed to create your basic focus stack can be found in one window, that´s great!
Now hit render, and you can see how Helicon identifies the in-focus areas and creates the final composite on the right side of the screen in real time.
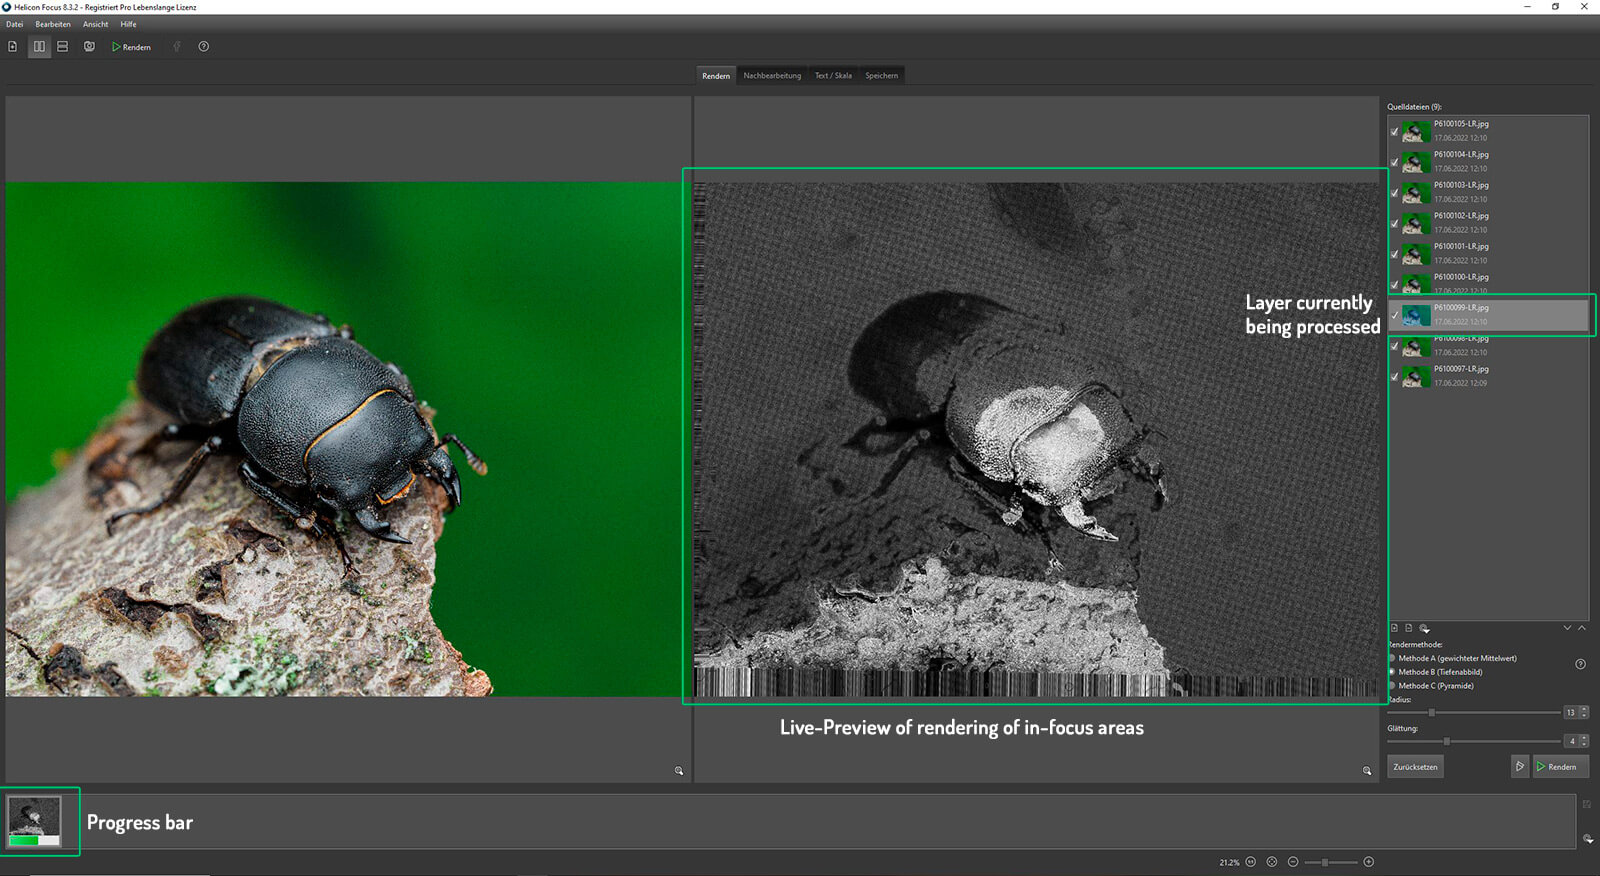
I have changed some of the basic settings of Helicon Focus as well, to make sure it can correctly align and stack my source files, as they often show a shift in the frame´s plane.
As I often take my shots handheld,I rarely get a perfect series of shots without any swaying to the left/right or top/bottom.
To reflect this, I have increased the “adjust vertically” (german: Vertikal einpassen) and adjust horizontally” (german: Horizontal einpassen) value to 30% each.
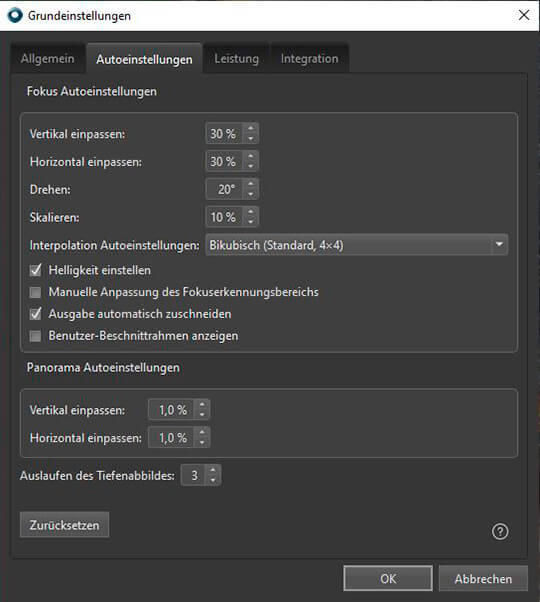
While you can finetune the sttings even more, those were totally fine for my workflow and give me great results.
Tip: make sure to have your focus bracket in a consecutive order (front-to-back or back-to-front).
If you loaded a perfect image series, which means no movement from the camera, the specimen, the background and no change of angles, your final composite image should be almost flawless.
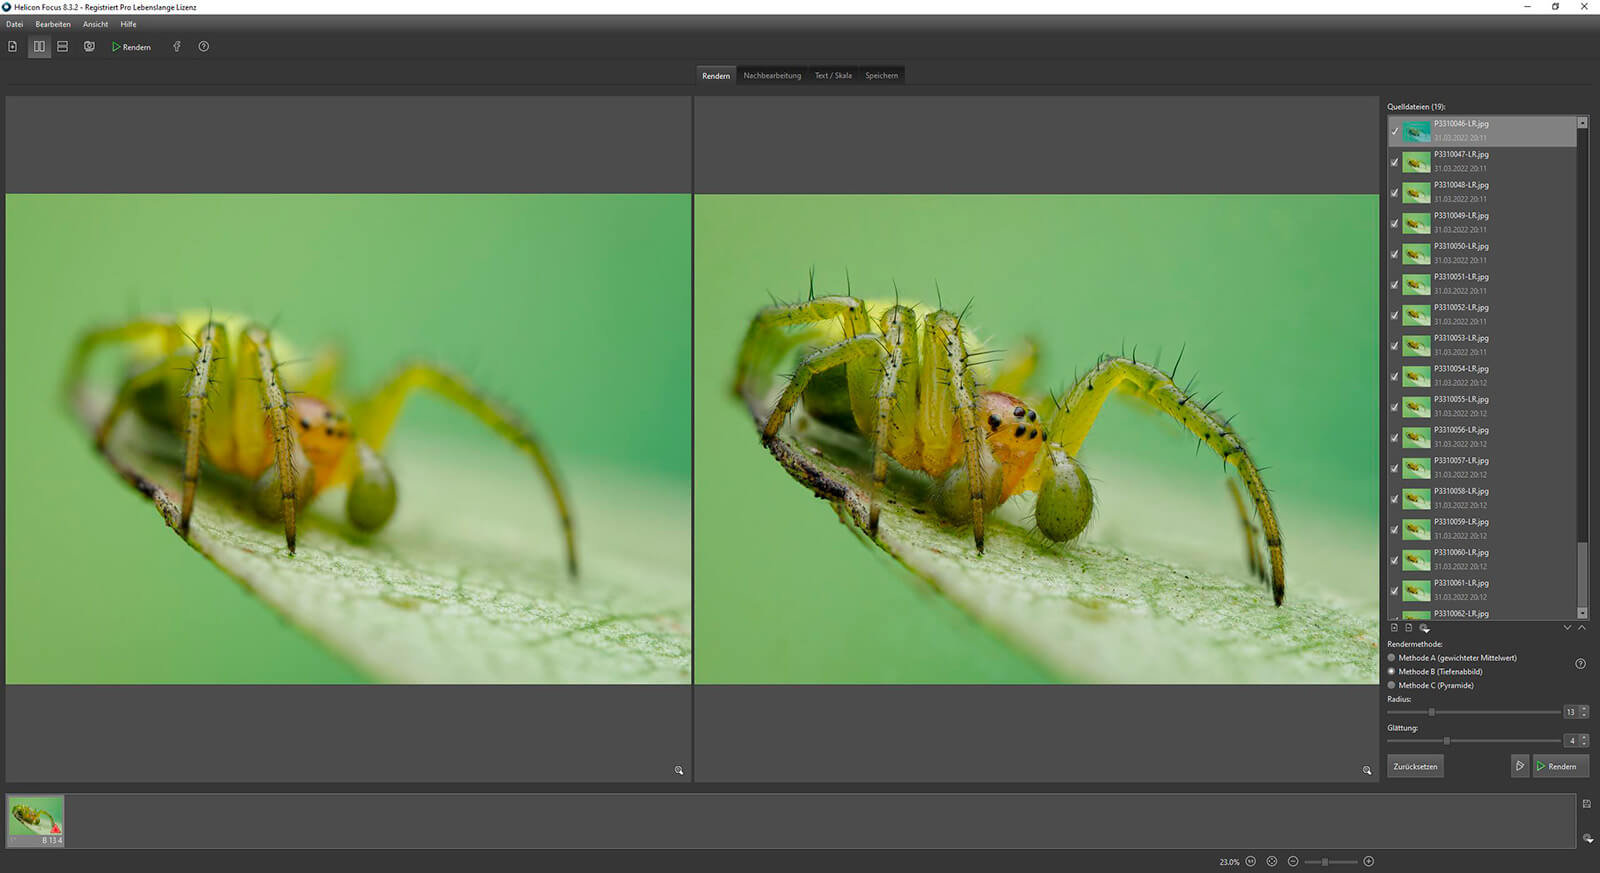
However, with live specimens that is an ideal scenario that is rare to witness, so you will most likely encounter movement in body parts like the antennae, for example, as you can see in the image below.
These moving parts will be rendered multiple times, as they all show more detail and focus than the plain background.
Here is where the simple yet powerful editing features of Helicon Focus come into play.

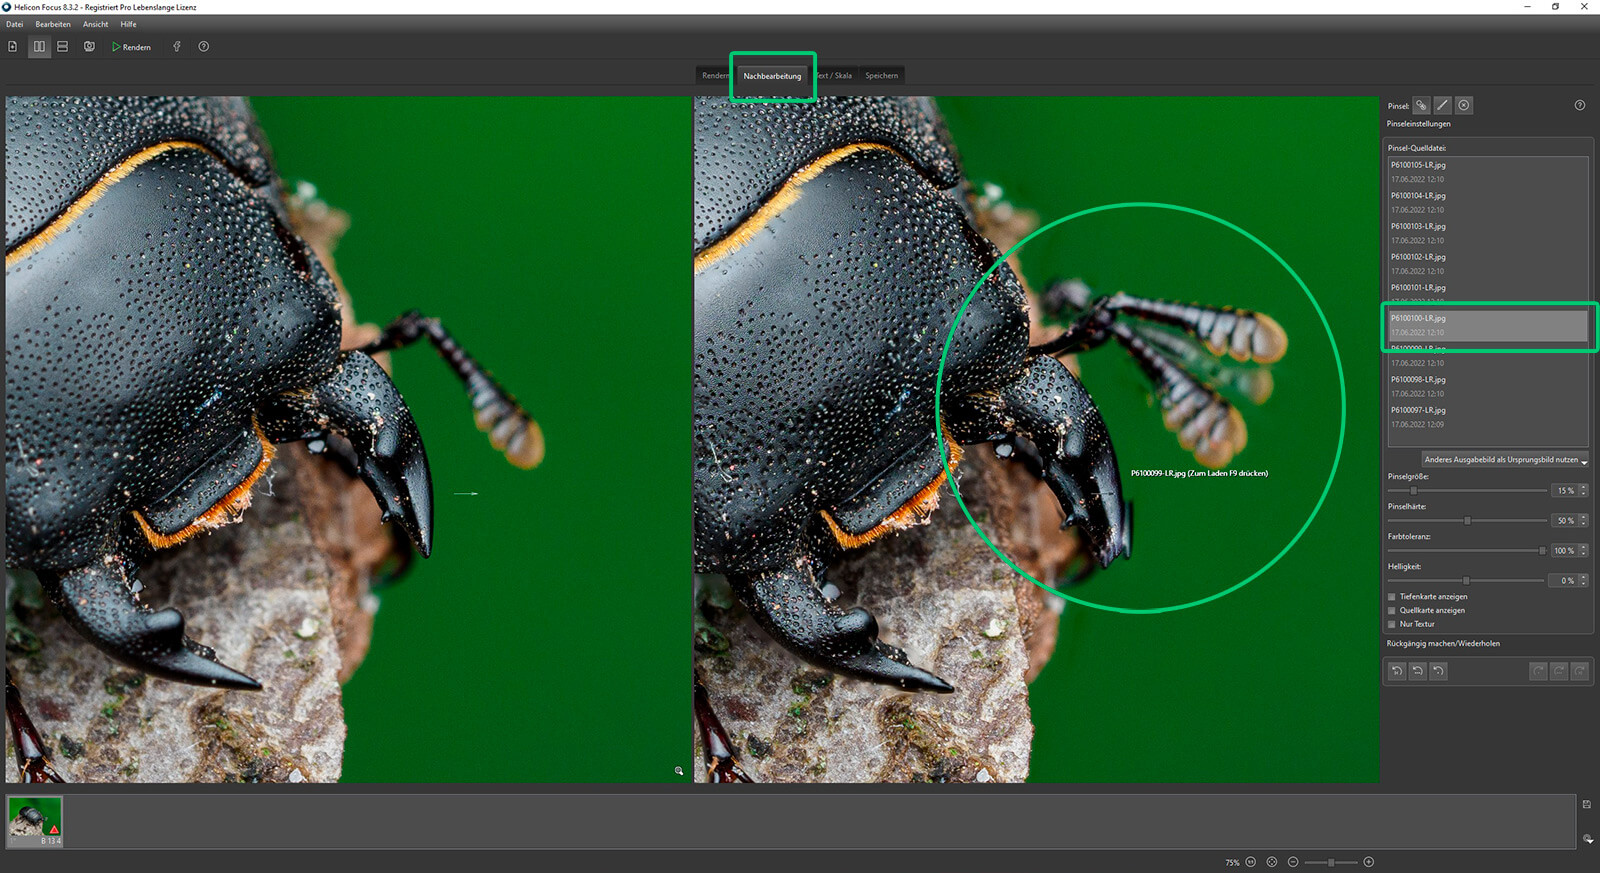
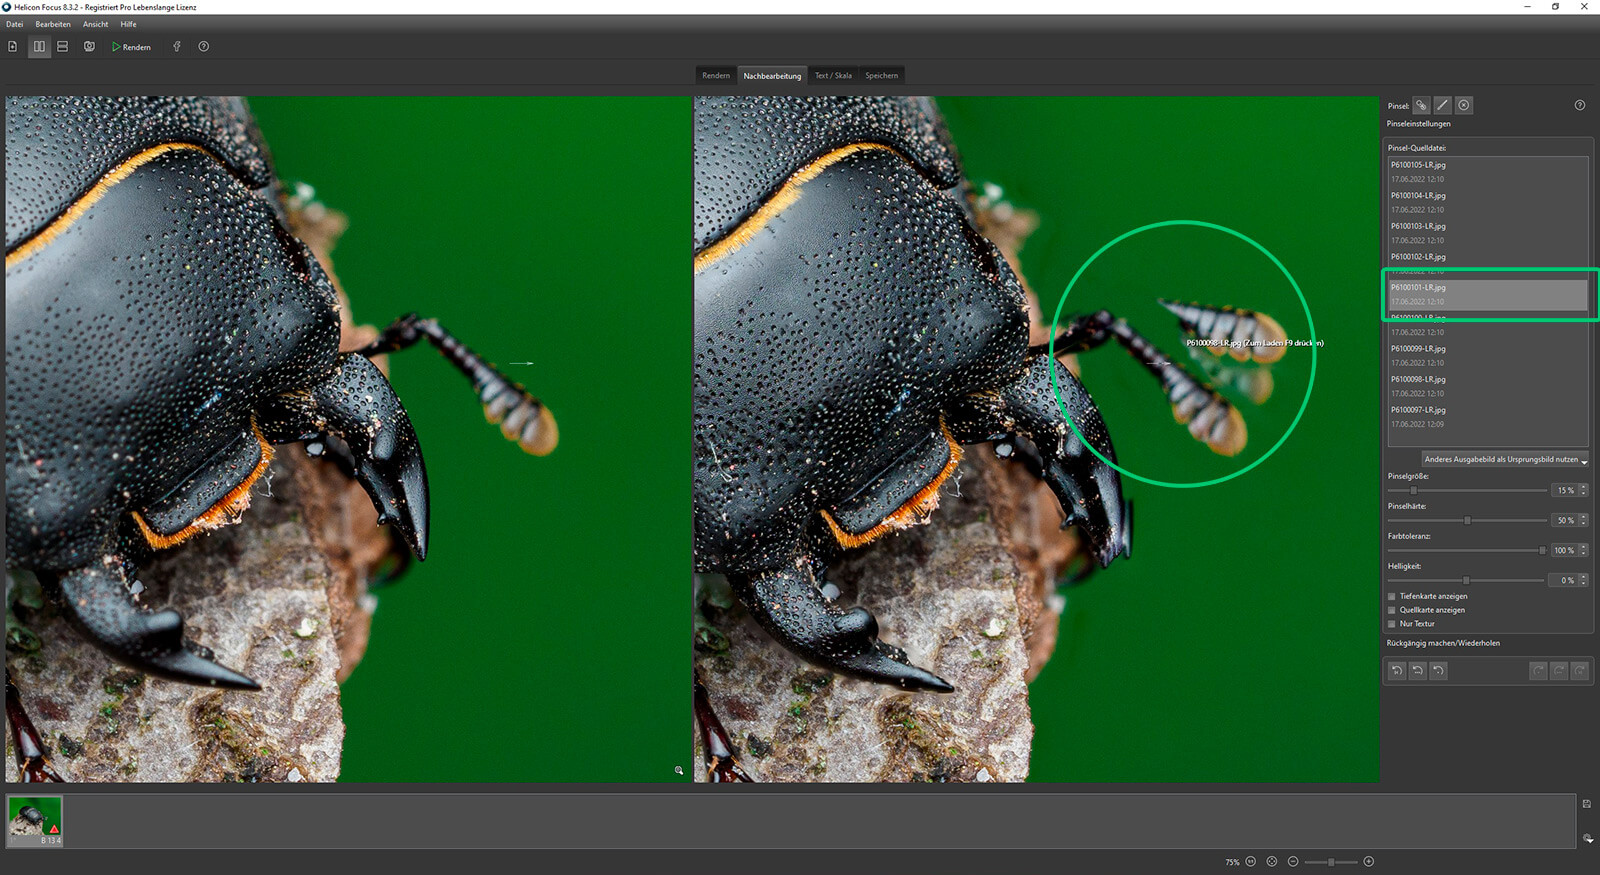
To fix the image, you select the single layer with the pose of the antenna you would like to keep from the right list of source files.
The source file will then be displayed on the left side of the split screen and you can draw/mask back in this area with a live preview on the side.
If you watch closely, you can see that the mandible of the Lesser stag beetle also moved slightly and needs to be fixed.
Reminder: try merging large focus brackets with hundreds of photos in slabs.
Conclusion
As much as I initially did not want to use automated focus bracketing on my OM cameras, as I enjoy a full manual approach, it also took me some time to try out Helicon Focus and frequently use it to process my focus brackets.
However, it took only a couple of focus stacks to process in Helicon Focus, to notice that I had literally wasted hundreds of hours, aligning, merging and processing my focus stacks in Photoshop.
Meanwhile I use Helicon almost exclusively to create my focus stacks.
It is an extremely useful software that is both easy to use and also very fast and and intuitive.
The retouching features are also very nice and make sure I do not need to switch between softwares.
You can find the User Guides for Helicon Focus in different laguages (english, german, french, spanish, italian), here.
They can also be downloaded as PDF.
Helicon Soft also offers tutorials, including videos, on theit website, which you can find here.
Sign up for the newsletter mailing list & free ebook

Did you enjoy these tips and want to learn more or improve your macro photography skills?
Stay up to date with new blog posts, reviews and tutorial- and ebook-releases.
Sign up below to get notified when the free edition of my ebook
‘How to master spider & insect macro photography’ is ready for download.
No Comments