
02 Mar How to get sharper macro photos with focus stacking
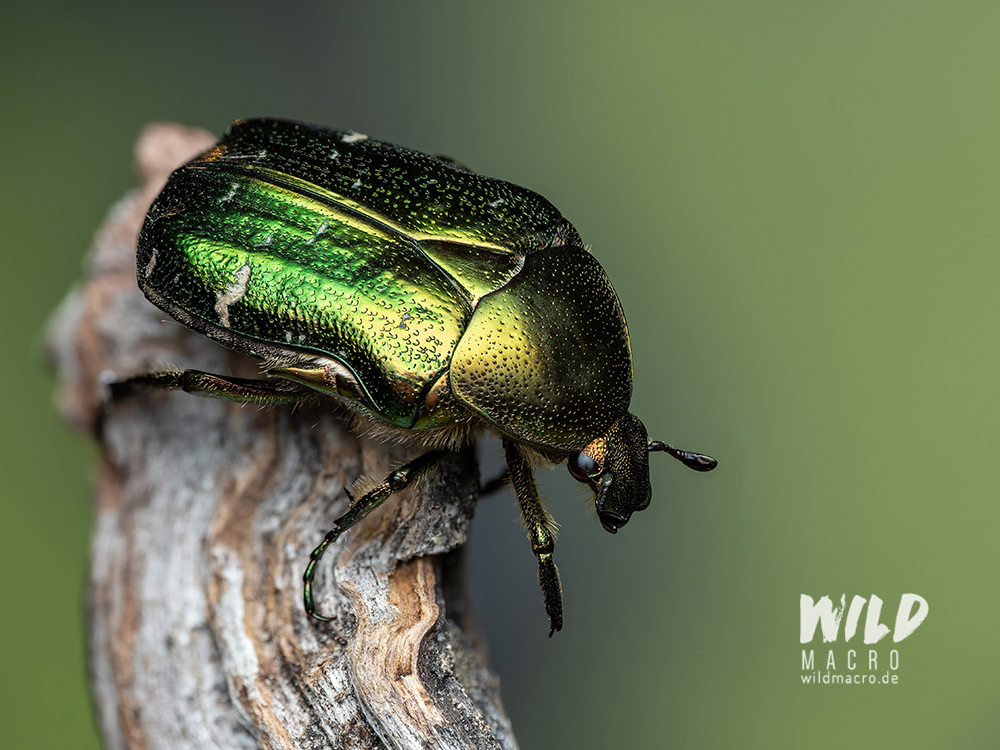
Have you ever seen a macro shot of an insect or flower and wondered, how they got the entire subject in sharp focus while maintaining a high magnification?
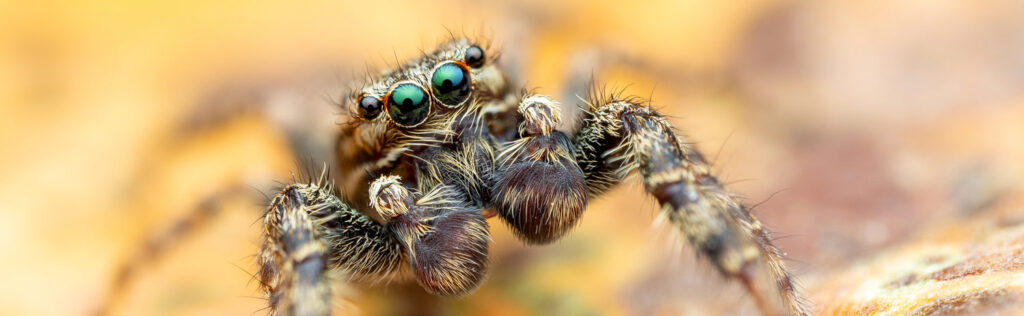
I am going to let you in on a (maybe) little secret… the answer is focus stacking.
In macro photography, you often shoot at a close distance, which results in a very shallow depth of field.
Even if the lens is closed down to its smallest aperture, such as f/22, it is difficult to achieve focus on the entire subject, foreground to background.
Typically only a single, thin plane of focus will look and be sharp.
What is focus stacking?
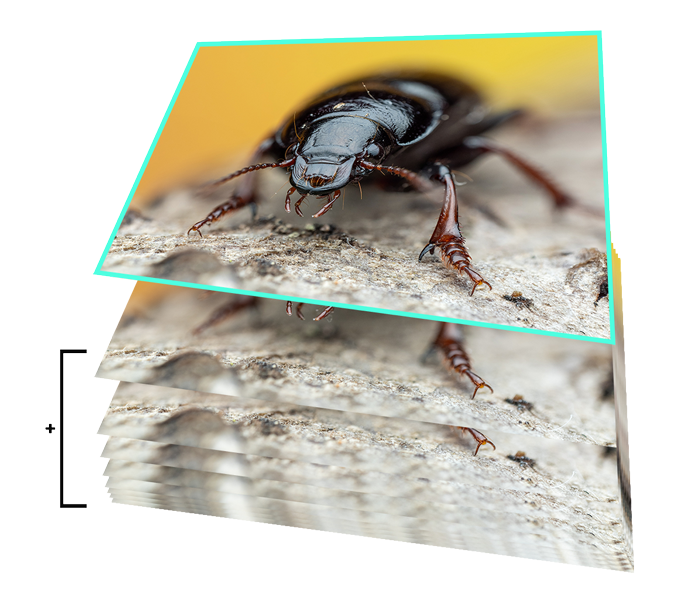
Focus stacking means taking several photos of the same motif, with the same settings from the same angle and distance, while shifting the focus plane further to the distance or back with every shot you take and this way scan the subject.
This results in photos with different layers of focus/sharpness.
These photos are then digitally stacked and combined/merged to create one final image with a greater depth of field, than what you would achieve with only a single photo with the same settings.
The process of photographing the various layers can be done manually or automated with some cameras, and is then called focus bracketing.
If you are working at very high magnifications it can be mandatory to create a focus stack to have enugh depth-of-field for the photo to look good.

You can read more about the differences between single shot macro photos and focus stacks here.
How do you take photos for a focus stack?
If you have to take a handheld, manual focus stack, it is a good tip to either use your finger(s) as a support and touch the ground or a tree for example, or even just hold a leaf for some extra stability.
Sometimes this can make or break a successful stack.
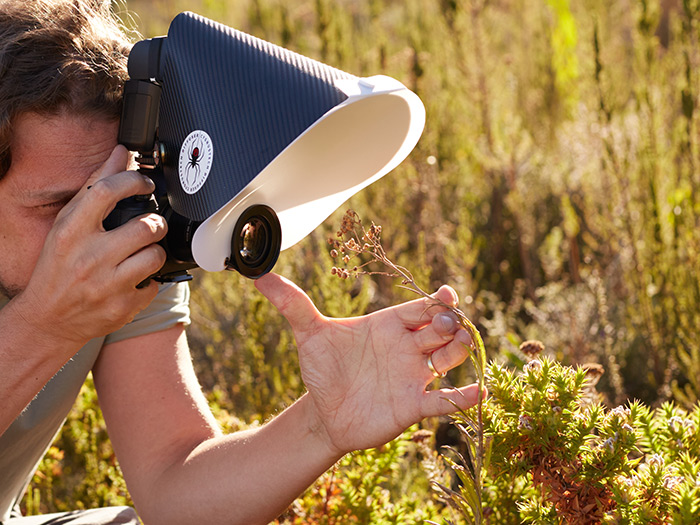
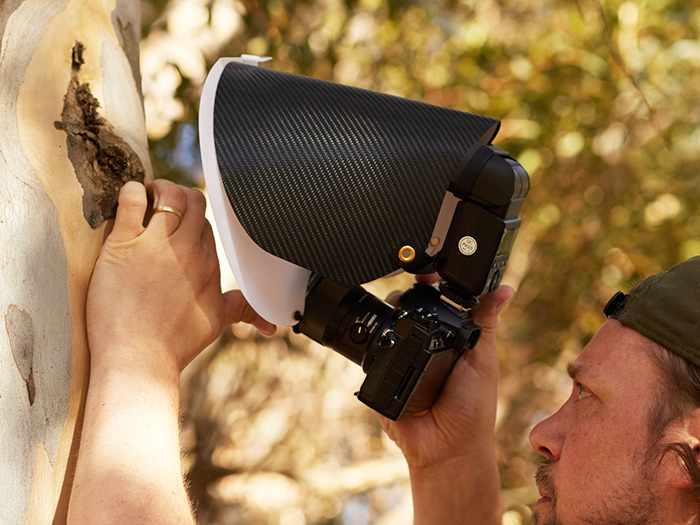
To find stable support you can also use a bean bag, a mono-pod or tripod or simple place the camera on the ground – depending on the scene you are photographing.
Movement and vibration is your enemy!
You will then either slightly turn the focus ring with every seperate photo, or move the camera (and sensor) closer to, or further away from the subject.
Personally, i prefer the second technique, as it does not distort the images as much.
It is very important to not change the angle from which you take the series of photos.
While any difference in angle, distance, magnification will make the alignment and merging of the photos more difficult, chaning the angle is the most critical error.
For non-moving motifs, it does make sense to use a focusing rail for optimal calibration of the distances and steps.
As an alternative to manual focus stacking, or rather bracketing, you could use an automated, more comfortable and accurate, process in-camera, like with the OM SYSTEM cameras.
Benefits of focus stacking
Focus stacking can lead to a greater depth-of-field, we learned that before, but how and why does the title say ‘how to get sharper macro photos’?

There are actually 2 aspects, that we can benefit from.
Firstly, since we are stacking, we can and will often use opened apertures and hence will not be prone to diffraction so much.
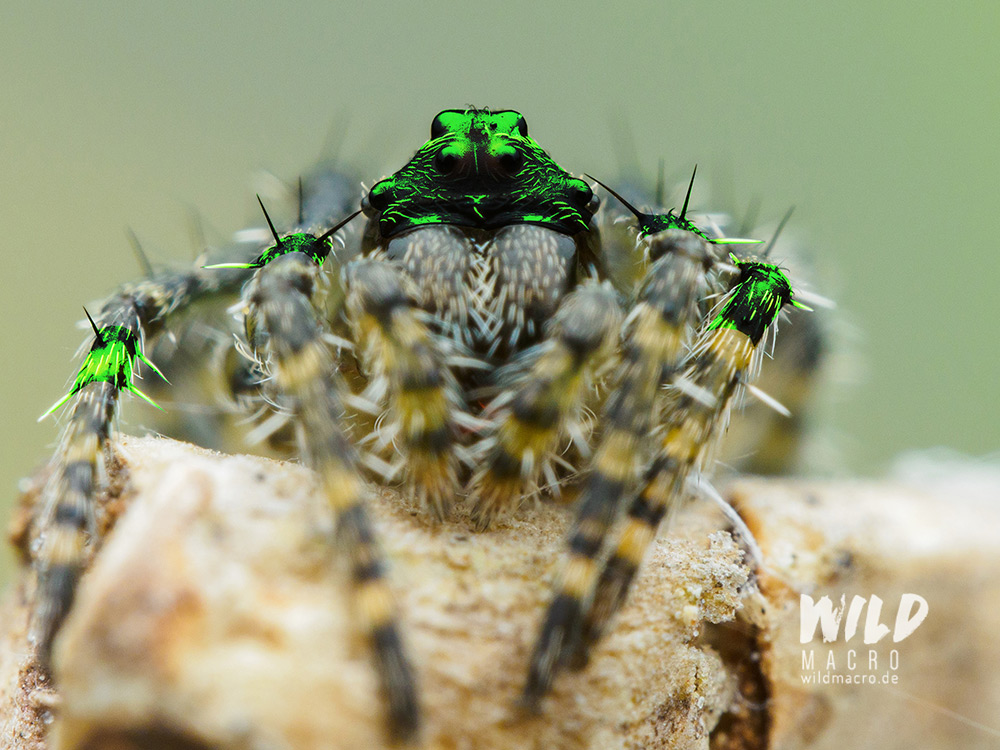
Secondly, by having a deeper area of focus and hence sharpness, we also have an increased subjective sharpness when it comes to our perception.
A macro photo will appear sharper simply because there is a deeper area of sharpness, and more sharp details in total, even though this is not actual sharpness by definition.
What we do is, we increase the total area of in-focus and sharp objects, rather than actually increasing the sharpness itself.
The latter could be done with post-processing software.
It is very similar to how the perceived sharpness can be increased simply by setting the correct white balance and getting rid of yellowish tints.
Issues to consider when focus stacking
In-focus to out-of-focus transition
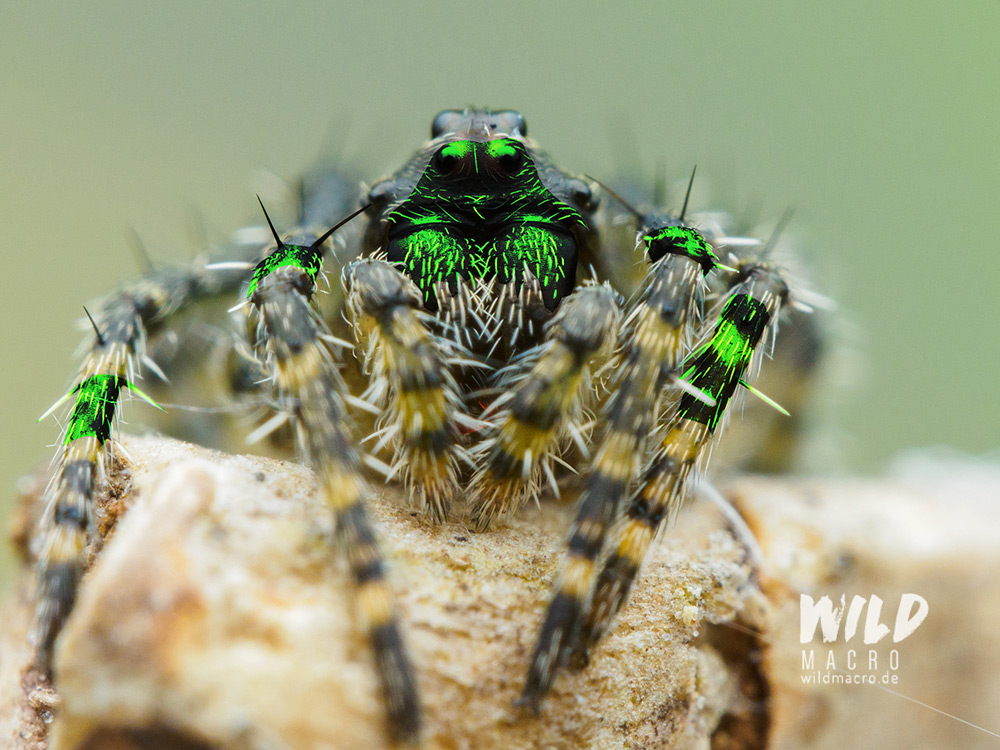
Sometimes, when aiming for a deep focus stack, it can look unnatural, when the in-focus area transitions to the out-of-focus part.
The transition is often very harsh and hence results in a very unnatural looking image.
To prevent this, it can be a good idea to mask the stacked, in-focus parts of the subject back in to one of the single images, where you like the focus-transition.
It also helps reduce potential errors or thin missed focus lines on the ground.
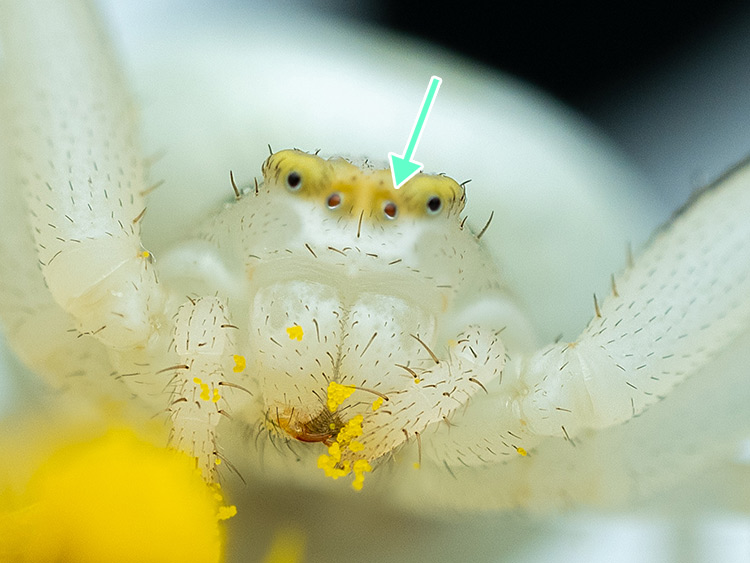
Missed layers ruining complete stacks
Missing a single layer (which corresponds with a single image) within a stack, mostly ruins the complete stack.
It is particularly annoying when this happens to the layer that is supposed to have the eyes of an insect or spider in focus.
While automated focus bracketing can reduce the risks of missing layers, focus stacking handheld and fully manual is definitely prone to producing these errors.
Movement of subjects or the sensor
As annoying as missing layers will be movement of the photographed subject while focus bracketing.
While a missed layer might be fixable in post-production with cloning for example, the change in posture due to movement, will make the focus bracket unusable in most cases.
Have a look at the following animations, to illustrate what such a focus bracket will look like.
The following 14-shot focus bracket shows movement in the head and anteannae but since it was minor I was still able to create a focus stack out of the source material.
It requires more work, time and masking though.
Which focus stacking software?
There are several softwares to choose from, when it comes to combining the photos of a focus stack.
The short answer is: all the market leader softwares are good and do their job – they all have their inividual advantages and will produce satisfying results.
Helicon focus
Zerene stacker

In-camera stacking (OM SYSTEM / Olympus)
The OM SYSTEM cameras, for example, have both a focus bracketing and focus stacking function on board.
If you choose to let the camera stack and merge the single shots in-camera, you can still choose to have the base material, the multiple focus-shifted exposures, saved as well for later editing.
The greatest advantage of using an in-camera focus bracketing function is the speed and accuracy with which the camera creates the stack, compared to do this manually.
This also decreases the risk to have a stack ruined because our subject moves.
If you master the bracketing and stacking functions, you will be able to create focus stacks from live insects for example and produce results you would normally only expect from studio setups with preserved specimens.
plus some more stand-alone programs, and built-in functions of softwares like Photoshop.
As Adobe Photoshop is one of the most used programs for post-production, it is great that it also has a built-in aligning and merging function.
This way you can stay in the Adobe suite (from Lightroom to Photoshop for example) and still create a focus stack.
However there are certain situations, when Photoshop really struggles to get clean and satisfying results.
It often requires you to clean up errors or manually mask areas back in afterwards, hence why it is always a great idea to make copies of each layer and never overwrite them, so you can always come back and edit them again.
Quick tip: How do you focus stack in photoshop?
To create a focus stack from a set of images in Photoshop we will have to do that in 2 steps.
First we have to load all the photos with the different focus layers into 1 document to align them, and then we have to merge them to get a final image that masks in all the sharp, in-focus areas.
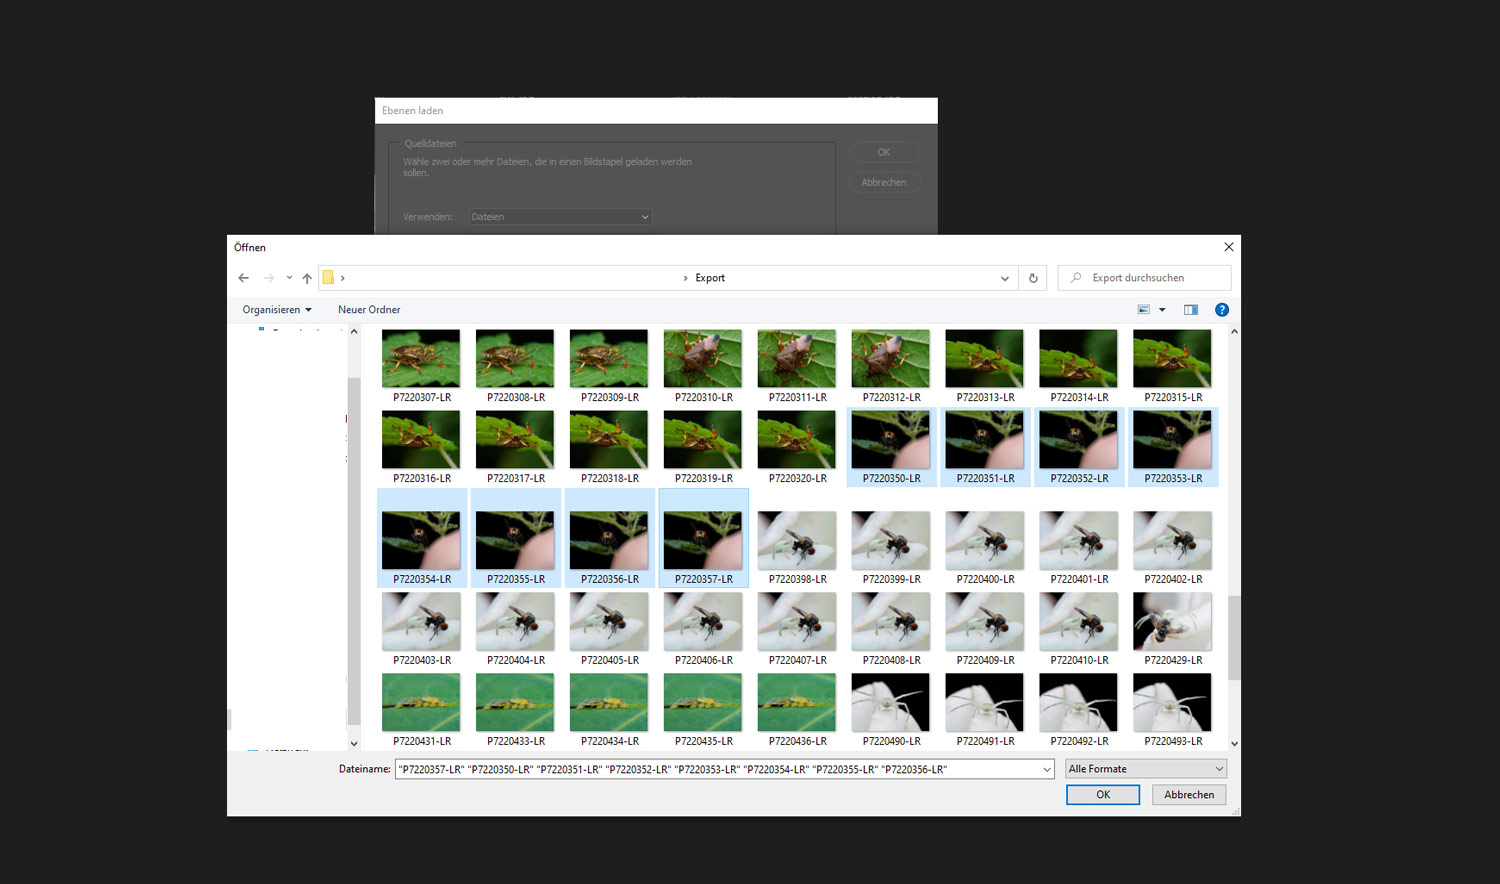
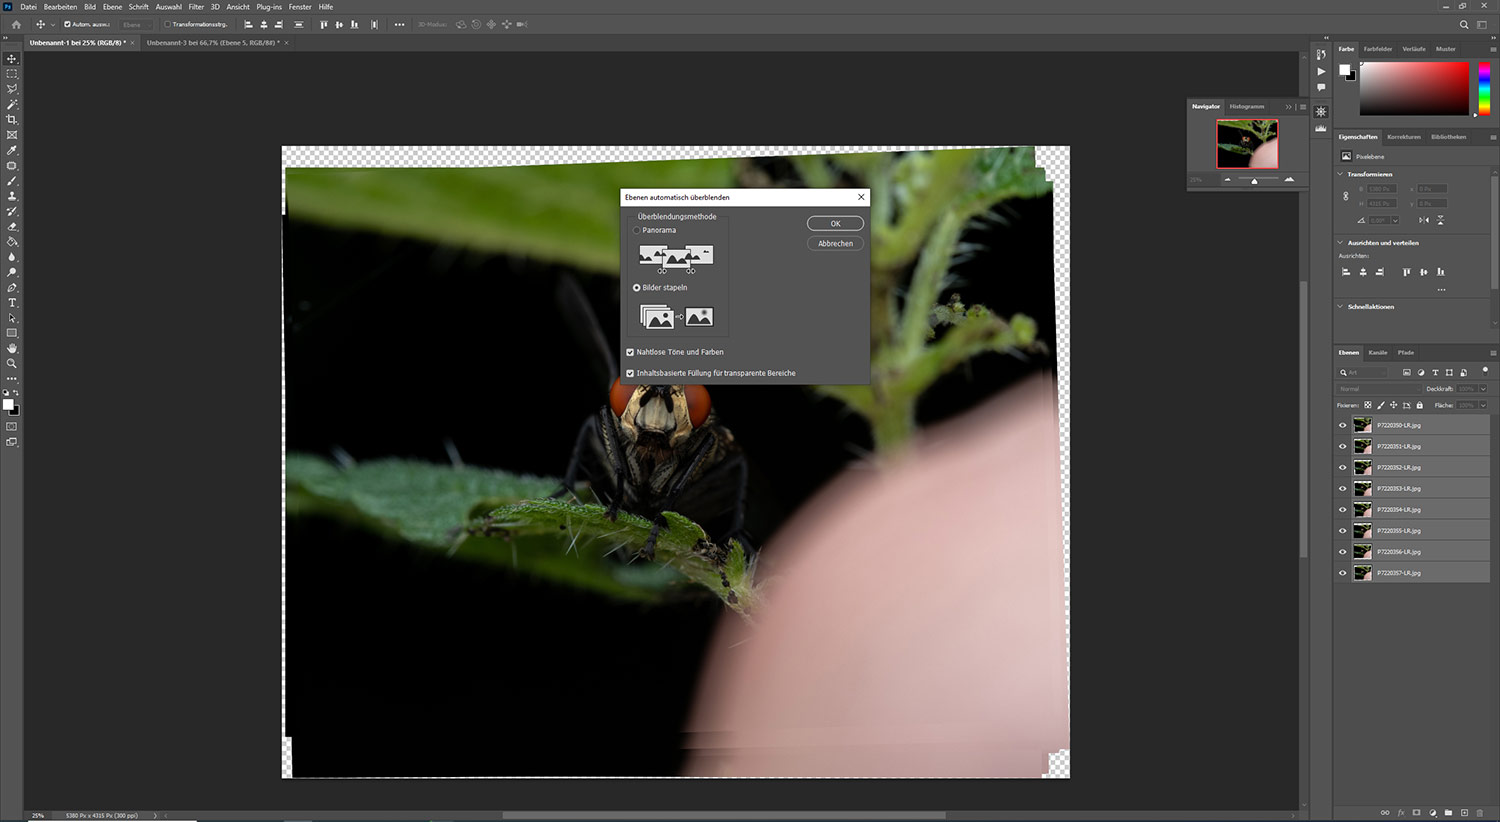
Step 1: Loading and aligning the focus stack (focus bracket)
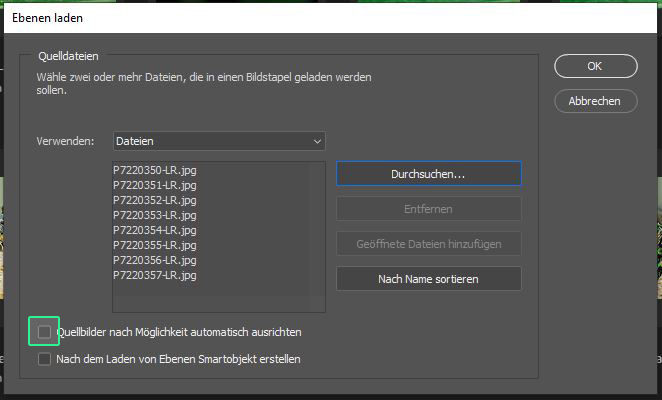
To load the seperate photos of the focus bracket into one file we select script – load files into stack.

You can then select all the files you wish to use for the final focus stack.
Press Ok
Another Ok button starts the loading process but yo can also tick the box to have your source files automatically aligned.
I tend to not use that option and do it in a seperate step to have maximum control over everything.
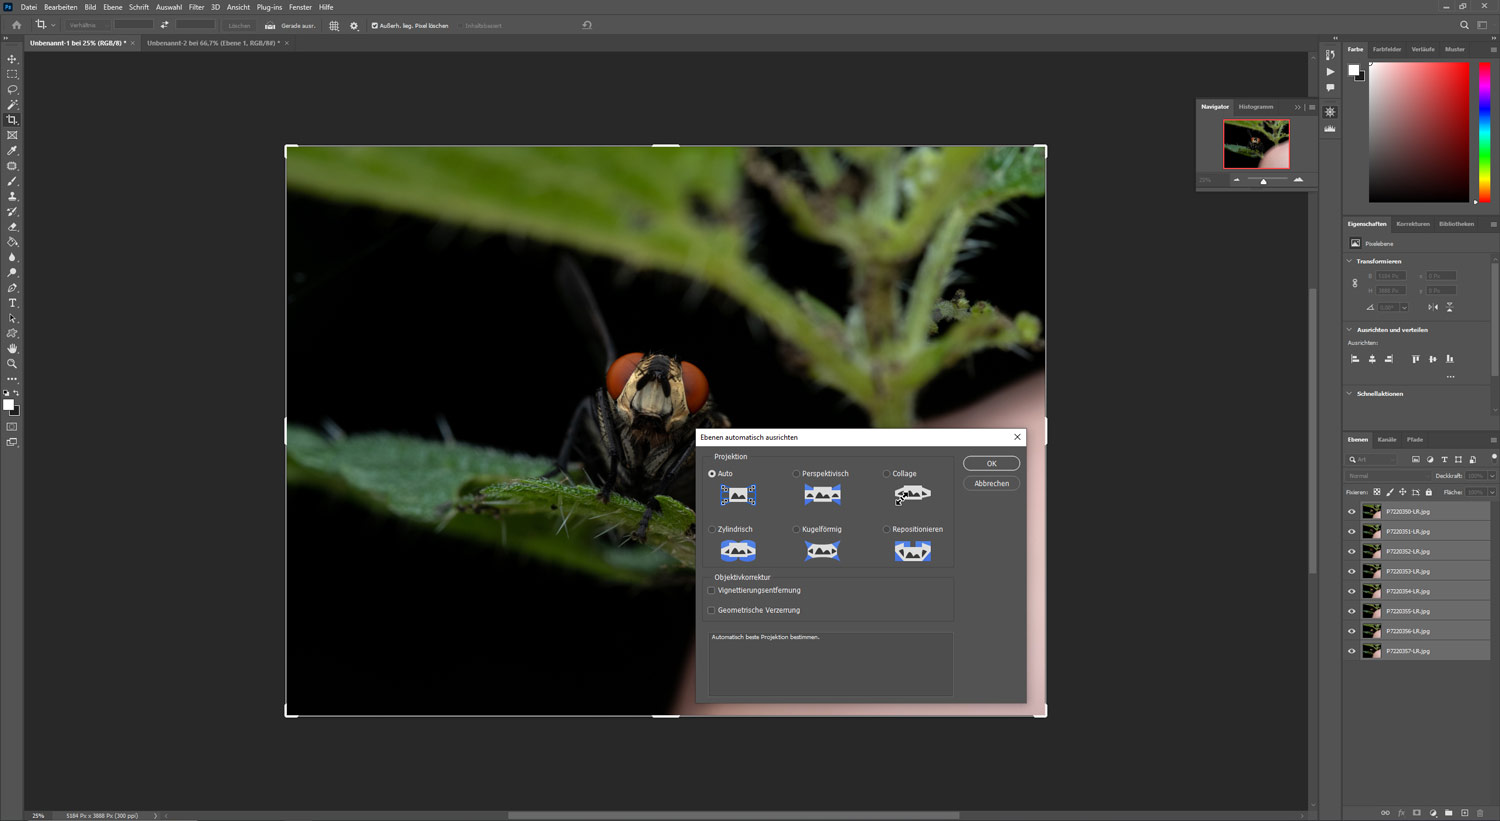
When i have all files loaded into one file, i select all the layers i need, go to edit again and this time select align layers automatically.
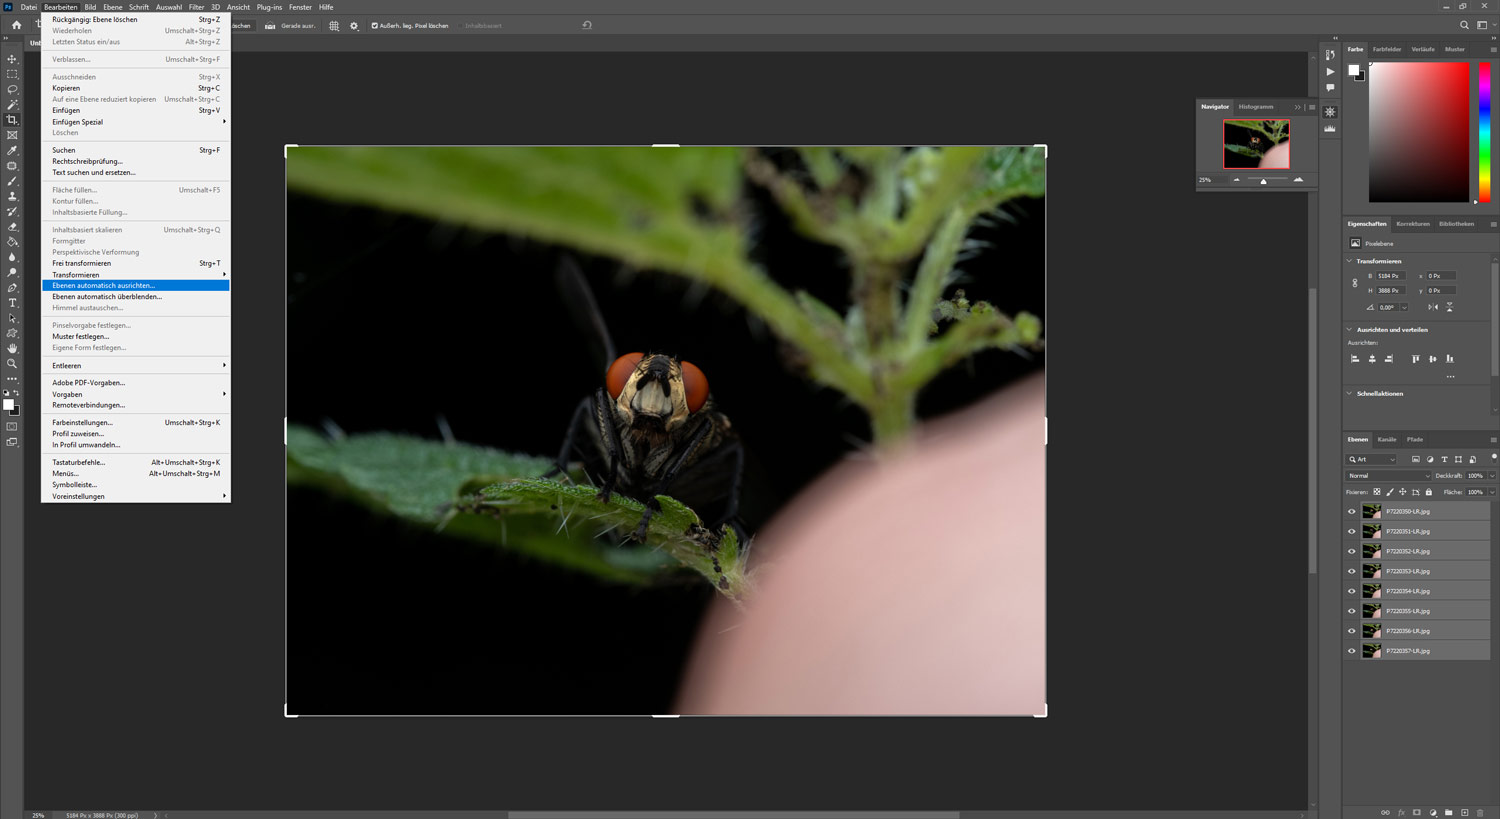
Leave the default options and hit Ok.
Step 2: Merging the aligned layers
I do a quick check if all the layers look like they are properly aligned and sometimes finetune them depending on what i want to be my focus point.
If i think my source files will result in a stack that is too deep for my taste, i even might delete some again.
If you are happy with the alignment, choose edit and then merge layers automatically.
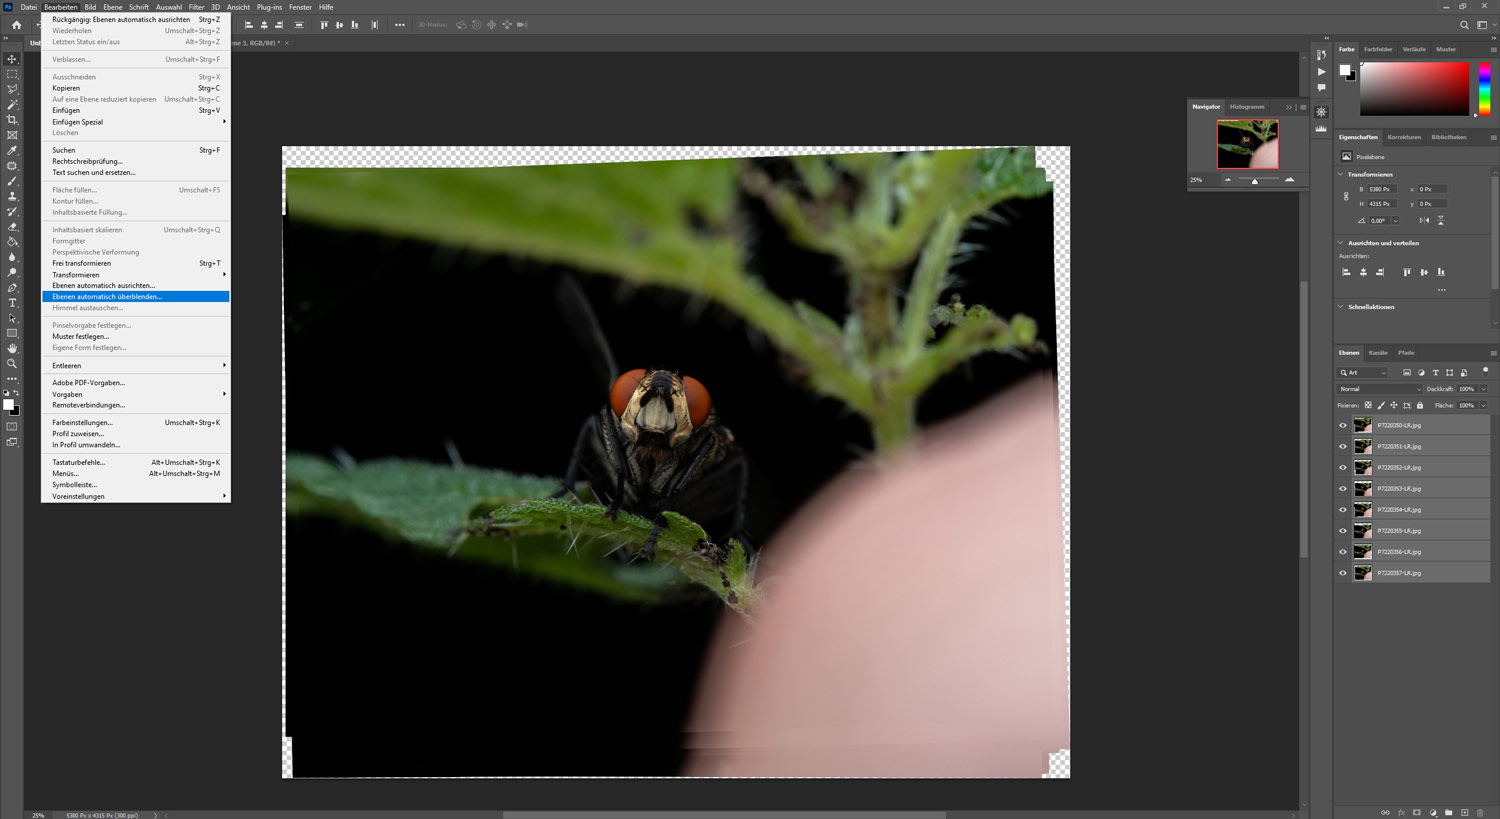
Leave the default settings and hit Ok.
Photoshop will then start to mask and merge yor layers.
The speed of the process heavily depends on your machine´s RAM.
The final image can then be cropped and edited further.
This is how your layers will look like: the final image can be found on top, with a copy of your original photos each including a mask to only get the in-focus areas in, following below, sitting on top of the source files.
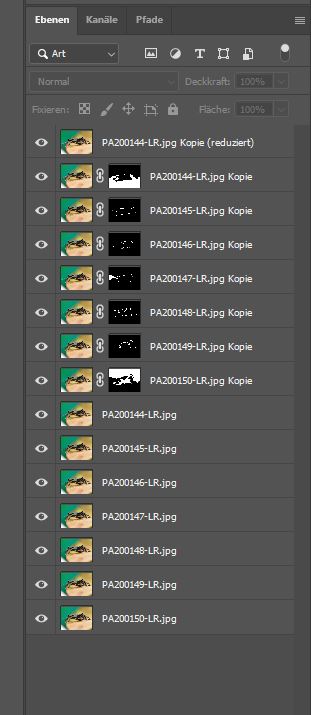
Tip: If you merge focus stacks with Photoshop, only delete the masked layers and keep the original ones with the merged result on top for post-processing.
This way you can get rid of stacking errors, masking content back in to the top layer.
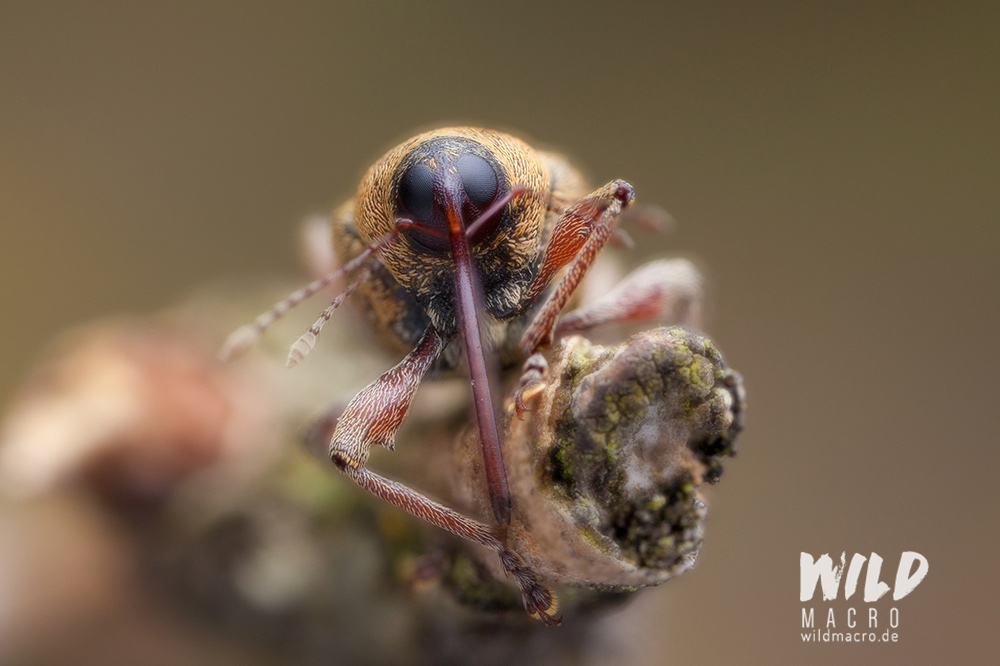
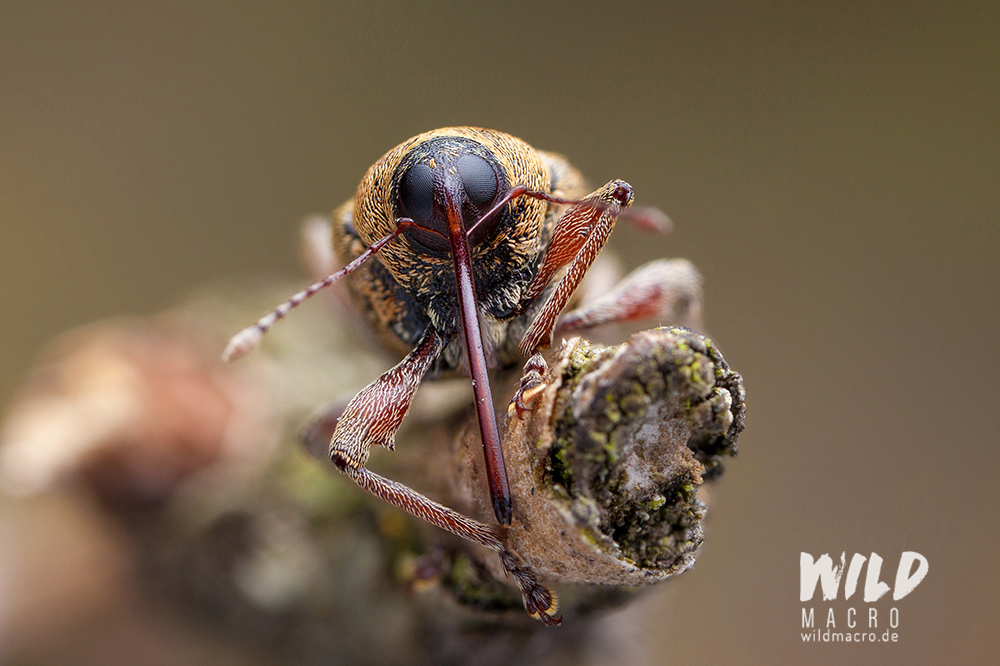
Step 3: Optional and sometimes necessary – fixing, retouching and post-processing
In a final step you will often have to clean up the resulting image, as Photoshops algorithm tends to mess up specific areas.
Whenever you have an object overlapping another, but both will be in focus due to the source material of the stack, Photoshop might create an unsharp halo around the closest object.
This is caused by the fact, that on the layer with the object further away in focus, the object closer is unsharp and hence wider than it will be on the other frame, covering the actual details of the object further away.
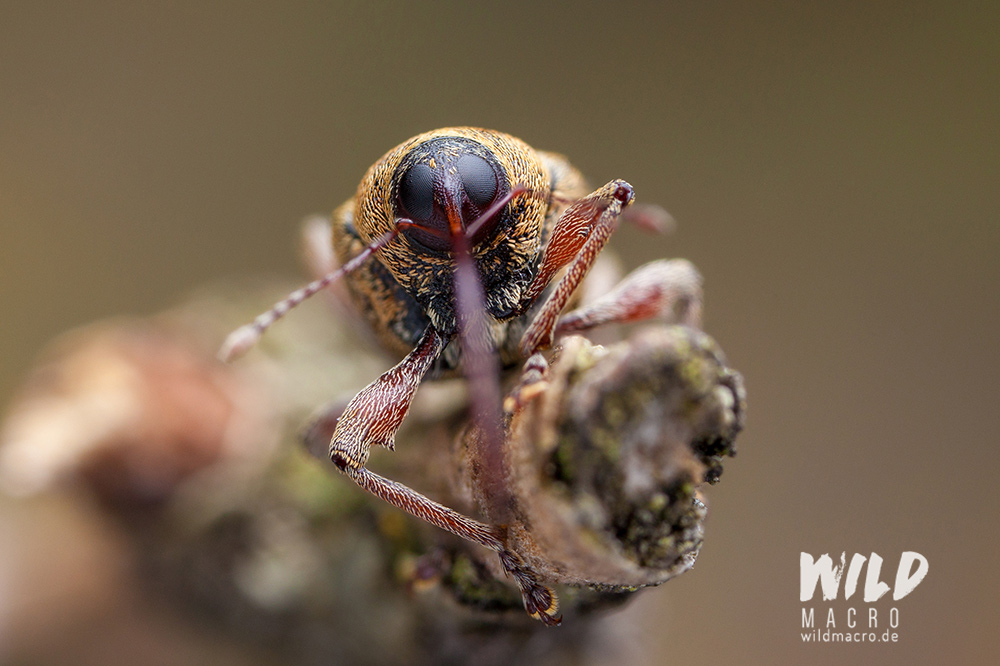
Take a look at the snout (rostrum) of this Acorn weevil and see how it covers the details and texture of the beetle, when it is in focus.
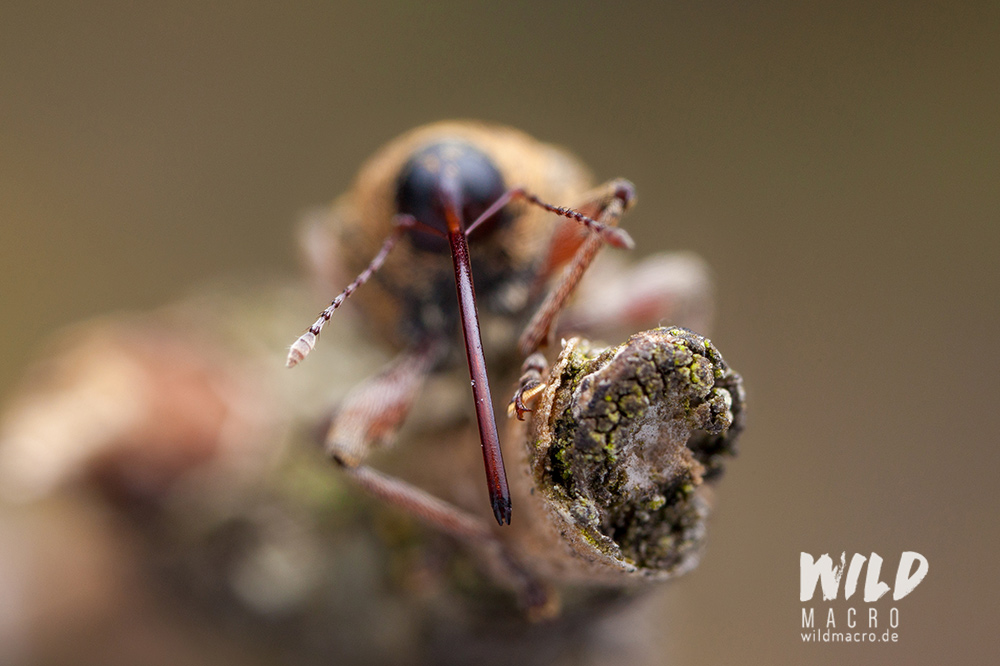
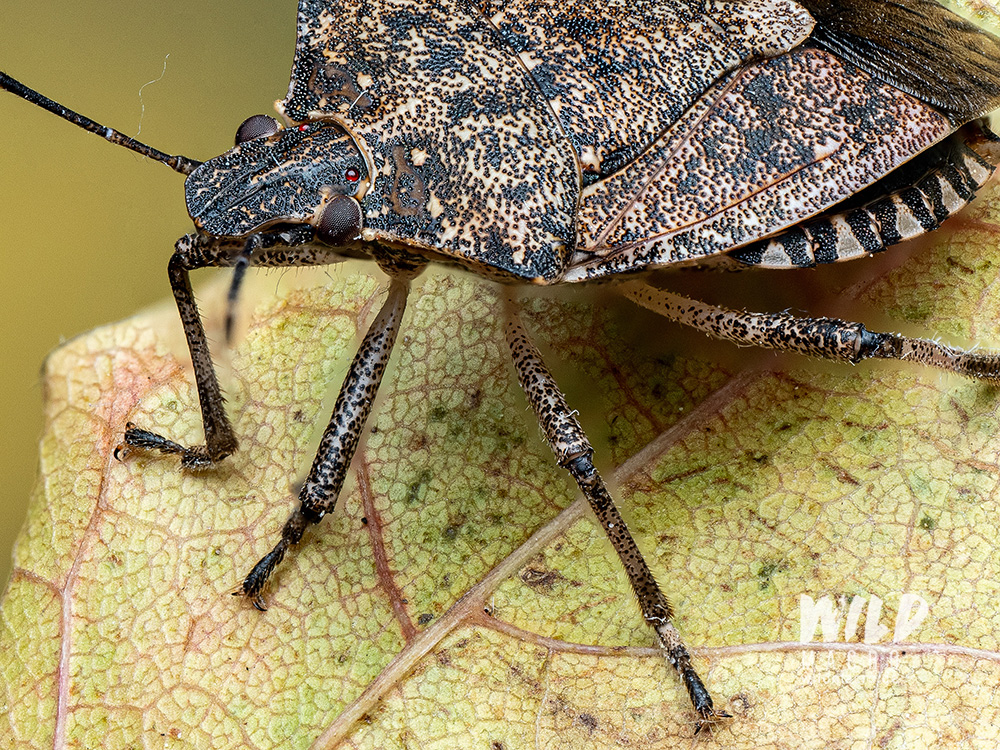
The issue can also be found when the in-focus background is too deep.
See how the bug´s legs have an unsharp border, where Photoshop´s algorithm could not mask the ground back in properly?
Another classic scenario for clean-ups, are slight movements of antennae.
Sign up for the newsletter mailing list & free ebook

Did you enjoy these tips and want to learn more or improve your macro photography skills?
Stay up to date with new blog posts, reviews and tutorial- and ebook-releases.
Sign up below to get notified when the free edition of my ebook
‘How to master spider & insect macro photography’ is ready for download.
Carsten Theves
Posted at 09:11h, 05 MarchVery good article, explains very well to beginners how focus stacking works.
Another program that delivers very good stacking results is Affinity Photo 2. It has an independent function for this called focus merge. I stack all my macros with AP2 and edit them there after the stack. So I stay in the same medium from the stack to the final result.
You can find many of my stacks from last year on Instagram at car.thev.photo. Since I hardly did any macros in the winter, you’ll have to scroll down a little.
Greetings Carsten
wildmacro-chris
Posted at 13:42h, 05 MarchHey Carsten,
thanks for the feedback.
I also have AF2 but rarely use it, as i miss the ability to apply my editing to multiple images at once. Or i just don´t know how to do that. Will check the Stacking function out though.
Carsten Theves
Posted at 14:14h, 05 MarchMaybe this video will help. Marit explained how it works very well.
https://youtu.be/VzJQKzFB-Uw?si=Gk9nwlMugmzgCOuz