
16 Nov Macro photography: focus stacking or single shot
What makes the better macro photo?
A highly detailed focus stacked shot, or a single shot with a blurry background and a shallow depth-of-field?
As usual there is no definitive answer to that question, as it is always a matter of personal preference.
There are, however, some factors that should be taken into consideration, when deciding which route to go for.
Let´s take a look at focus stacks vs. single shots from both an esthetic/visual point-of-view and a technical/visual point-of-view.
While a high level of details and focus is desirable in macro photography, it can lead to images that look ‘off’ or less visually appealing when created from focus stacks.
Why is that?
The human eye and brain instantly realize when an image is ‘off’ or looking unnatural, different from the viewing habits.
Although we rarely realize it during our daily life, our visual perception of the world around us is dominated by the relation of focus and out-of-focus areas.
This can be translated to photography 1:1 and teaches us a lot about how and why images can look ‘off’ or ‘strange’.
Let me explain this with some examples.
Esthetic – visual point-of-view
Taking a single shot, or a small focus stack, which means having a shallower depth of field compared to a deep stacked image, will result in
- a natural focus vs. out-of-focus fall-off/transition
- and considerably more out of focus areas, often smooth and blurry
- an obvious layer (and hence point) of focus
This gives great creative freedom and enables us to effectively lead the eye to the areas of interest.
Examples


Technical – visual point-of-view
A focus stacked image, on the other hand, also has its advantages and fascination.
- Combining multiple photos into a stack with greater depth-of-field can
- show more details & textures
- show more of the subject (or the subject in total focus even)
Producing a perfect focus stack from a technical standpoint is a great achievement.
Examples
Bringing the subject relatively parallel to the sensor requires less single shots for a focus stack that gives a greater perception of focus and depth.
The need to focus stack
Some camera setups simply require to focus stack for the images to be usable.
These setups produce photos with such a shallow depth-of-field, that they do not look good without combining several focus layers into one.
A typical setup would be a full frame DSLR with a macro lens used at a magnification of 1:1 or even above (like the Canon Mp-E 65 that goes up to 5:1 mag) at the closest focusing distance possible.
But even with a superior (when it comes to depth-of-field straight out of camera) Micro-four-thirds camera you can sometimes feel you need more DOF and hence need to focus stack.
Example:
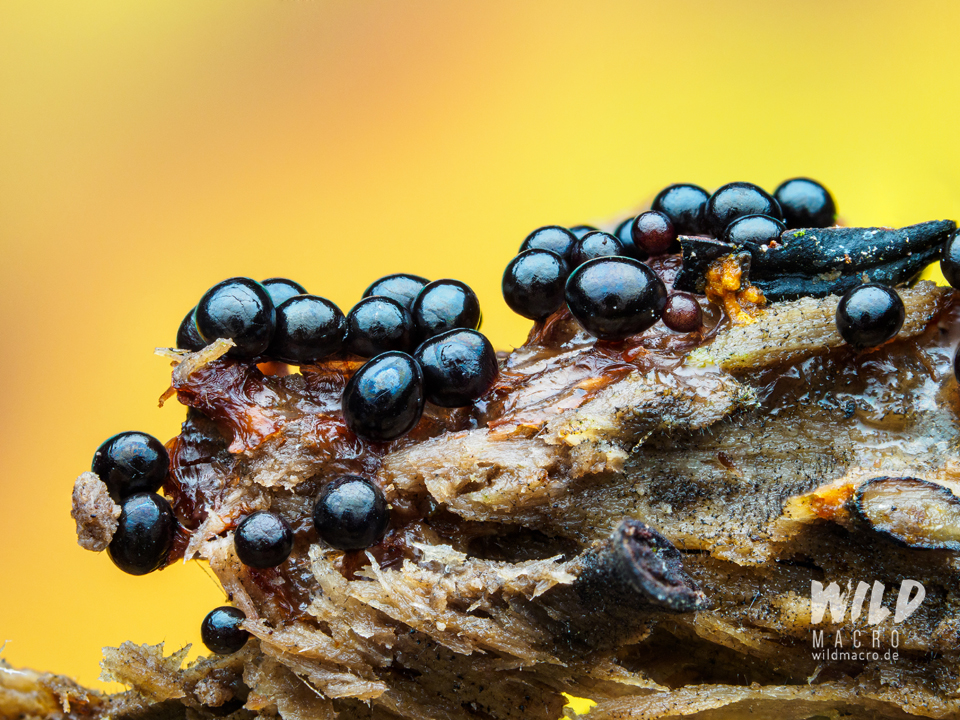
This slimemold on rotten wood was impossible to capture in a single shot, even on an MFT sensor. The Magnification was high and the camera very close to the scene.
On the left you see the final result of a focus stack consisting of 23 photos and on the right you see a single shot out of the sequence.

These factors influence the photo´s depth-of-field the most:
- size of subject
- distance to subject
- magnification of the lens
- f-stop / aperture of the lens
- sensor format of the camera
The extra work
Processing focus stacks often means investing a lot of extra time in post production.
There are cameras that will let you take a fully merged and processed focus stack in-camera – like the OM System OM-D – but mostly you will need to manually photograph the stack.
Using a focus bracketing mode will help, but you will still need to merge the photos and clean up potential errors produced by the merge script or AI.
If you are not a big fan of spending too much time on the computer retouching your images, it might be better to have a setup with maximum depth-of-field, so you will only need to take one single photo, or let´s say a couple instead of many!
Problems with focus stacking
Despite the sometimes unnatural look of deep focus stacks, there are more aspects and challenges to keep in mind, when creating focus stacks with a great depth of field.
Movement of the subject
If the subject is moving while taking the photos for the stack, you will either lose a thin layer of focus while ‘scanning’ the subject, or you will see ghosting and repeated structures in the merging process later.
The more photos you take for the stack, the higher the chances for movement and errors.
Finding the optimal number of steps for the stack is inevitable to get the best out of it.
Example:
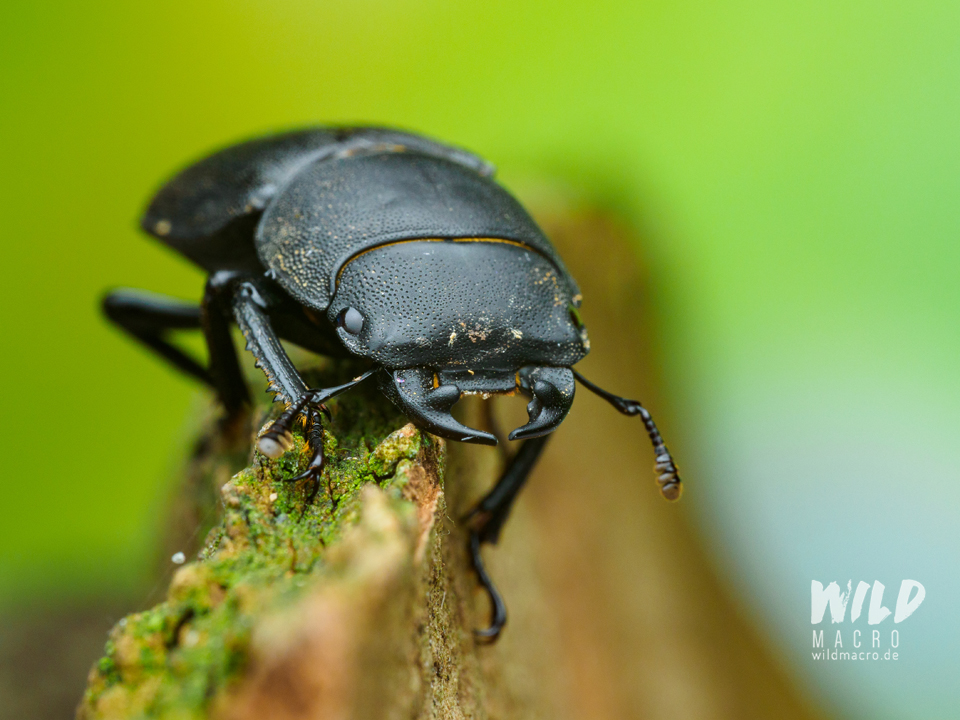
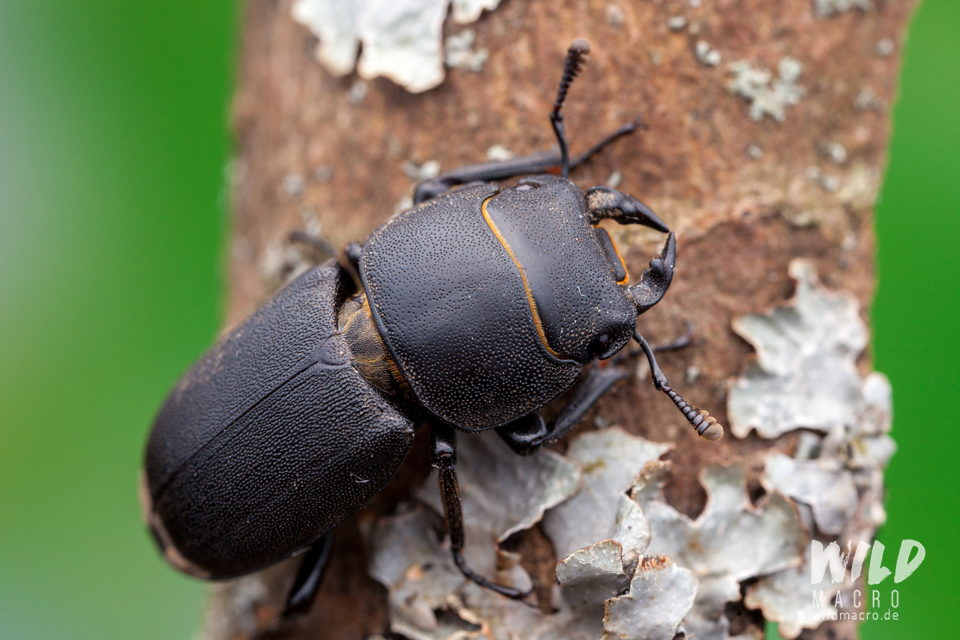
The following image is a focus stack of an Ocypus olens beetle, that was in defensive posture but slowly lowering its elevated abdomen, while I was photographing the stack.
It was impossible to get a stack of the complete beetle, as the abdomen was moving and never in full focus and so i decided to focus on the head instead.
Transition from in-focus to out-of-focus areas
As mentioned earlier, the human eye and brain realize what looks natural or normal, and what does not.
Using less steps and photos for a stack results in less abrupt changes from in-focus to out-of-focus areas.
This does especially show on ground textures, for example.
It does look very unnatural if a bigger, sharp area ends and transitions abruptly to a creamy out-of-focus area.
Tip: I often take a lot more photos than i will actually use for the stack in the end.
This way i ensure i have enough material to control the actual area of focus and its transition in particular.
I rarely use all of the material I got.
Conclusion
As said already, there is no ‘right’ or ‘wrong’ – it is a matter of personal taste.
But a photo that looks ‘off’ or ‘wrong’ irritates our eyes and brain and hence gets a different reception compared to a ‘natural’ looking shot.
When photographing focus stacks, it makes sense to try to make them look as natural as possible.
This applies to the range of the depth-of-field and also the focus fall-off.
If the fall-off is too abrupt, it will look highly unnatural and – at least in my opinion – extremely unaesthetic.
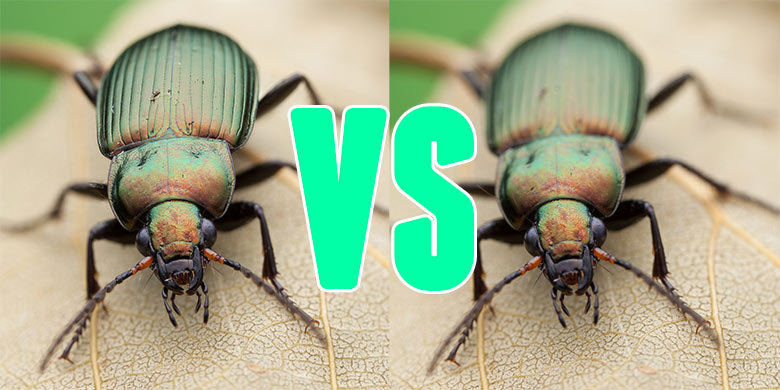
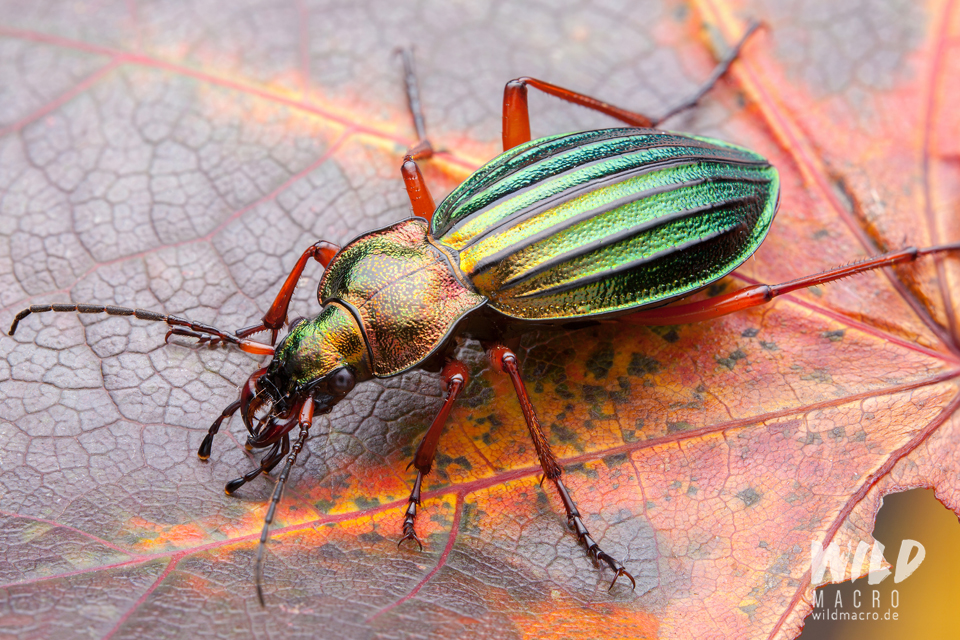
To illustrate this, here, both photos have the most important part of the subject in focus – the eyes.
But while the one on the right, the single shot, does not have enough depth-of-field to give the viewer´s eye enough area in focus, the one on the left is a focus stack of 12 images and increases the area in focus considerably, while still looking natural.
I could sell it as a single shot and nobody would notice that it is actually a stacked image.


Tip: Try creating the stack for the subject and then mask this back in to a single shot with an appealing focus fall-off in the background and ground, to keep a natural look.
Don´t go for a deep focus stack just for the sake of taking a focus stack.
Think about why a focus stack might work better than a single shot and make the (reception of the) focus stack believable.
The choice between single shot and focus stack strongly influences the esthetic direction of the final photo.
Kyle Covan
Posted at 17:46h, 17 NovemberInteresting read. You brought some great points to light between the two styles. And thanks for providing so many visual examples.
wildmacro-chris
Posted at 23:03h, 17 NovemberHey Kyle, very glad you enjoyed reading! Thanks a lot for the feedback.
Peter Bader
Posted at 20:37h, 01 FebruaryWondering how you create a stack with manual focussing. Just start at the closest part and move to the back f the subeject?
wildmacro-chris
Posted at 21:15h, 08 FebruaryHey Peter, yes, that is a possible way to do it.
You can also shift the focus by turning the focus ring but it is more accurate to move the camera/sensor back/forth.