
27 Apr Review: RRS BOM1-LS L-Bracket for OM System OM-1 Mark II for better Grip
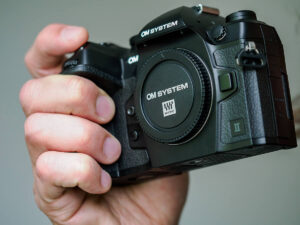
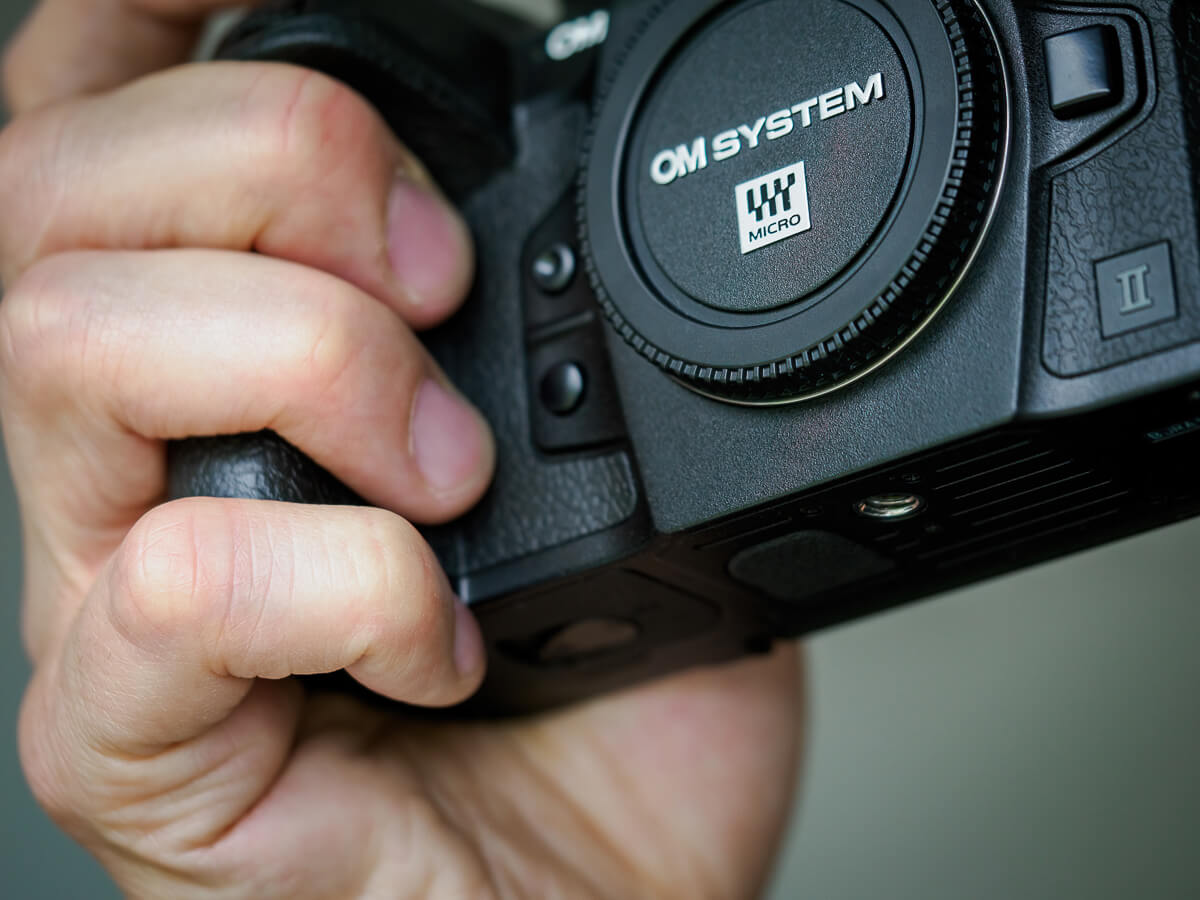
Do you also have problems holding your super compact MFT OM SYSTEM camera with your big hands?
While the small cameras of OM SYSTEM are great in terms of portability and compactness, it can be challenging finding a spot for the right pinkie-finger, to get a grip on the camera body – particularly if you have big hands, like me.
Looking for a solution, I decided to try an L-bracket to add some more surface for the fingers to hold on to.
My research led me to order the RRS BOM1-LS L-Bracket to use with my OM-1 Mark II (knowing that the product was designed for the predecesor OM-1).
The problem: with my personal approach to photograph macro using a flash and diffuser, I have a setup, which I use with only 1 hand most of the time, using the other hand to control foliage and plants. Even though the MFT setup is relatively compact and light, I need enough surface for my fingers to safely grab the camera.
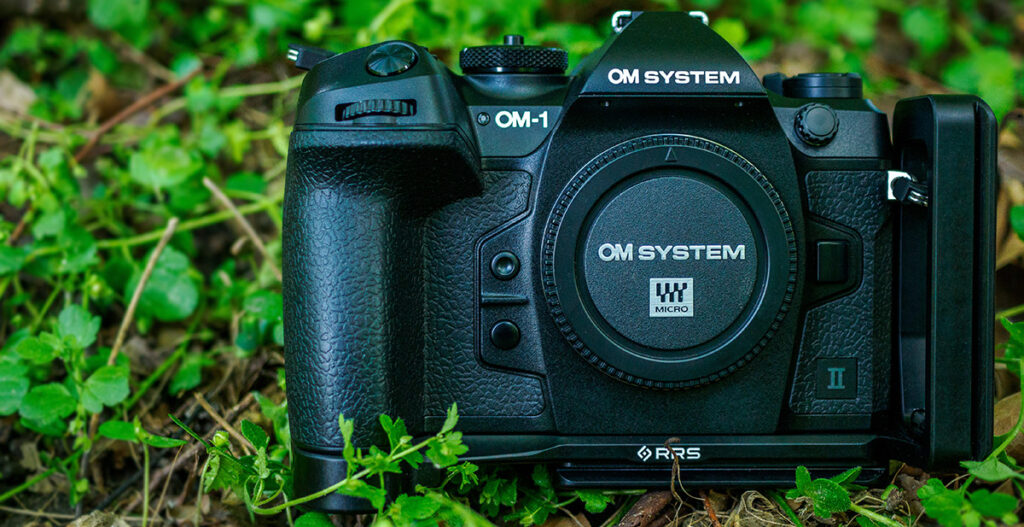
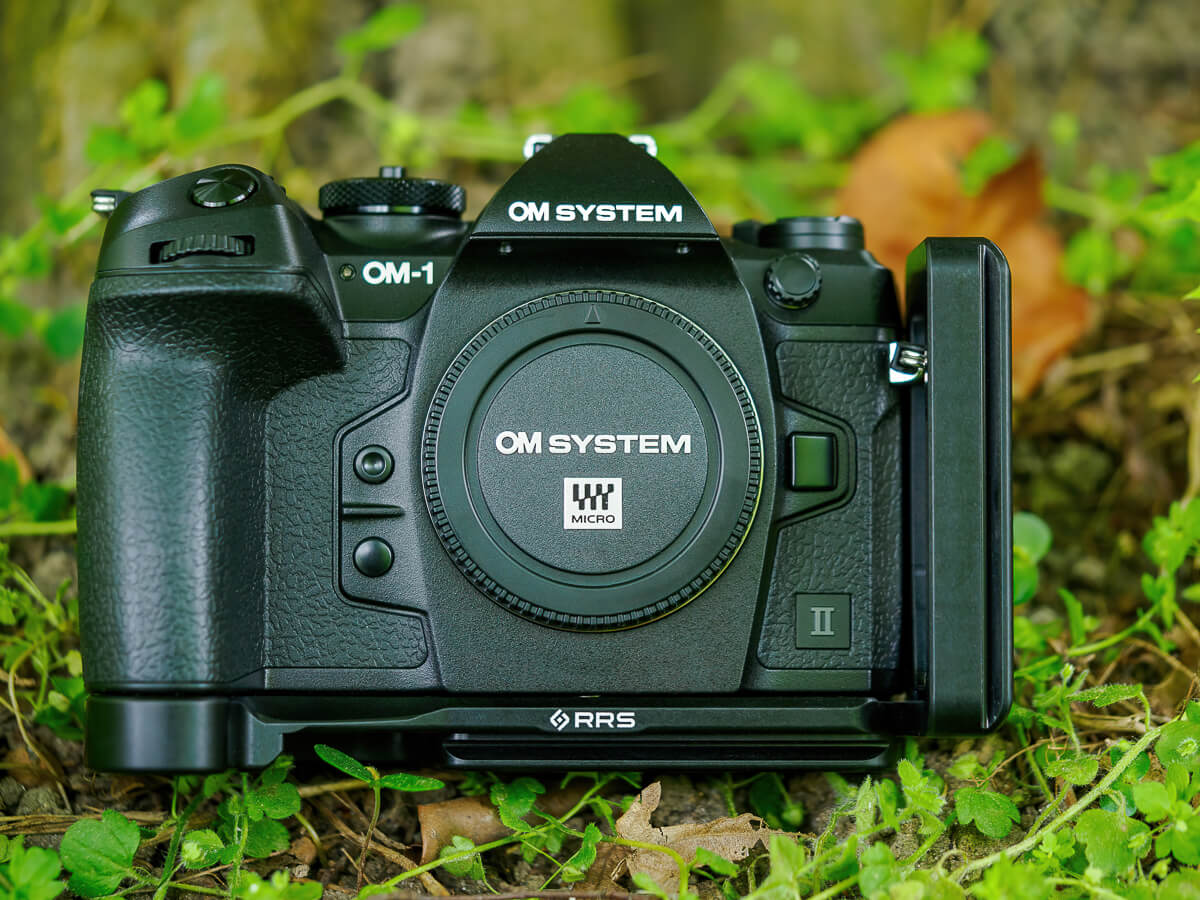
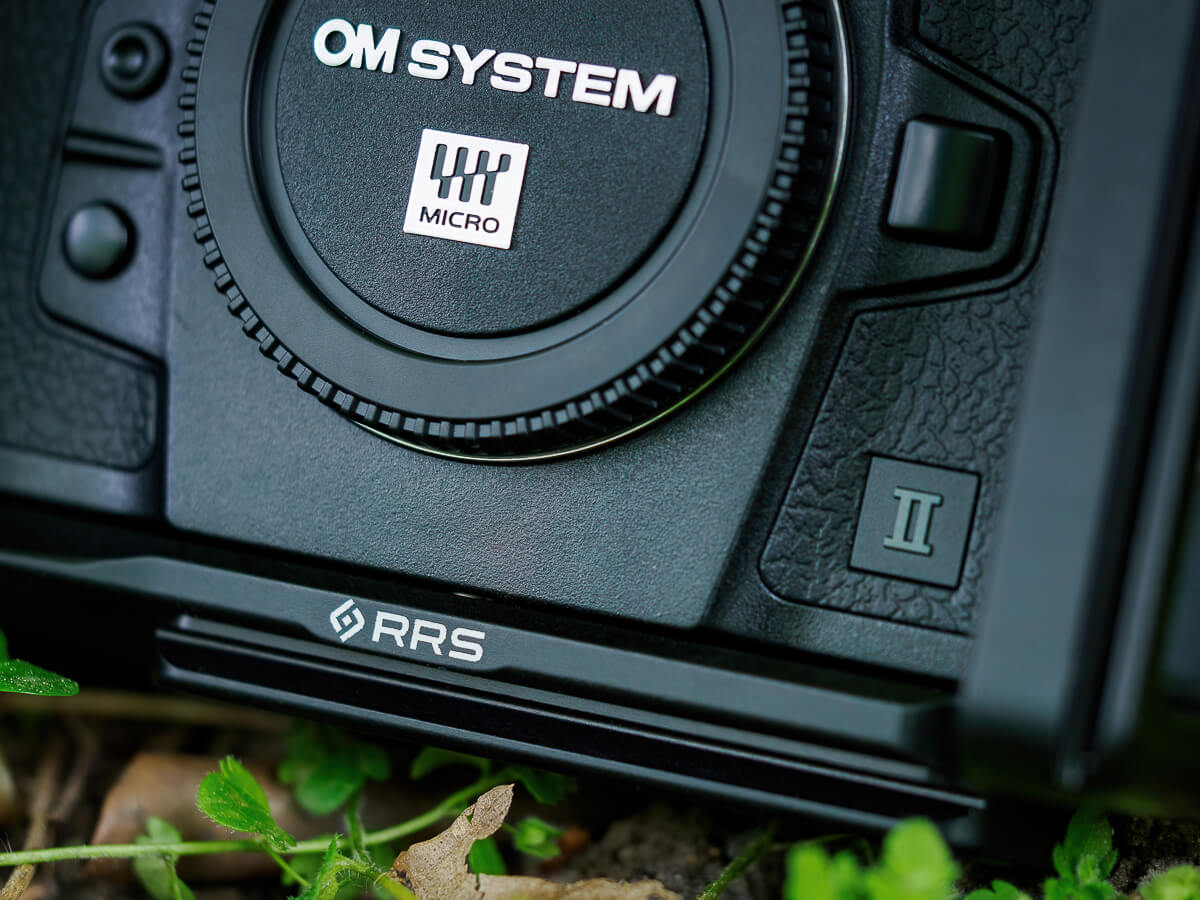
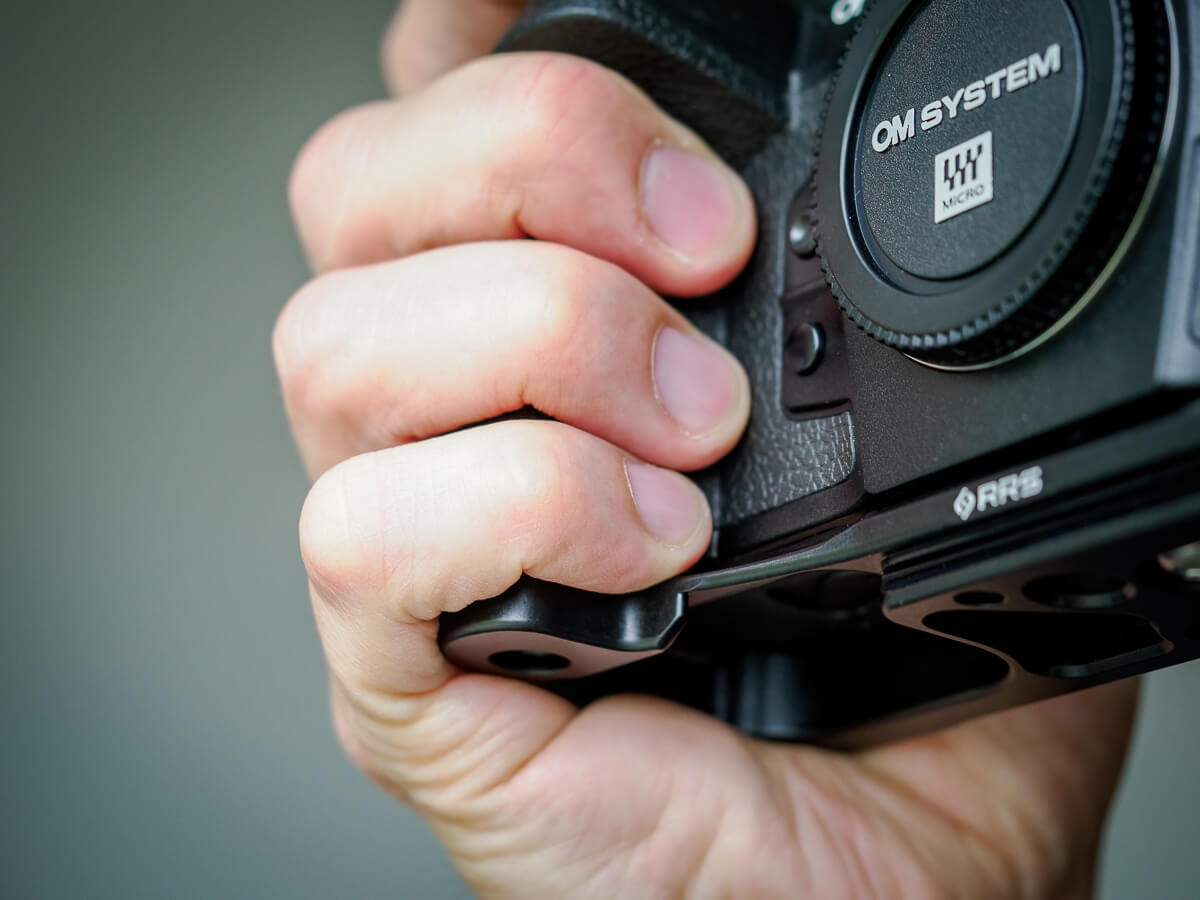
The Really Right Stuff RRS BOM1-LS L-Bracket
Originally, L-brackets are supposed to help to quickly change the camera from horizontal to portrait orientation, when placed on a tripod.
While this is only a nice-to-have feature for me, i am rather looking for the benefits of the extra millimeters, which the bracket will give me.
If you do not want to increase the dimensions of the otherwise compact MFT system too much, a simple base plate would be another option.
What I really like about the RRS BOM1 is, that it is modular: whenever I only need the extra grip for my fingers of the right hand, I can remove the vertical L-option and only use the plate.
If i need a quick solution for changing the orientation on a tripod for example, i re-add the vertical component and have an L-bracket again.
There also is a base-plate-only option called BOM1-B (130,00 Euro).
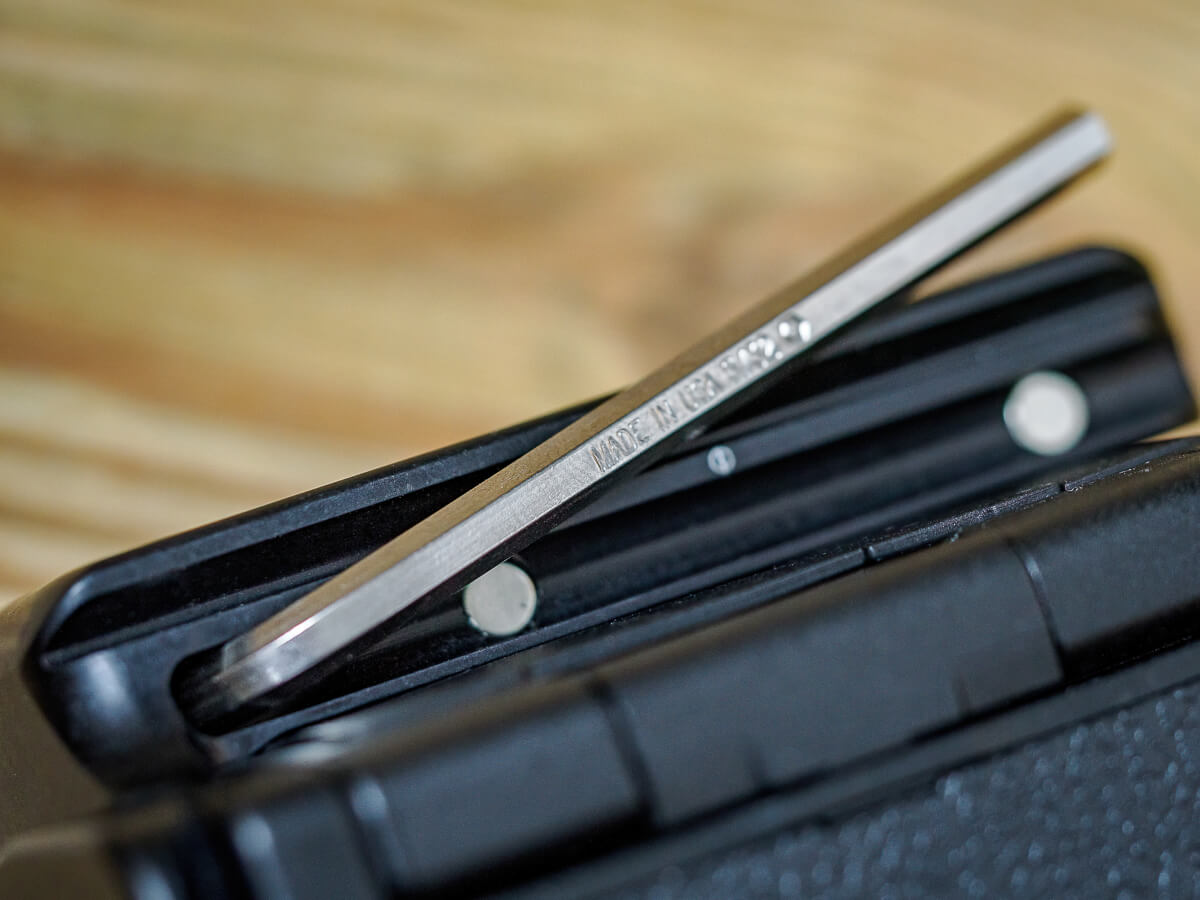
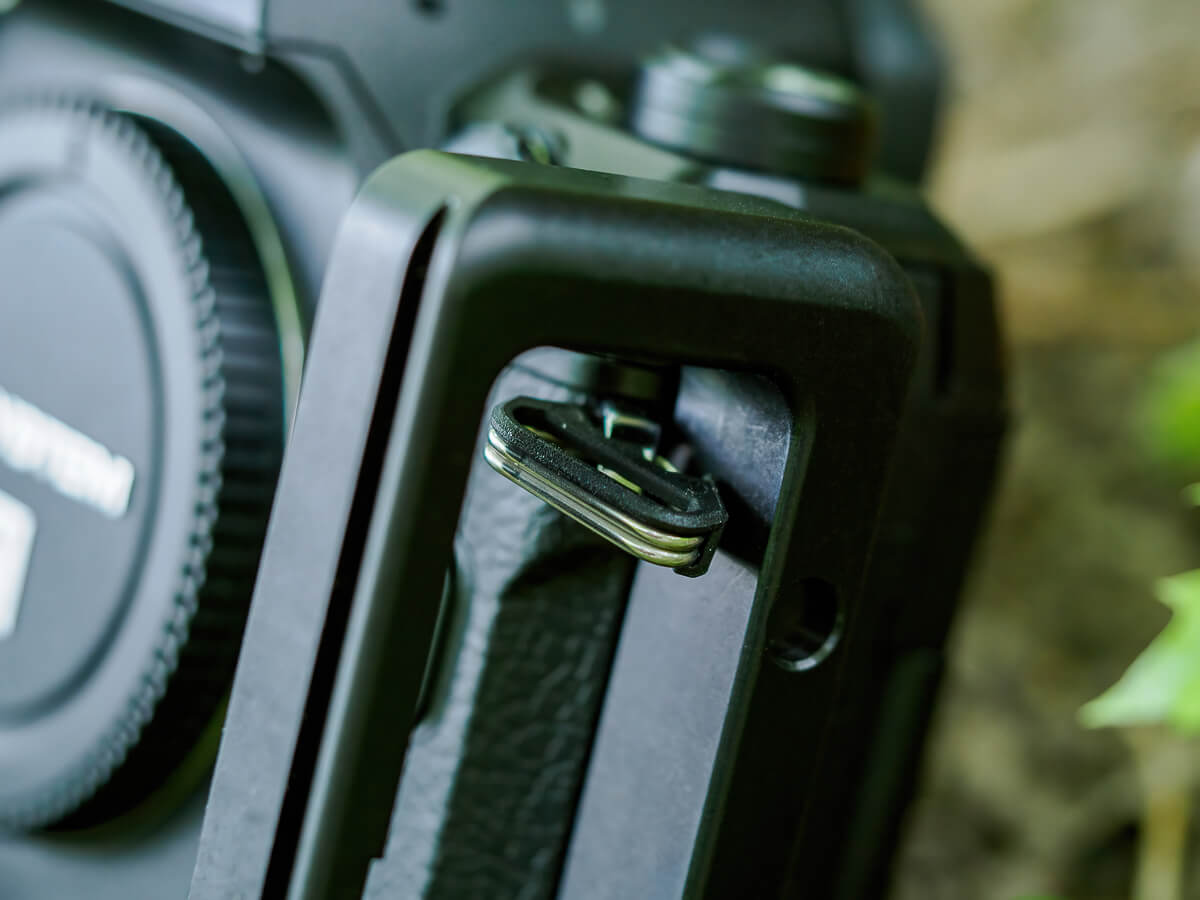
Only the L-combination has the magnetic holder slot for the Hex Key though!
Is the RRS BOM-1 compatible with the OMSYSTEM OM-1 Mark II?
-> Yes – the BOM-1 and all its versions are 100% compatible with the OM-1 II.
The RRS BOM-1 was, as its name indicates, originally designed to fit the OM SYSTEM OM-1.
Since the predecessor OM-1 Mark II has the exact same dimensions as the OM-1, the BOM1 plate fits both models perfectly.
Weight: 165,5 grams
RRS BOM-LS Price: ca. 290,00 Euro (175 USD)
Order at reallyrightstuff.com here for USA and international orders or at augenblicke-eingefangen.de here if you are from Germany.
Features and build quality
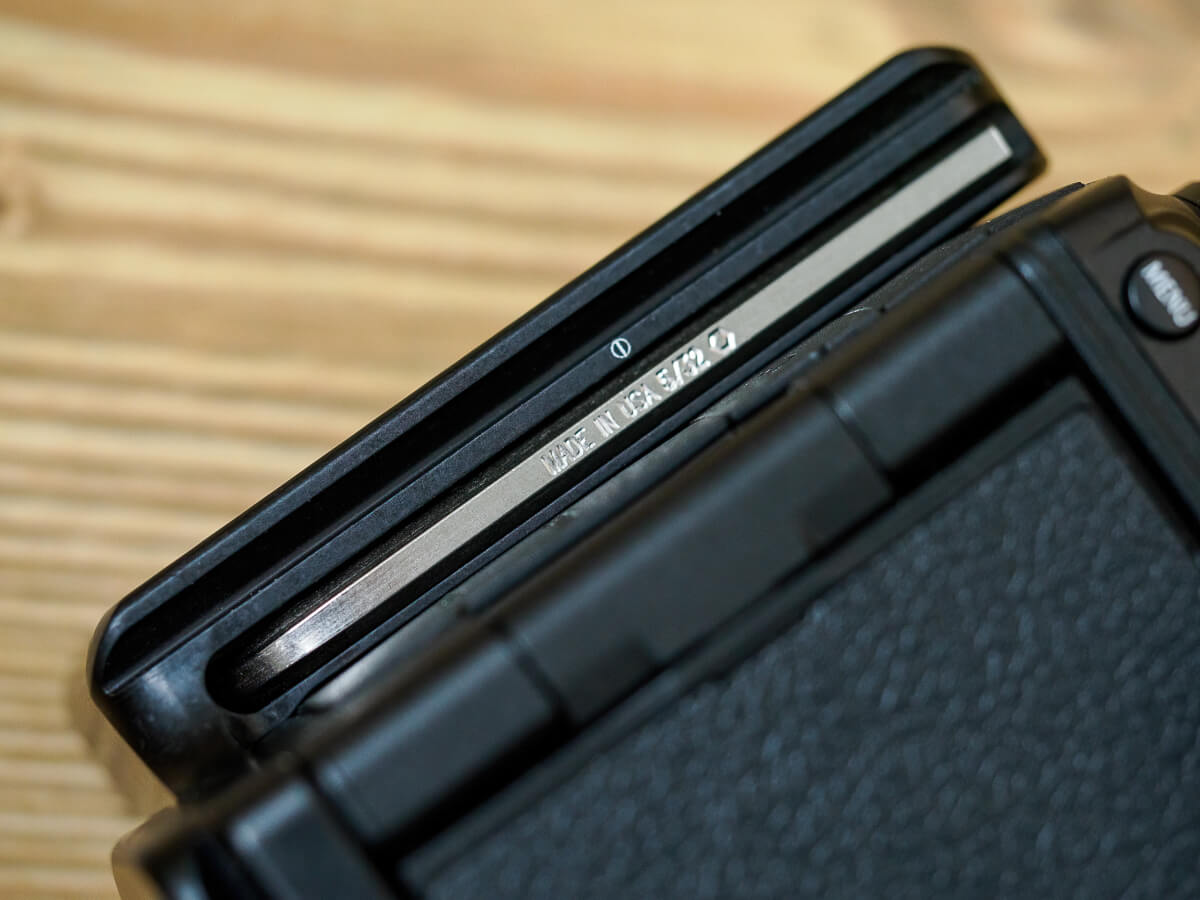
RRS – Really Right Stuff is a company known for perfectly manufactured products, made in the USA.
They advertise with “Unmatched Quality. Innovation.” – so this is what their products, that are anything but cheap, too, must live up to.
The product(s) come in a stylish cardboard box, with black ink prints and a label sticker.
I like, that the packaging is simple and practical, and that they do not use any unnecessary plastic components.
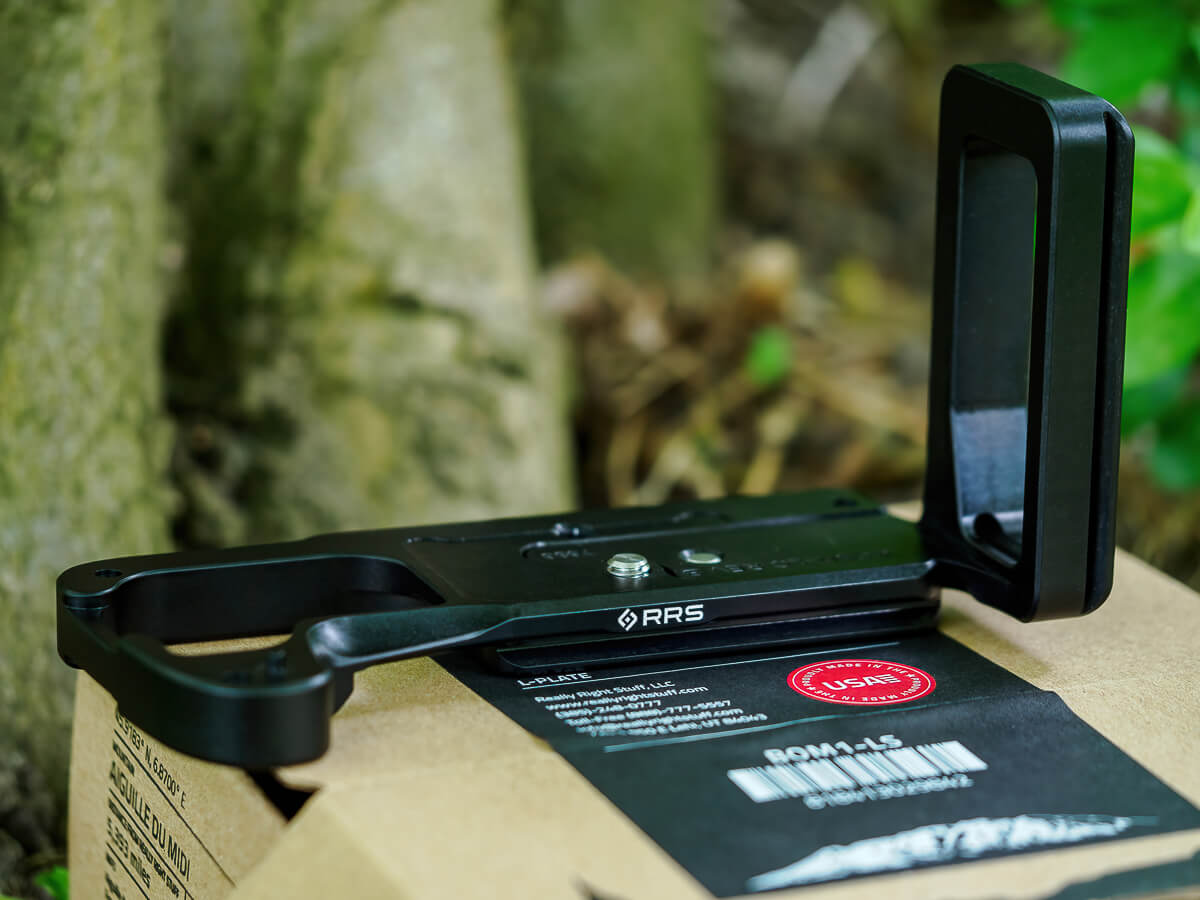
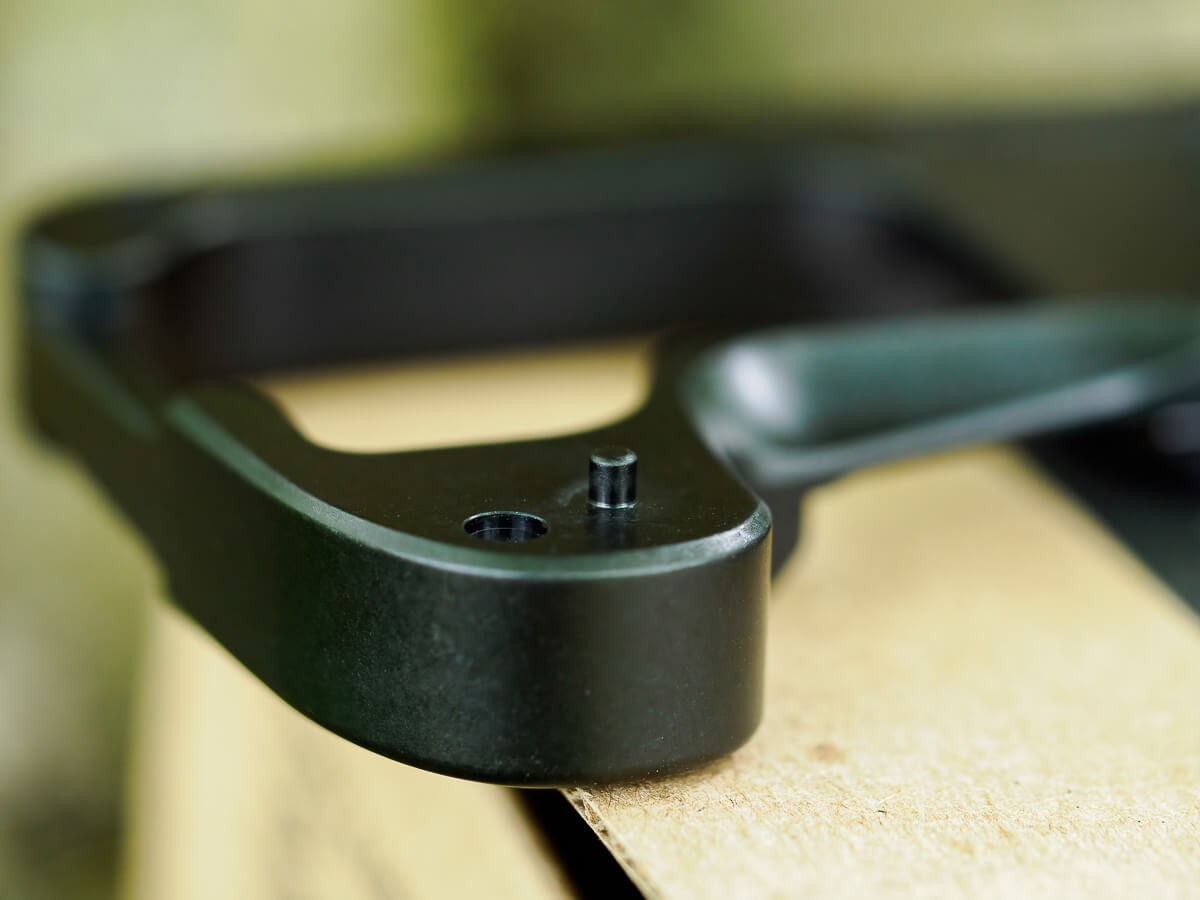
The package contains the L Plate (2 parts, preassembled) and a Hex key, which later perfectly integrates in a (magnetic) slot in the bracket, so you always have it with you.
Holding the L-plate in hands, shows that it is lighter than you might expect, while being absolutely solid and sturdy.
Surface and its Type II black anodized finish look and feel great, no sharp edges at all, all rounded instead.
The product is CNC-machined from 6061-T6 Aluminium.
Another tiny but nice detail are laser-engraved center marks, that mark the sensor middle point and help with the alignment on the camera (for panarama shots for example).
Dual dovetail mounting surfaces with ARCA-Swiss compatibility make changing between horizontal and vertical orientation an easy task.
For more versatility, the RRS BOM1-LS has an extra 1/4″-20 threaded accessory mounting socket and makes the RRS plate score on all fronts: side-to-side extension, flexibility and modularity!
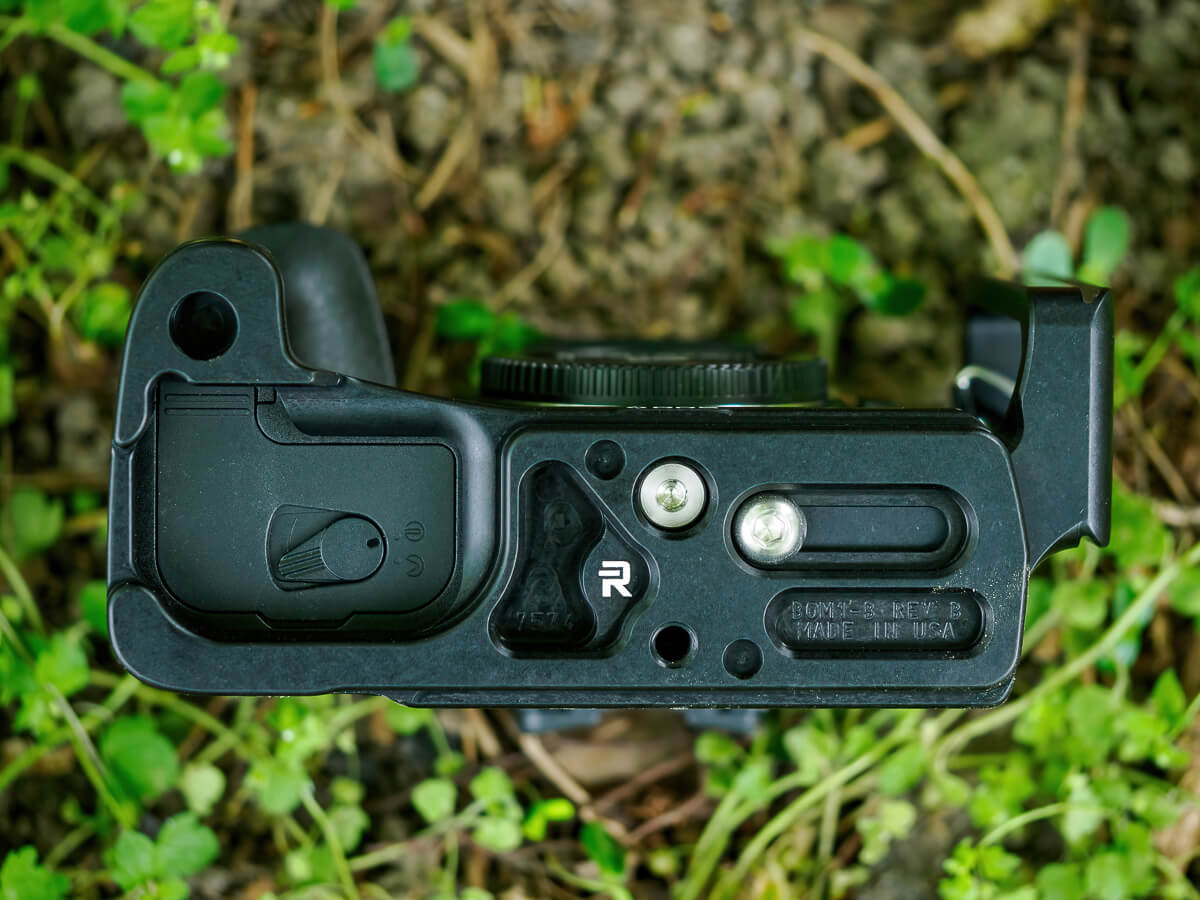
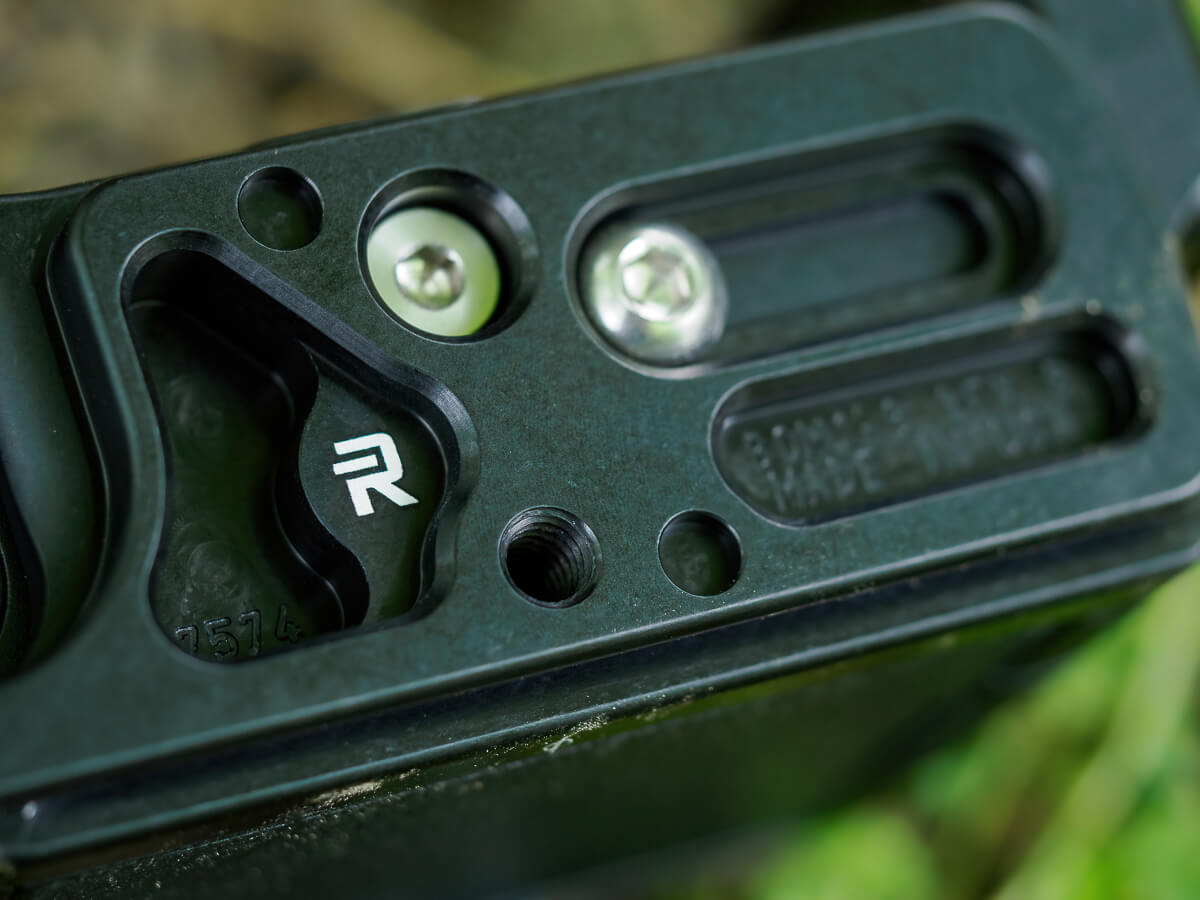
The RRS plate is also compatible with the MagPul QD (Quick Disconnect) product range and offers a dedicated QD attachment port on the underside.
As I use a peak design carrying system, I unfortunately cannot benefit from that – if you are a MagPul user though, it´s great to have that option.
To round up the line of features, the BOM1 has 2 R-Lock (RRS´s Rapid-Lock system) ports.
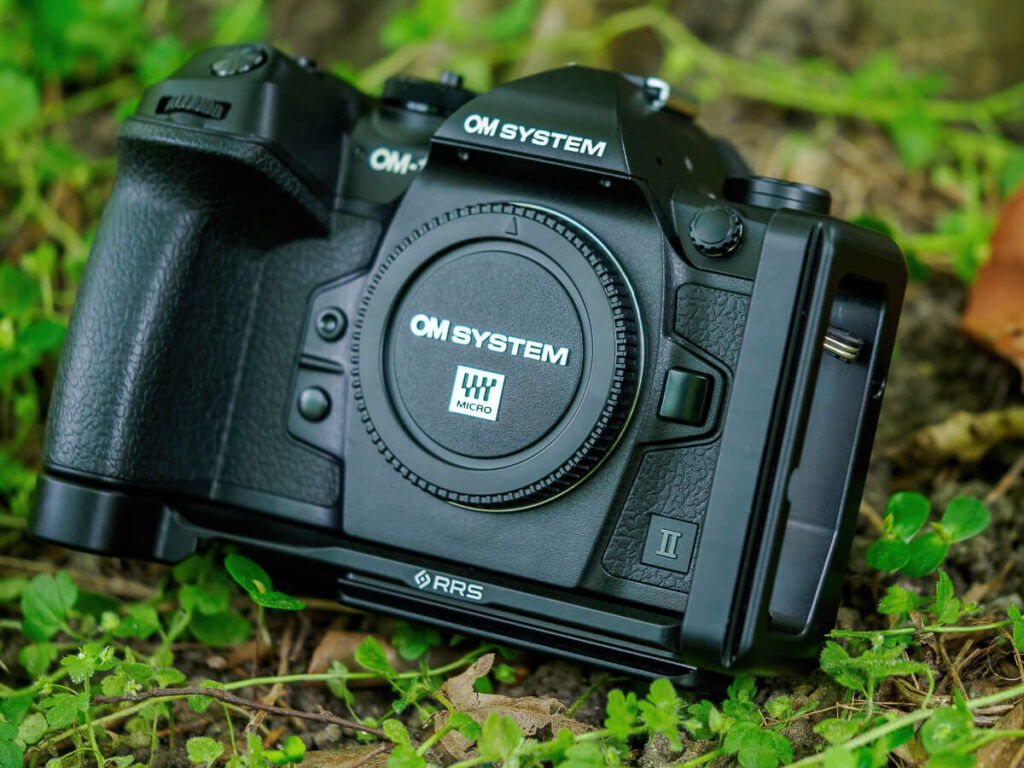
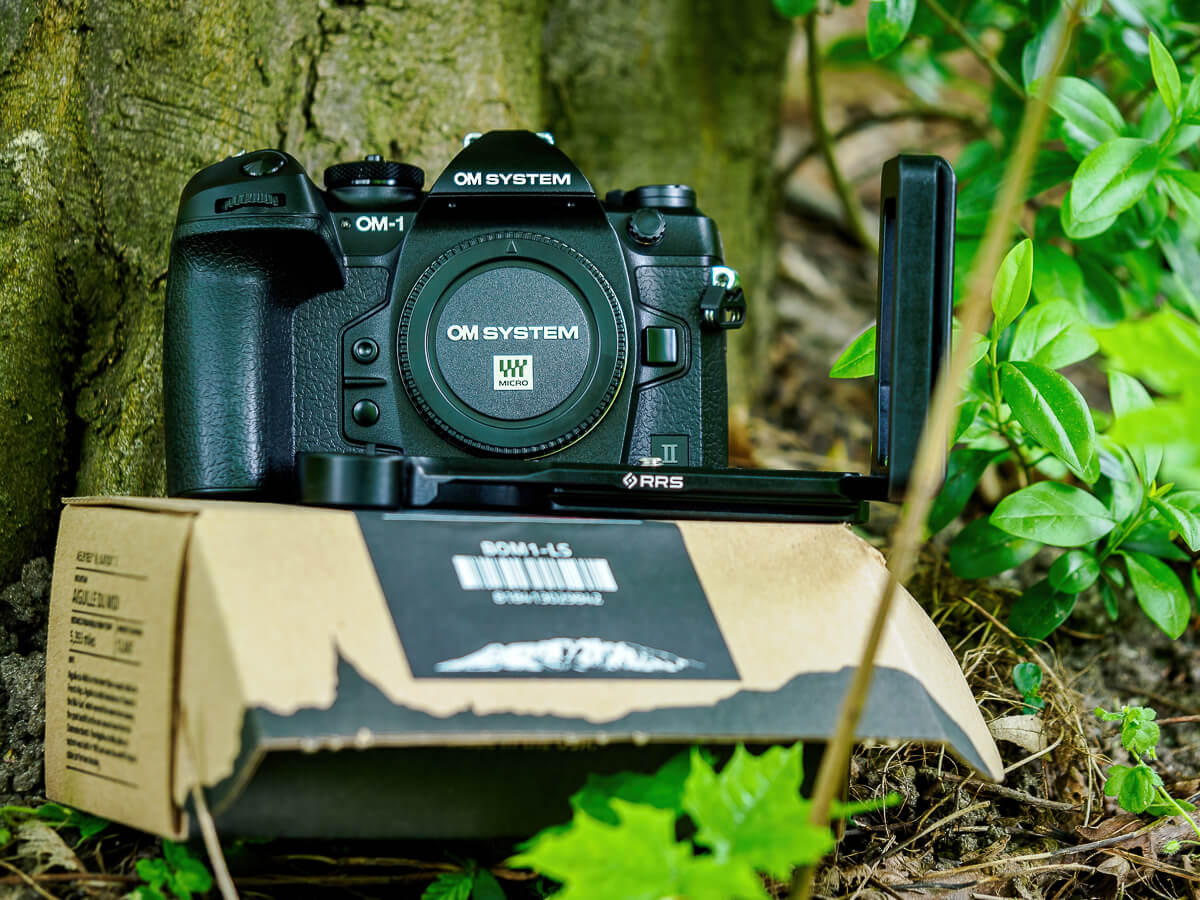
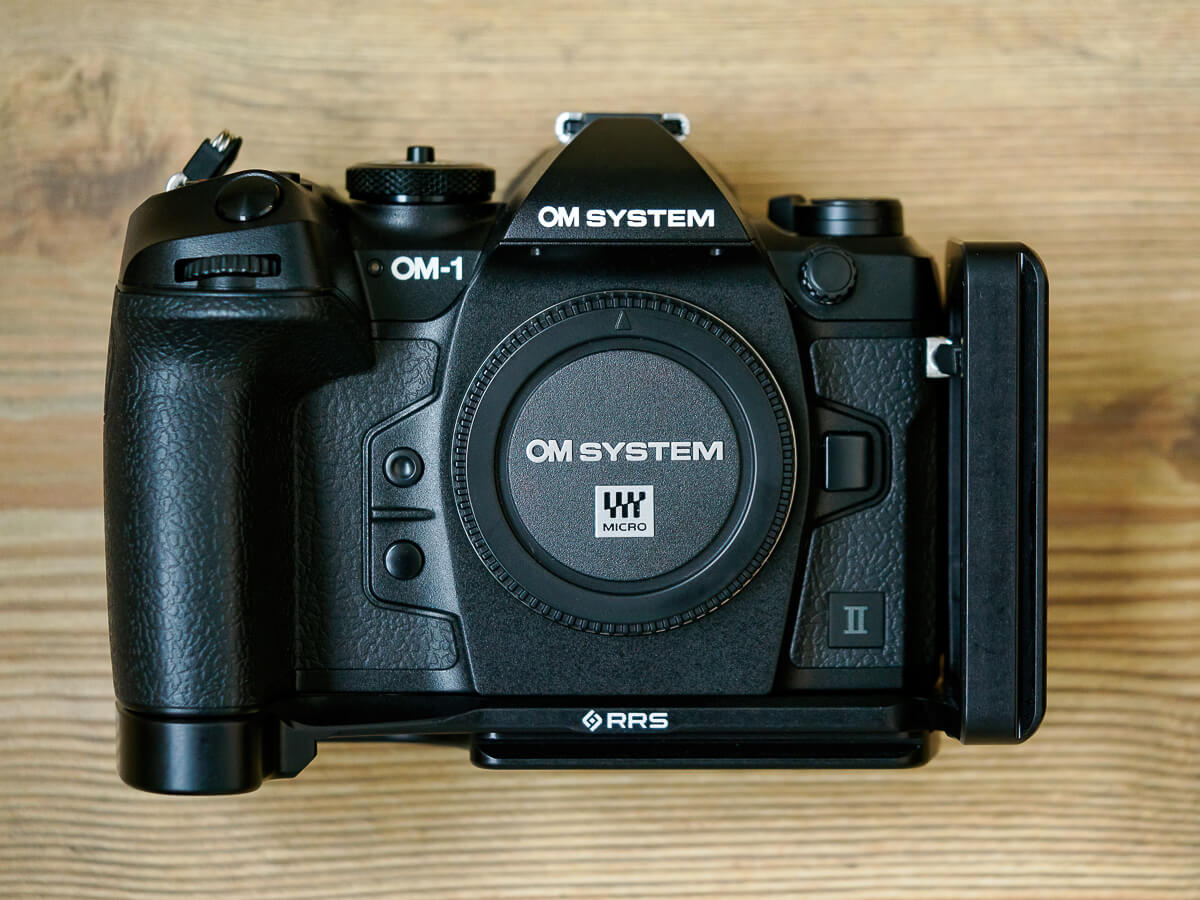
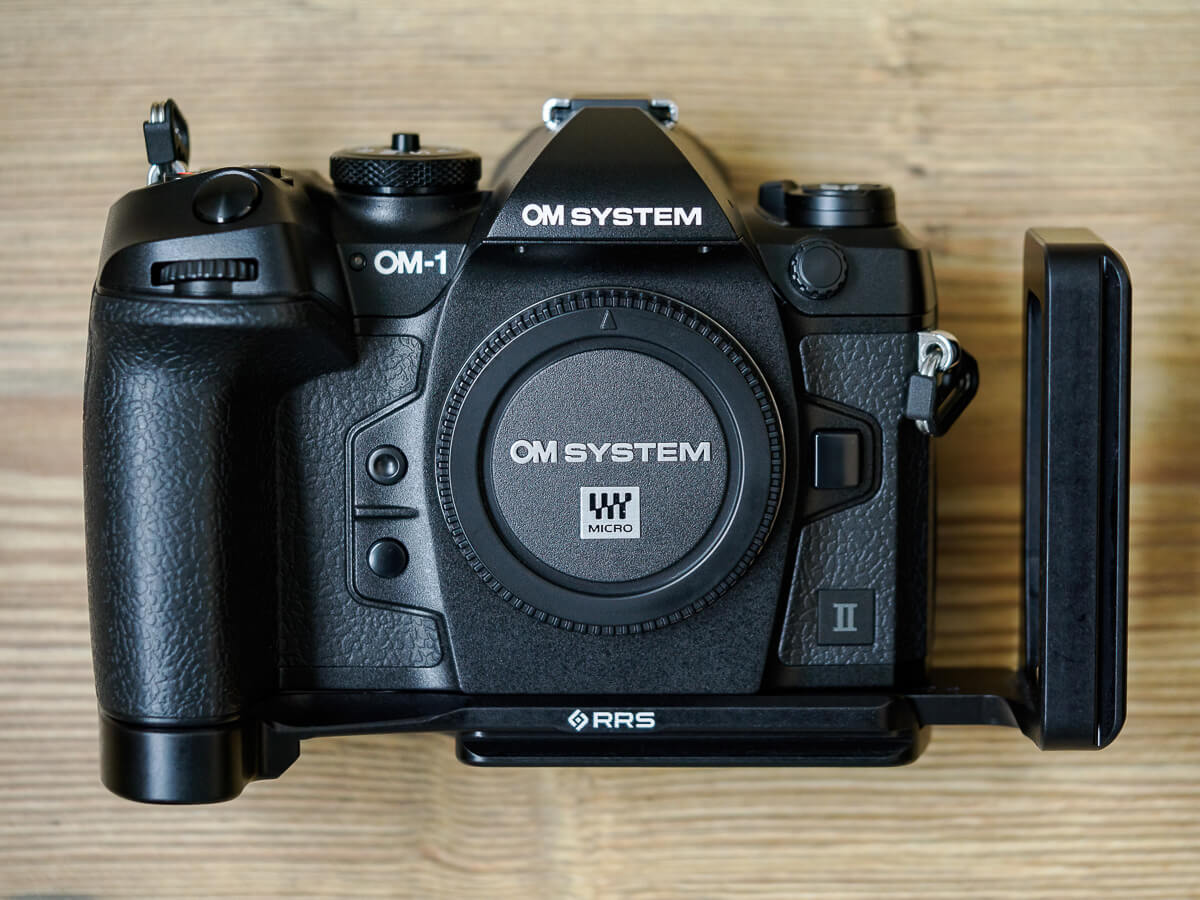
Fit on the OM SYSTEM OM-1 II
The RRS BOM1-LS bracket sits great on the OM-1 II – just like on its predecessor, the OM-1 as well.
I own and tested both.
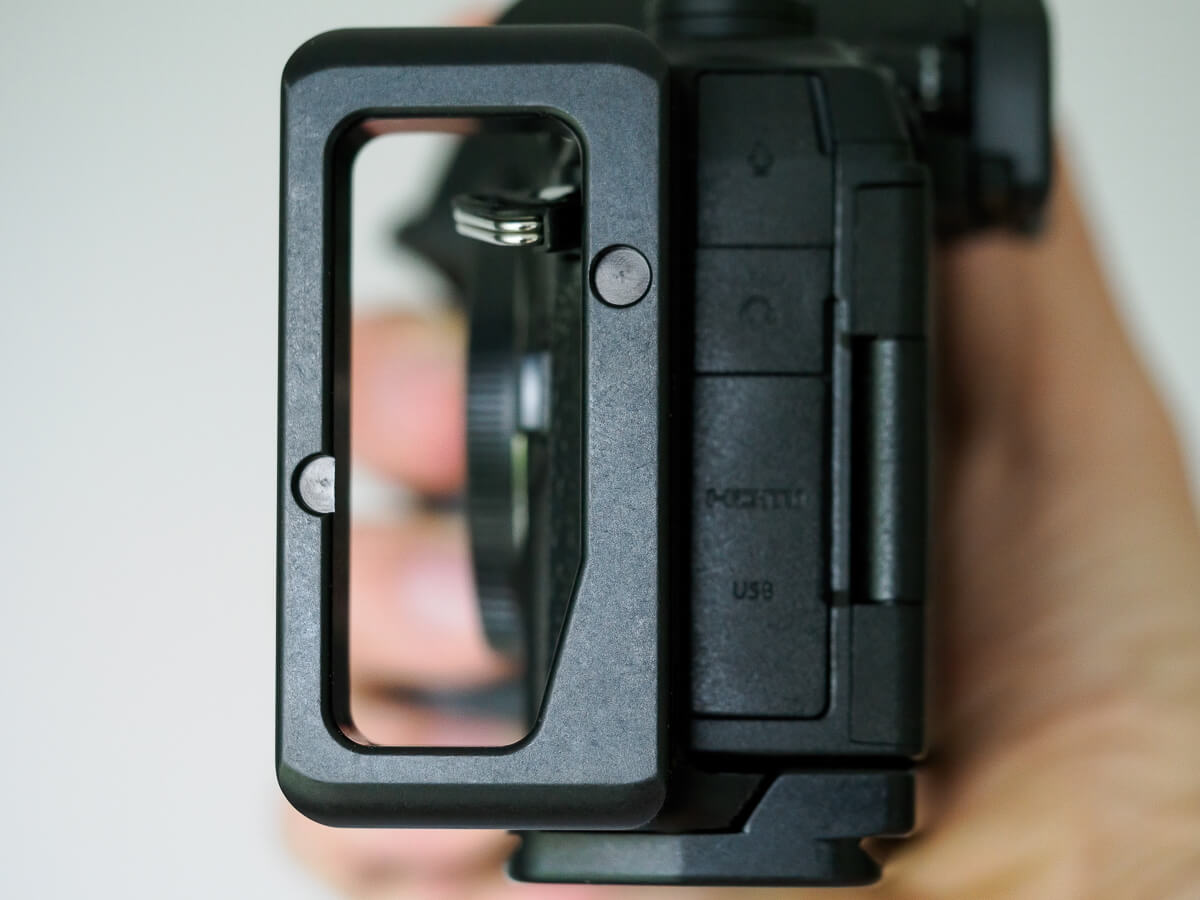
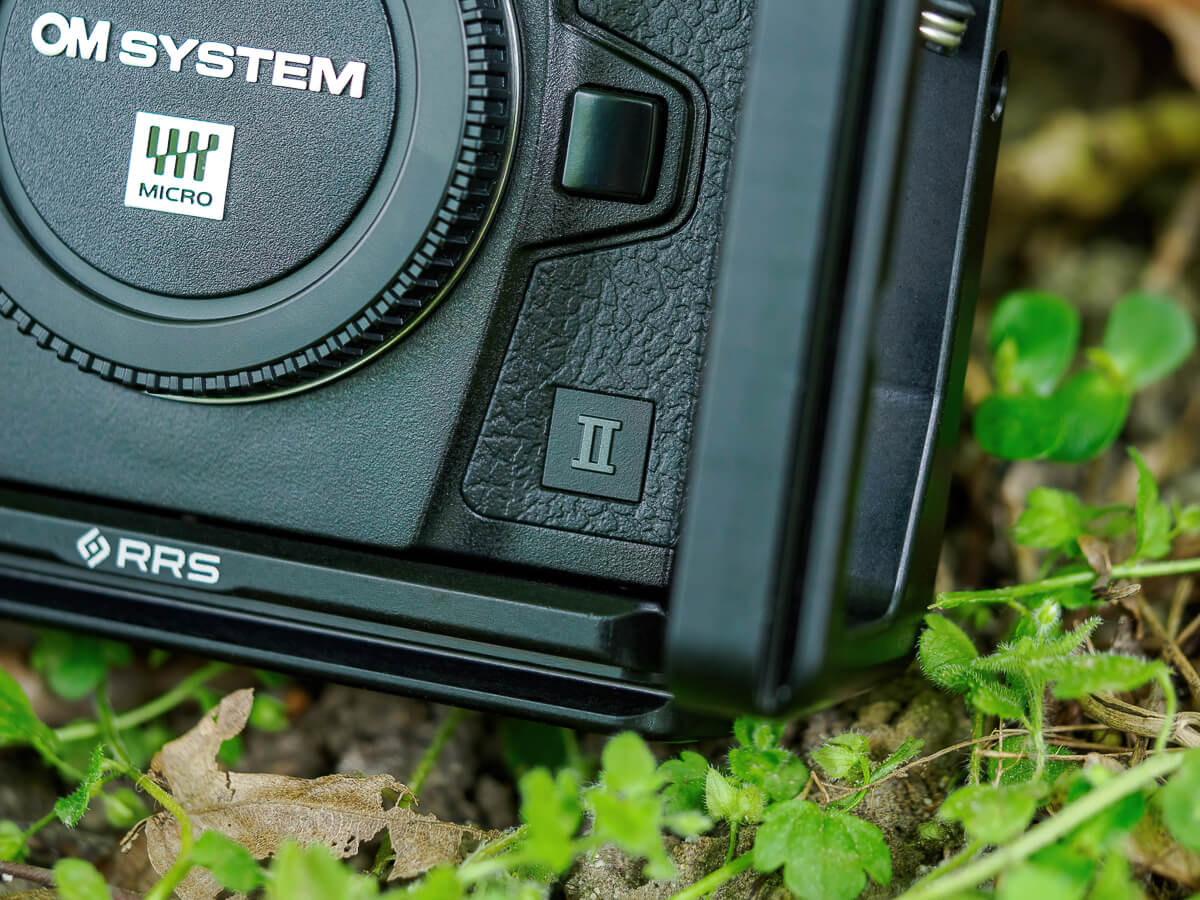
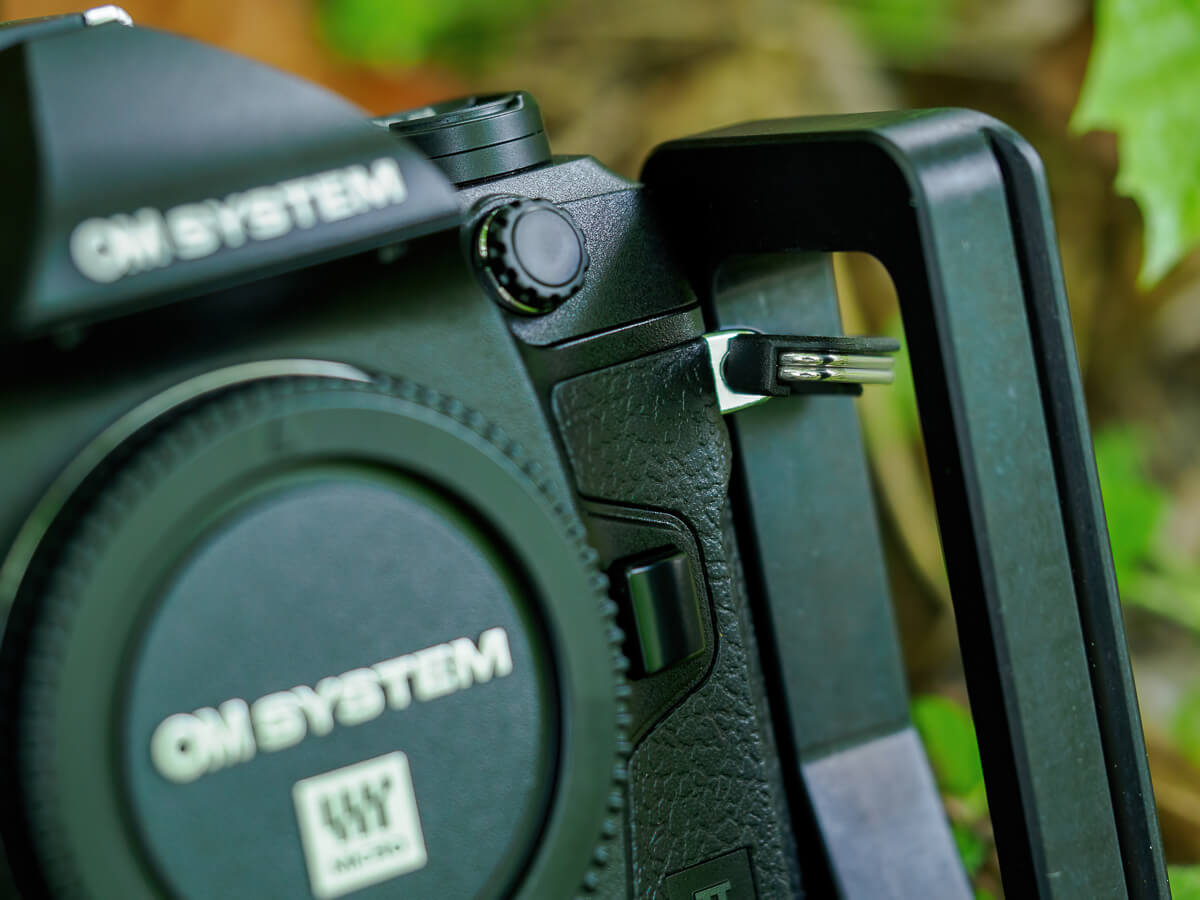
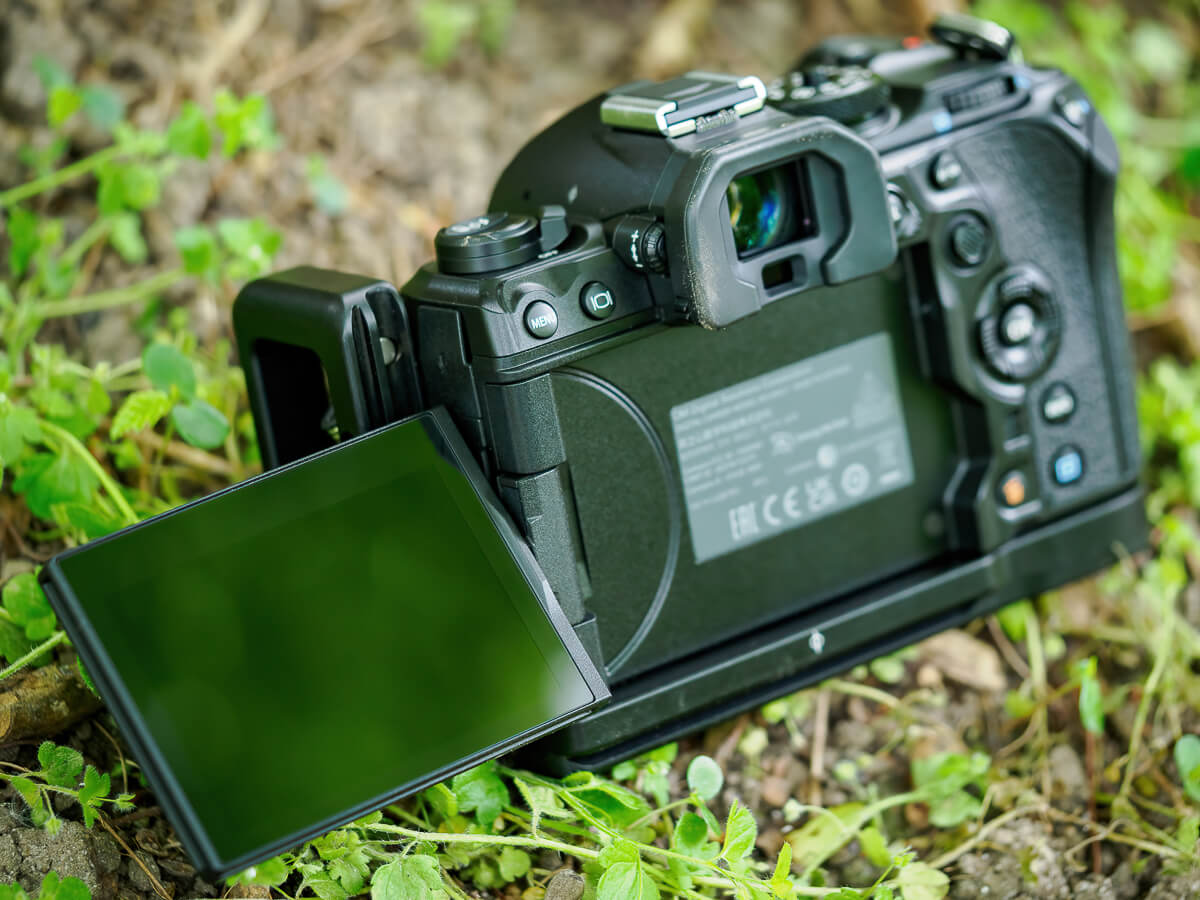
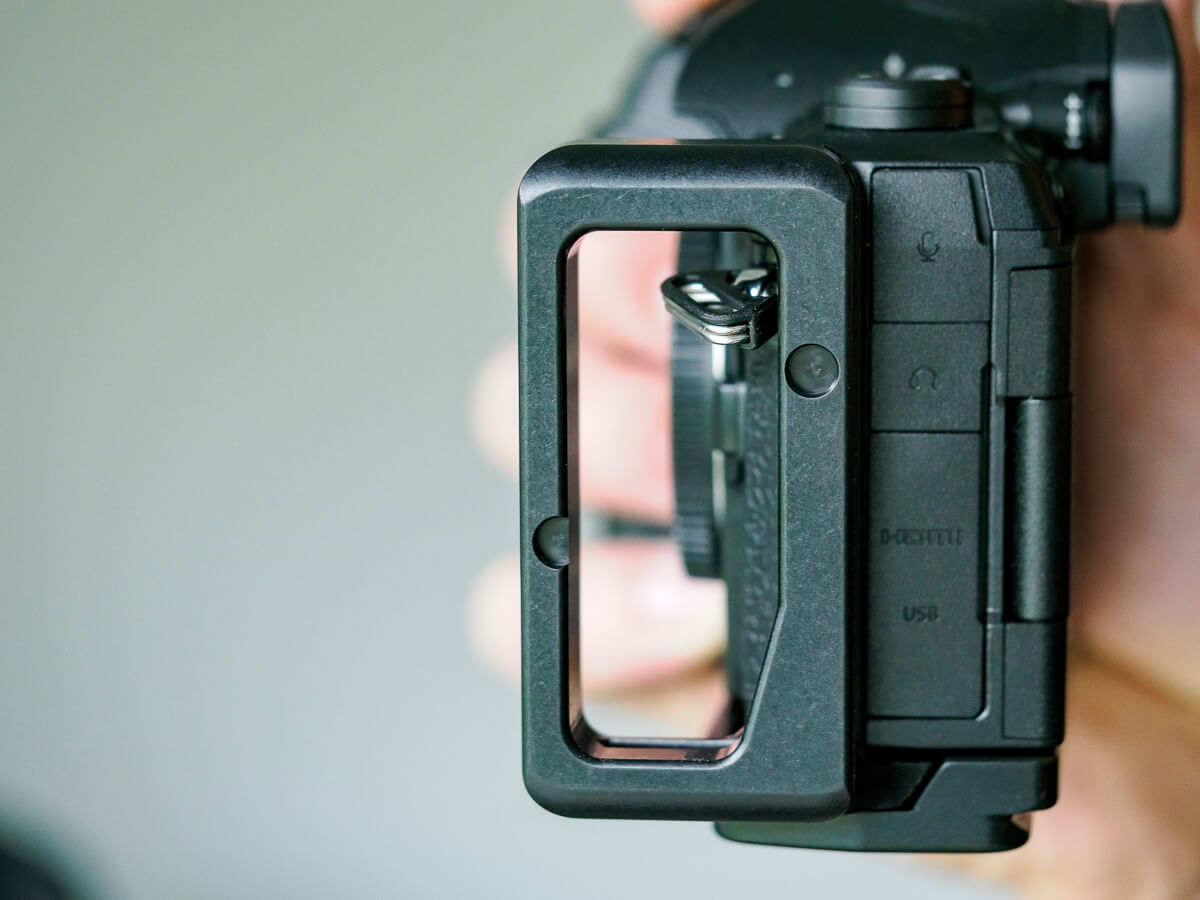
All ports and the battery are accessible with the bracket attached to the OM-1 II.
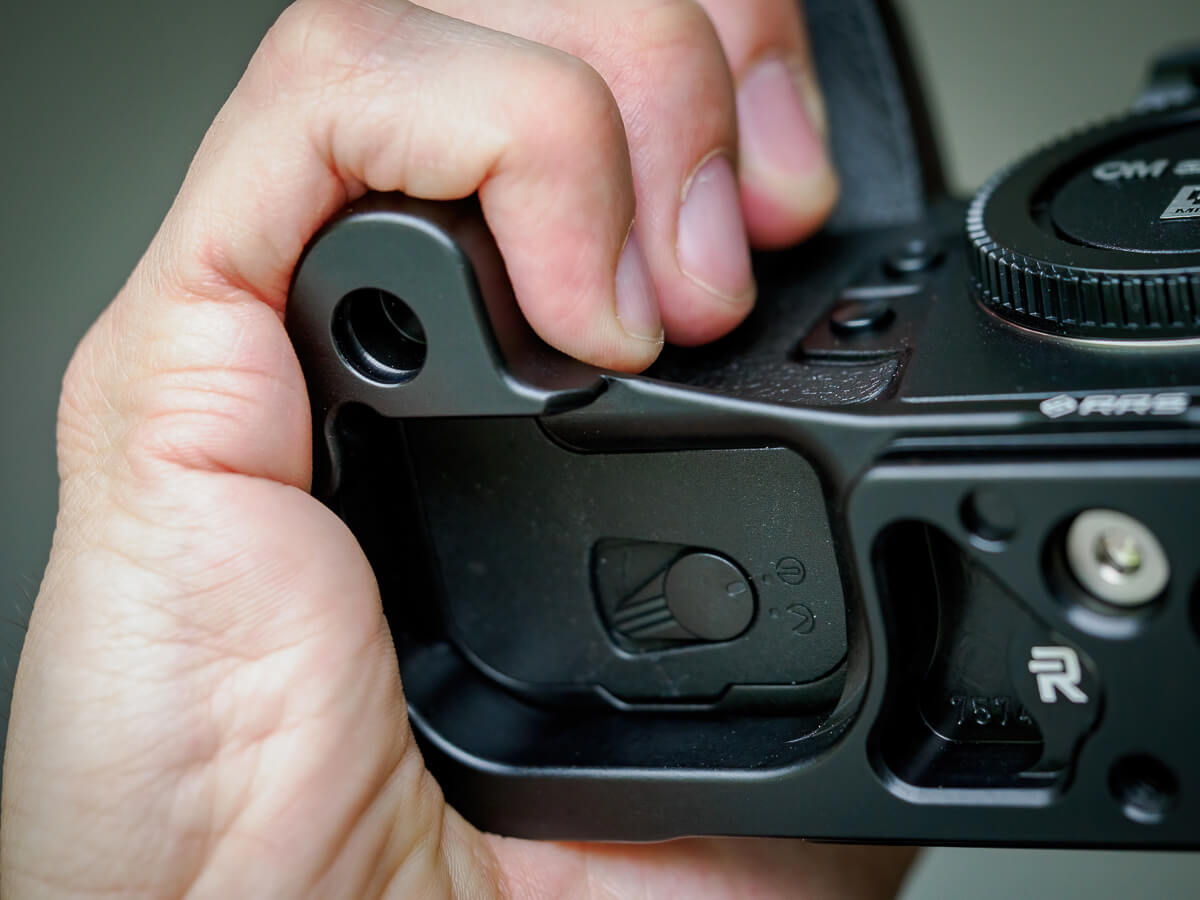
For secured positioning, the BOM1 has a fixing pin, that fits into the hole in the handle in front of the battery compartment and 3 dents, where the 4 tiny ground pins of the camera body underside fit it.
If you have ever used a universal plate or bracket on your camera, you will be amazed by how perfectly a fully customized product for a specific camera model fits in comparison.
Using the hollow vertical element to upgrade the BOM1 plate for an L-bracket does not require you to take off the little eyelet on the upper left.
This mean leans fiddeling – which is great.
I have had some equipment for various setups that forced you to remove small pieces of gear to make them fit/work and that has always annoyed me.
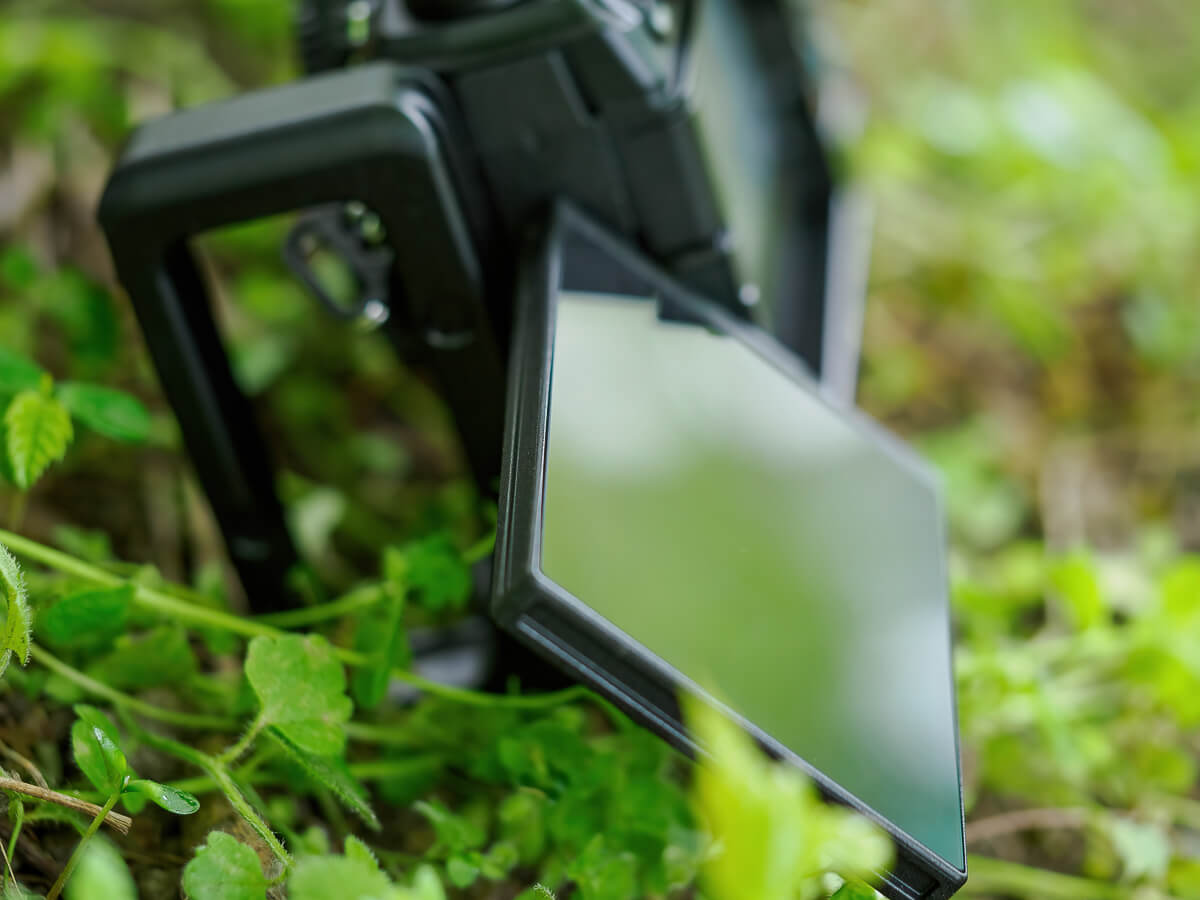
The articulated LC-Screen on the back of the camera is not blocked by the L-Grip and can still be rotated.
Conclusion
Is the Really Right Stuff BOM1-LS L-bracket what i was looking for, providing the extra grip I need?
It sure is – the pinkie finger of my right hand has a surface to grip now all the time.
Depending on the size of your hand and fingers it might not feel perfectly comfortable as the plate has a rim running along the position where your finger ends, but that is really just a minor gripe.

If you do not need most of the original L-bracket features for macro photography (like the orientation changing), a base plate would probably also do the job while keeping the setup a bit more compact – but this is of course no fault of the L-bracket but my personal choices and thoughts.
Thanks to its modular design, you can easily detach the vertical part of the bracket and opt for a simple base plate instead.
At the same time though, I have experienced the vertical component to be a handy feature in certain situations.
Since it protrudes to the front (originally to not cover the port access on the left of the camera body), it can also provide you with a grip handle for two-handed shooting, similar to an underwater casing.
I even use it as a carrying handle when the setup is light enough, just like you would carry a suitcase (it can hold roughly 23 kg).
During macro photography field trips I realized, that I intuitively pick up the camera from the ground with my left hand using the L-element and then grab it with my right hand to start shooting.
While doing some filming tests I was also happy to have an extra grip on the left side of the body.
Sign up for the newsletter mailing list & free ebook

Did you enjoy these tips and want to learn more or improve your macro photography skills?
Stay up to date with new blog posts, reviews and tutorial- and ebook-releases.
Sign up below to get notified when the free edition of my ebook
‘How to master spider & insect macro photography’ is ready for download.
henri
Posted at 09:26h, 27 JulyI have been using RRS Plates starting with my first E-M1 waaay back… they are just great.
You can also get fitting quick release thingies from LeoFoto, more focused on foto slings than gun slings. Just search for “QD” on their website.
Cheers
Henri
wildmacro-chris
Posted at 20:18h, 28 JulyHey Henri, yes, i also like them – both build quality and features are great, expensive, but worth the money! I will have a look at the quickies you mentioned, thanks.