
18 Nov How to get more depth-of-field for macro photography: cropping vs focus stacking

In macro photography it is often about getting in as much details and as much depth-of-field (DOF) as possible.
The latter is usually a challenge, as at high magnifications of 1:1 and above (where it is even a must), the DOF is paperthin.
Getting the best result, means balancing a lot of factors and find the perfect compromise of those.
As with every relation of aspects, focusing on one will usually come at the cost of underweighting another.
When it comes to the increasing of depth-of-field, there are basically two techniques to achieve that.
Techniques for getting more depth-of-field in macro photography
The depth of field is controlled by multiple factors, with the following being the most important ones:
- the magnification of the lens used
- the aperture chosen
- the distance between sensor/lens and subject
- Sensor type
The settings of the camera, the specifications of the lens, and the scenario itself result in a specific DOF.
With a specific aperture we can get only so much DOF for a perfectly exposed shot, with the light available (natural or flash).
If we want a greater depth of field, we would have to stop down the lens, but what if that is not possible due to the lack of light (which could probably be fixed by using a flash), or if we do not want to do that from an esthetic point-of-view (for a smooth and out-of-focus background)?
There are two techniques that can help achieve the desired, deepened DOF.
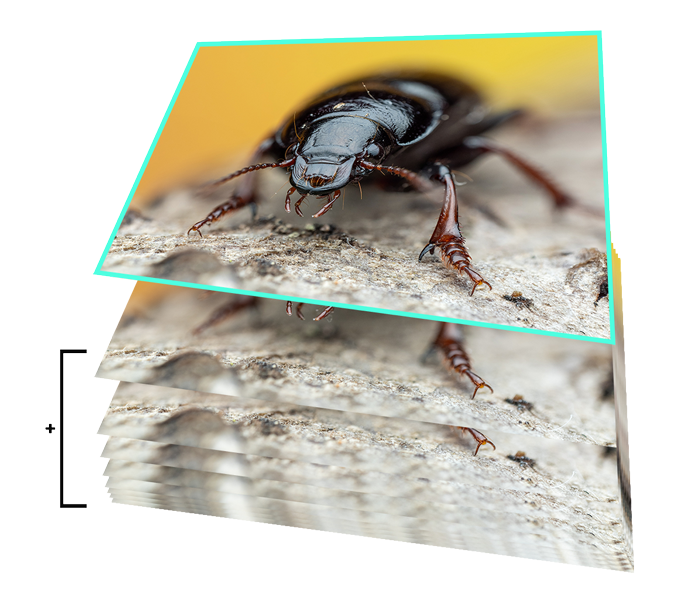
Focus stacking
This is the most effective technique when you want to increase DOF at a given magnification.
It can be considerably more time consuming compared to the second technique but offers the highest amount of detail possible at a true maximum magnification.
With focus stacking multiple photos with a slightly shifted focal plane get combined to a final composite, adding up all the thin layers of focus/sharpness to a deeper depth-of-field.
Cropping
With the cropping technique, we use a shortcut or trick rather – effectively, we are not photographing at the same magnification as in the focus stacking example, but at a lower magnification and then crop back in, to achieve the same look.

The animation shows, how three photos, all taken at a different magnification but with the same settings, will look as an overlay.
The white frame illustrates how each photo would have to be cropped to match the one with the highest magnification.


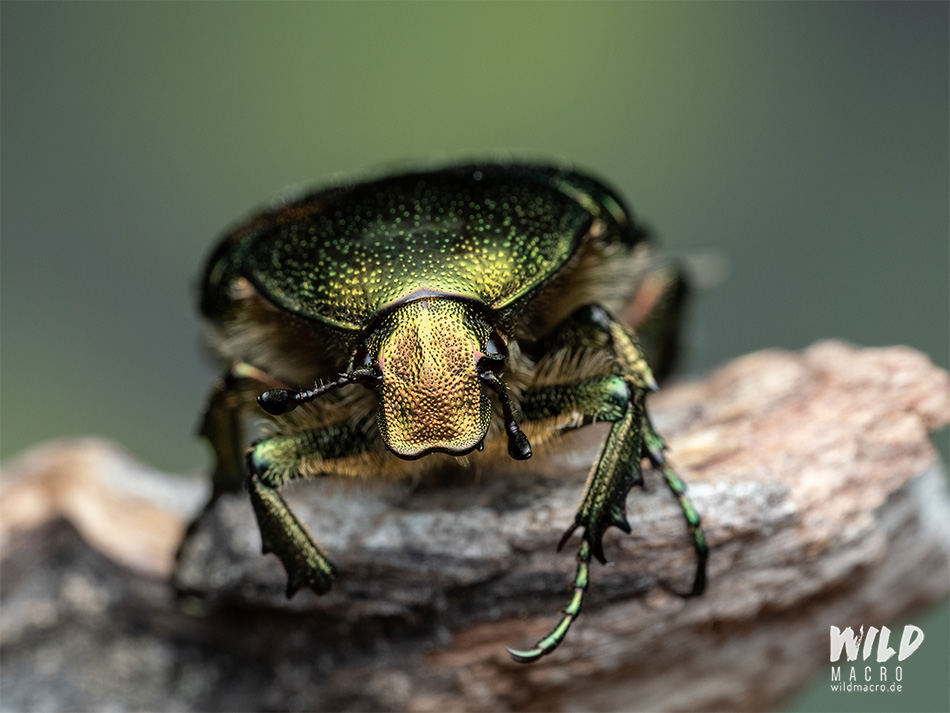
These are the three photos, side-by-side, all at a different magnification but with identical camera settings.
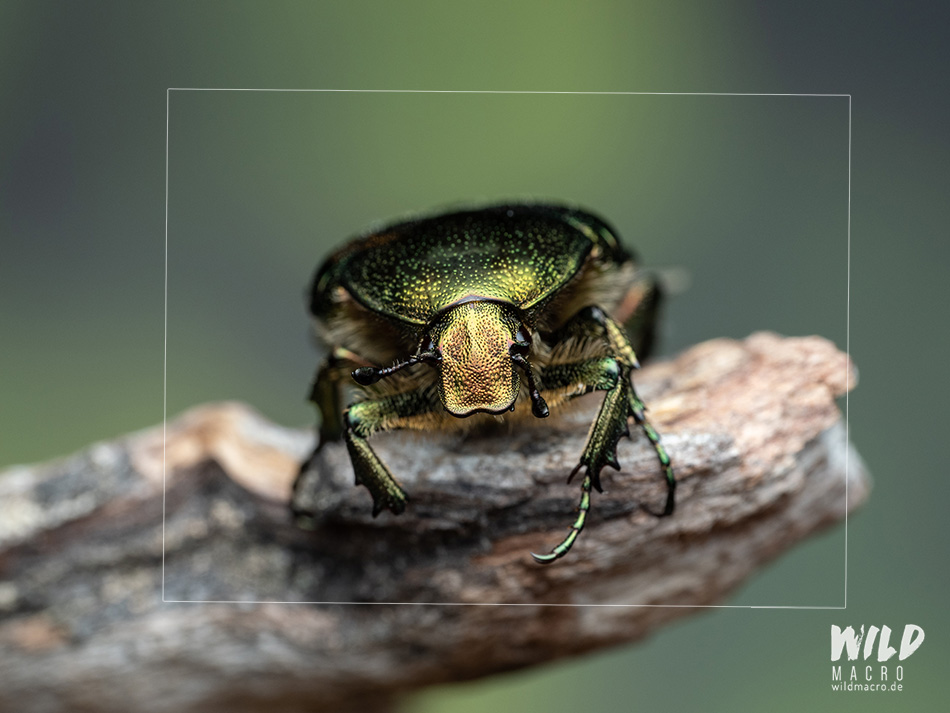
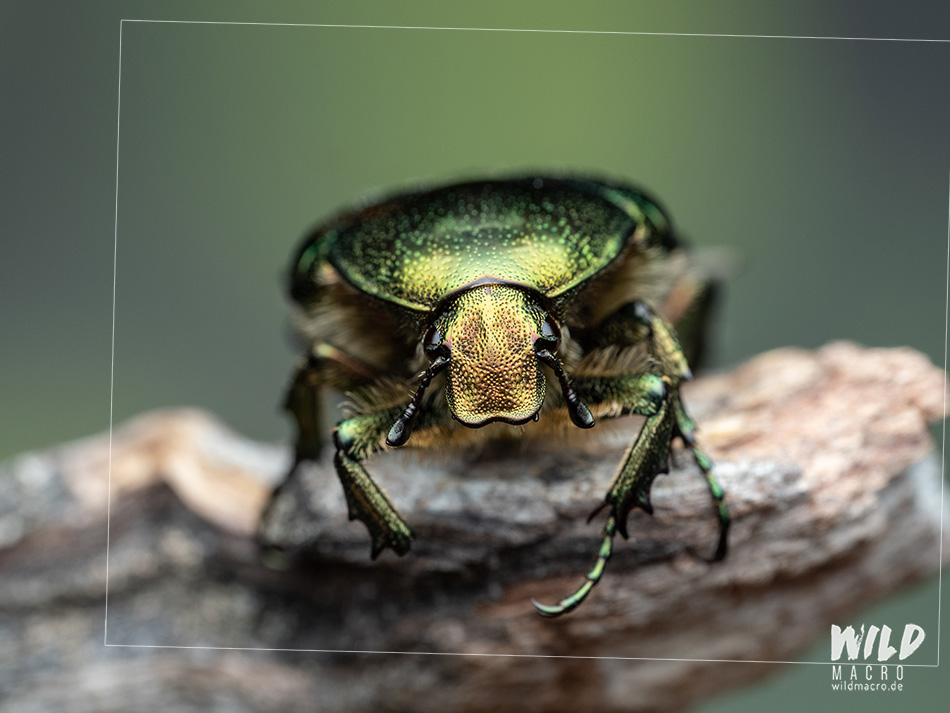

Here, like in the animation, the white frames highlight the format of the photo with the highest magnification (outer right).
The following photos are the original format of the photo with the highest magnification and a very shallow depth-of-field (top), and the two other photos at lower magnifications but with lightly more depth-of-field, due to the increased distance from lens/sensor to subject.
Matching the crop for the last shot to the format of the photo with the highest magnification (first), results in a considerably greater DOF.
The head and even a thin part of the thorax are now in focus, while in the first photo not even the complete head is in focus.
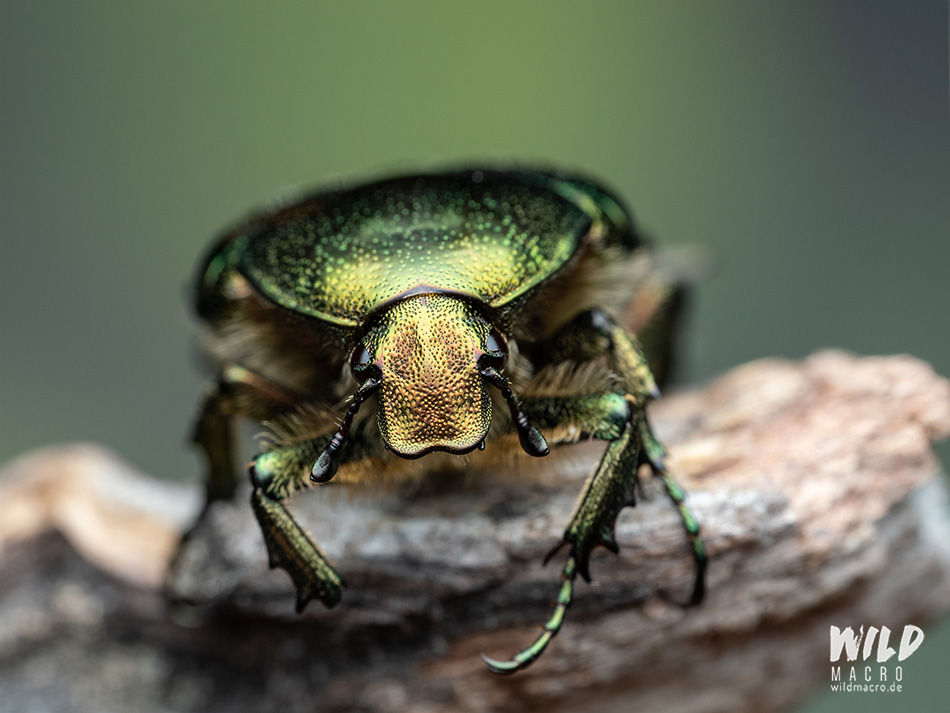
The principle behind this approach is, that as much as the depth-of-field gets thinner at higher magnifications, it gets deeper if we reduce the magnification again.
With enough pixel data (so cameras with a big sensor have an advantage, think full frame), the result will still look good, even though we reduce the megapixel count in the process, as we take image information/areas away.
Software like Topaz Gigapixel can enlarge the image again (and even improve sharpness at the same time), increasing the megapixel count with surprisingly good results.
Which technique to achieve more depth-of-field is better?
As always, there is no definite right or wrong when it comes to the approach to create a photo.
While one feels like a more technical and honest but time-consuming solution, the other might feel like cheating or taking a shortcut but can produce very similar results in a considerably shorter time.
What should it be?
Best quality and more time consuming, or moderate (often still enough) quality and a quicker turnaround?
This is no trick question, there is simply no right or wrong (except being open about the process).
You choose…
Sign up for the newsletter mailing list & free ebook

Did you enjoy these tips and want to learn more or improve your macro photography skills?
Stay up to date with new blog posts, reviews and tutorial- and ebook-releases.
Sign up below to get notified when the free edition of my ebook
‘How to master spider & insect macro photography’ is ready for download.
Christopher
Posted at 11:35h, 15 DecemberTBH – in case i want to “cheat” (given that my subject doesnt move) I’m basically just activating the highres mode on my X-T5 and then crop in. Stacking (usually) is too much effort for my very rare usecases of macros. But i really like your comparison! 🙂
wildmacro-chris
Posted at 13:04h, 15 DecemberHi Christopher, yeah, all (on the technical side) is fine as long as you/we get to the result you/we are trying to achieve 🙂