
24 Aug Macro photography: the importance of a Diffuser
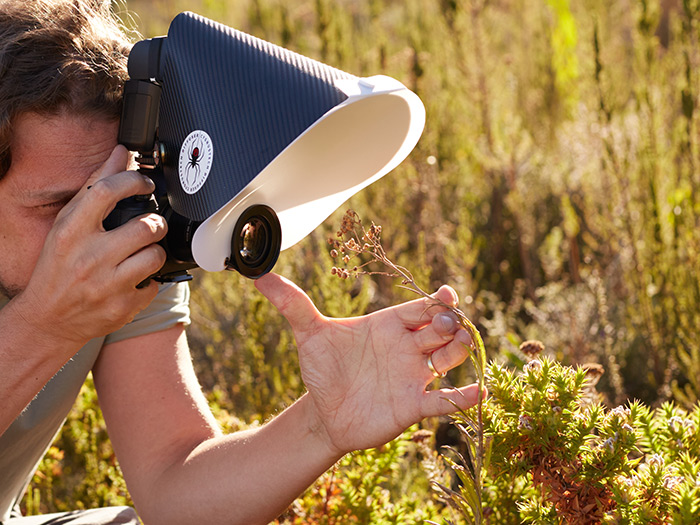
If you are using a flash for Macro Photography, the most important tool is the diffuser.
Learn more about why diffused lighting on your subjects is so important and how using a diffuser can make the difference between a bad and the perfect macro photo.
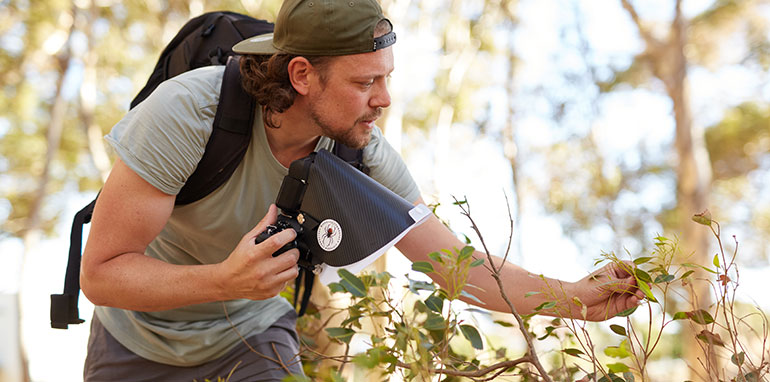
Photographing insects and spiders comes with a lot of challenges both for the photographer and the gear.
Many species have highly reflective bodies, iridescent eyes, or other features that present a challenge for getting even and well exposed lighting.
Being animals, they will rarely stay still and pose for you, which is another challenge.
Why are we using a flash in the first place, when we photograph tiny creatures like insects & spiders?
- Using a flash gives us a mobile and versatile setup to reach even obstructed spots and areas and still provide effective lighting.
- The burn time of the flash is so short, that the subject´s movement is effectively frozen.
There is no need to worry about motion and we will get a sharp photo. - With a flash we can use fixed flash/camera settings without having to care for the available light at all.
We are independent from the actual lighting scenario and hence highly adaptable and flexible.
In low light situations, where we could hardly get a well exposed photo with natural light only, a flash will provide a stable light source at any time.
What does the result look like, when we use a bare flash without a diffuser?
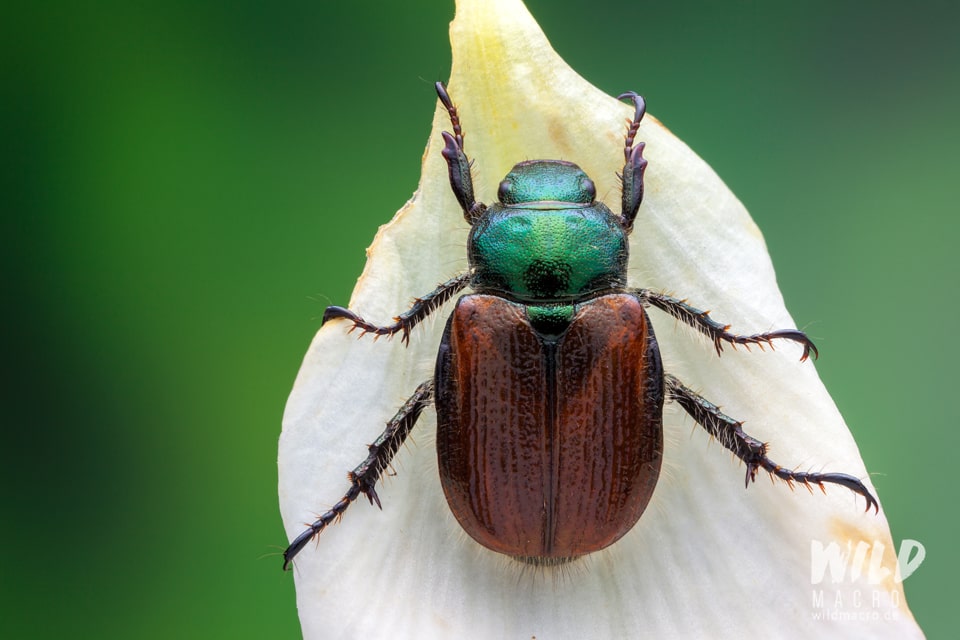
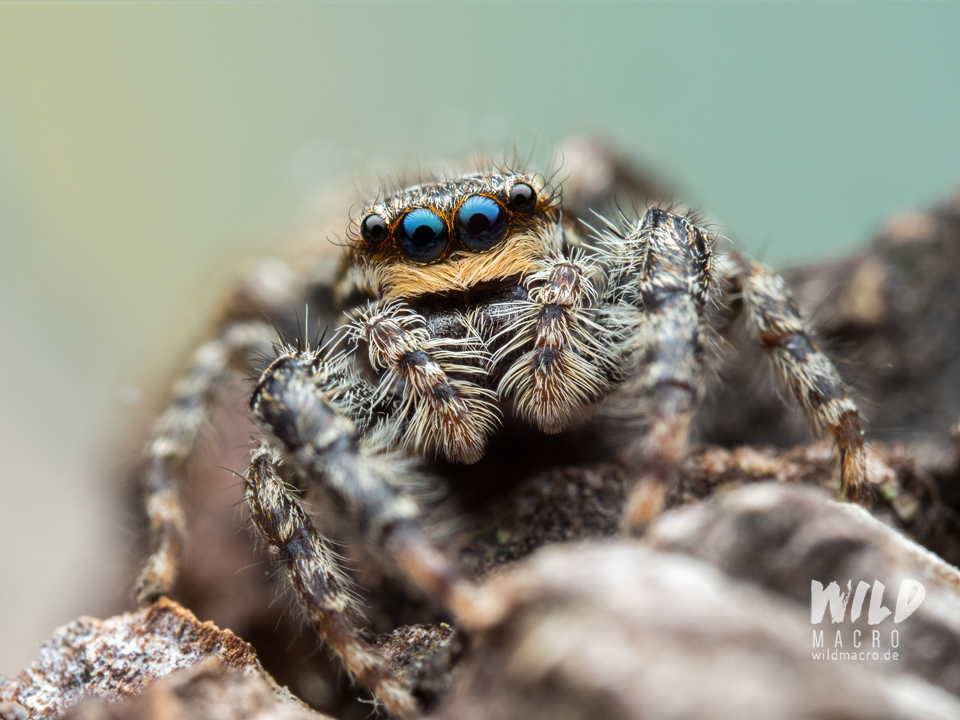
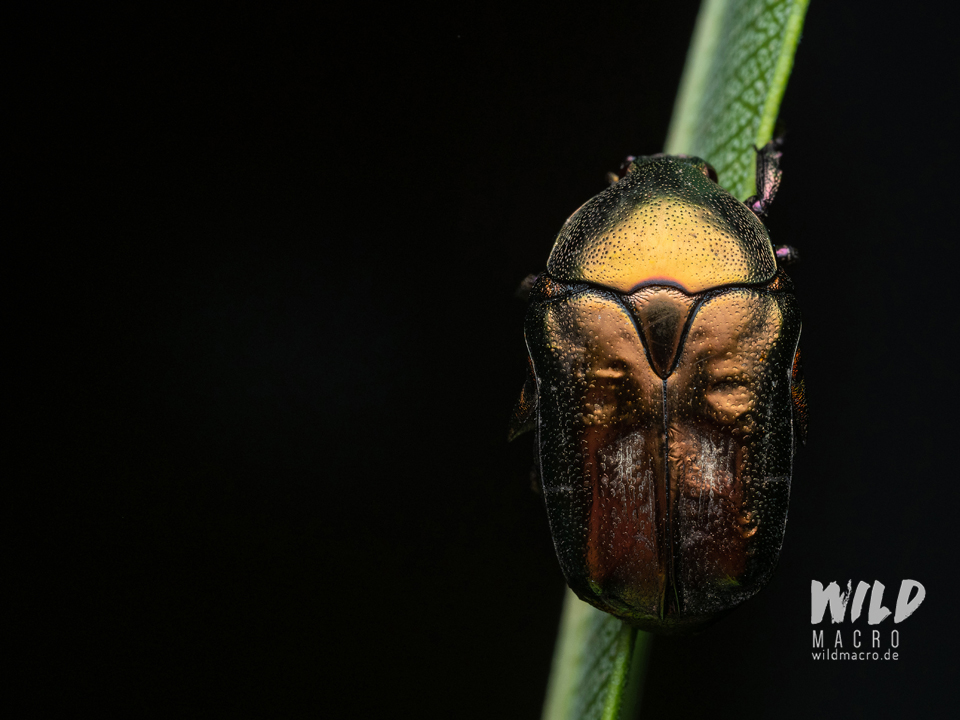
As mentioned earlier, a bare flash on shiny & reflective surfaces (imagine a marble of polished metal, the eyes of a jumping spider, or the smooth and highly reflective surface of a beetle´s armor or wing cases) will result in extreme highlights.
Textural details will most probably be lost and colors will not be as vibrant and visible as they actually are.
The shadows will be very visible and harsh.
The flash will also not hit the subject from an optimal angle and often shoot over it – depending on camera-to-subject distance though.
In addition precious light will be lost, as it is not channeled towards our scene.
Let´s take a look at the following photos to illustrate all of the above.
This photo was taken indoors with natural light only.
The beetle was set up next to a large window, the camera on a tripod
EXIF: F5, 1/4s, ISO 200

While the exposure and colors do actually look very pleasant due to the big window acting like a huge softbox, this was only possible because a tripod was used to enable the use of a slow shutter speed, and the pinned specimen was not moving.
At a higher shutter speed (1/80), to capture a moving specimen for example, the frame would have been black, or the ISO would have to be increased considerably to 2500 and more, to even make the beetle visible just a bit.
For the next photo a flash (Godox V860III) was added on-camera.
EXIF: F8, 1/100s. ISO200
With its additional light, the depth-of-field could be increased (closed the aperture more) and the shutter speed shortened.
However the highlights are burned and the flash caused very visible and harsh shadows underneath.
Finally, a Flash Diffuser was added and the shot taken with exactly the same settings (flash power also the same) as the one before.
EXIF: F8, 1/100s, ISO200

The blown out highlights are gone now, the extreme shadows considerably softened and almost not visible anymore.
Tweaking the settings of the the flash-diffuser-combination could make the image even brighter.
It would get closer to the nicely illuminated natural light only version.
At the same time offering more depth-of-field and hence details and sharpness.
If you are interested in side-by-side comparisons of how the light from the different DIffuser brands/models look, there will be an article about just that out soon.
How does using a flash diffuser considerably improve macro photography?
With a flash diffuser all of the above mentioned problems can be solved.
The light will be smooth and diffused, just like when a softbox is used in classic portrait photography.
Colors and details will be visible in all their glory and ugly highlights will be reduced or even eliminated completely.
Reflections on shiny surfaces, like jumping spider eyes for example, will look a lot better than with bare flash.
As any movement will be frozen by the flash, we also enhance the actual sharpness of our photo.
The emitted light from the flash is effectively channeled towards the subject, which can give us the freedom to dial down its power and achieve a better ‘motion-freezing-effect’.
As you can see, there is hardly any downside from using a diffuser – it is quite the opposite – it is a 100% win.
What the diffuser also does, is chanelling the emitted light from the flash towards the front of the lens, down onto the subject, which would normally shoot over the scene we are photographing.
This applies at least to the scenario, where we are photographing small insects or spiders at a relatively high magnification of at least 1:1 or above.
A common misonception is, that macro photography with flash will always look artificial and that the usage of a flash will be recognizable.
However, this is not true: both mixed-lighting and also the sole utilization of a flash can emulate the look of natural light, if done properly.
What types of flash diffusers are available for macro photography?
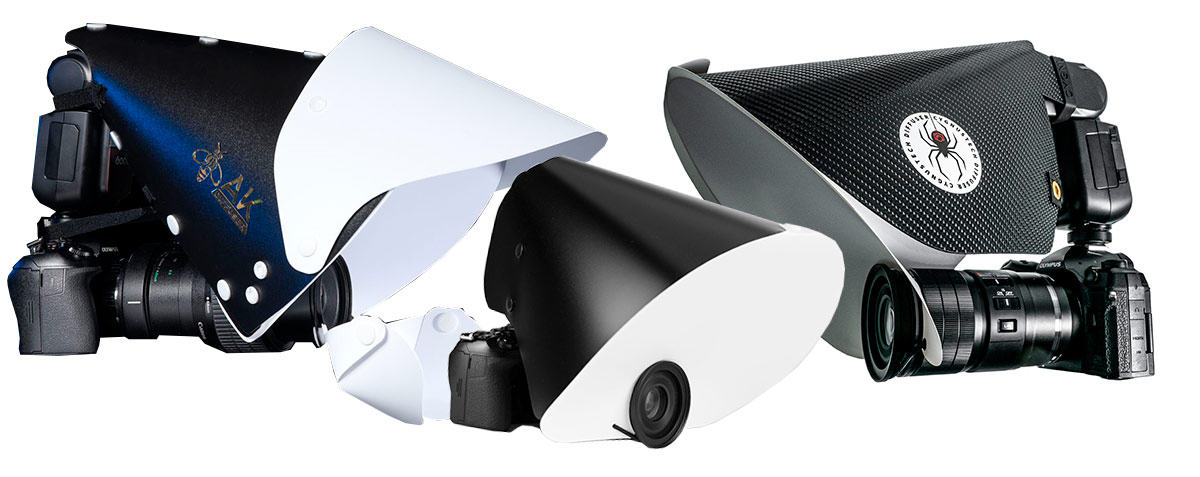
Diffusers for macro photography range from very simple homemade solutions to advanced reflector-diffuser-combinations and even professionally tailored multi-functional diffusers.
The simple use of a diffusion layer around the lens will already improve the lighting considerably.
Adding a reflector will channel the light and enable us to use a reduced power setting on the flash, which in turn, will result in shorter burn-time and hence a better motion-freezing-effect.
I have extensively tested & compared some of my favorite macro diffusers here.
What type of diffuser you will use, depends on your own preferences and your budget.
It is just important, that you use one in the first place (for this specific type of photography).
This will take your macro photography to a completely new level.
Trust me on this!
If you want to learn more about MacroPhotography with flash and using a Diffuser, check out these articles.
Sign up for the newsletter mailing list & free ebook

Did you enjoy these tips and want to learn more or improve your macro photography skills?
Stay up to date with new blog posts, reviews and tutorial- and ebook-releases.
Sign up below to get notified when the free edition of my ebook
‘How to master spider & insect macro photography’ is ready for download.
sarah
Posted at 12:51h, 25 AugustFirstly, thank you for publishing an amazing website/blog. The content and images are brilliant and have helped me understand macro using OM camera as opposed to the bridge camera I have been used to. It’s a steep learning curve what with all the new camera kit and using flash/diffuser. I have never used flash before and currently I am finding the diffuser very limiting as I try and get used to using it, knocking vegetation etc, almost to the point where I wish I never purchased it. I know that it is a skill that has to be learnt and that all the you tube videos that have them never show the many times that the subject fly away etc. That being said do you have any tips that might help? I know many people bring the subject towards the lens but even when I try this it disturbs them.
I look forward to being able to use the focus bracketing/stacking features and creating some great images that contain the subject intended and not just vegetation..
Once again, thanks for the content you provide in this space.
wildmacro-chris
Posted at 13:19h, 25 AugustHi Sarah,
thanks for the nice feedback – i am trying to keep the updates coming.
Regarding the diffuser, you are right, it can get in the way when you want to get really close, so these are many aspects that need to be right to make it work.
Something which, as you pointed out, is not shown nor talked about often, in the youtube videos and articles.
ALso, it requires patience and luck a lot of times, both to find and to get close to the subjects.
Understanding their behaviour helps as well, some wil instantly flee as soon as your shadow will cover them for example.
If you have trouble getting close with the diffuser because it touches vegetation, try to stay away a bit more and shoot from a greater distance where the diffuser barely touches (or better NOT touches) the vegetation.
Then, later, crop the image.
For the start that might be easier to get used to it.
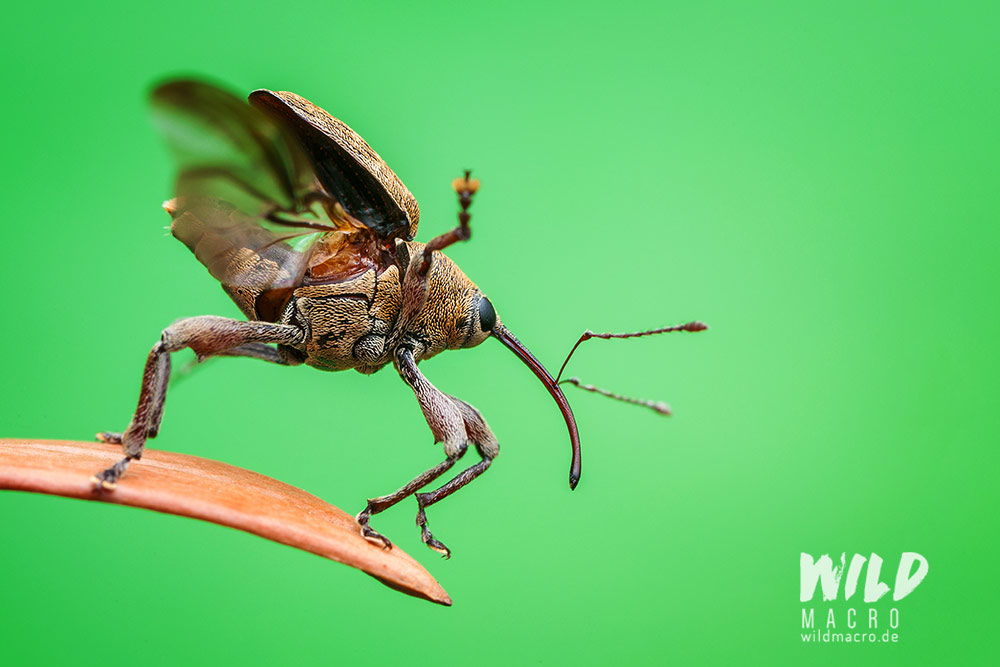
Photographing flying insects is a lot more challenging than ground-dwellers, too – especialy when it is warm and the sun is up, as they are the most agile and skittish then.
Good luck 🙂
sarah
Posted at 13:35h, 25 Augustwow thank you for replying (and very quickly too). Is it ok to crop on OM system? I have seen many saying that they don’t do it, hence why I am trying to fill the frame more than I would normally do.
On my bridge camera I used a Nikon diopter which allowed for a big working distance and I hardly ever disturbed things but I wanted the ability to create more detailed images that OM offered with in focus stacking and bracketing. I never was good enough doing this handheld with my other camera.
I do try getting out early as the light is better then and there are less people too. It doesn’t help that my eyesight is fading I guess. I will practice loads and prepare for many disasters and embrace the learning experience. I do try to watch the invertebrates for a while if I don’t know what they are, it’s great to be able to understand a bit of their life so to speak.
Thank you again for replying, I never expected one. I will take on board and practice, practice and hope that the invertebrates have a better year in the UK next year, as this year has been catastrophic for almost all of them, very sad.
wildmacro-chris
Posted at 13:44h, 25 AugustYou´re welcome. Some say this, some say that – in the end it matters that you are happy with your results.
YOu can crop in, even with MFT cmaeras, yes – i do that regularly when i cannot get closer.
It´s better than missing the shot completely.
If the quality is not meeting your own standards, you could still scale it up with “Topaz Gigapixel” or sharpen it with “Topaz Sharpen” for example.
sarah
Posted at 14:02h, 25 AugustNow this is great news, thank you. This whole new world of photography will take a while to fathom out but I really want to get there, and yes the amazing software will also help. I haven’t purchased anything yet as need to know if my old MacBook will cope with demands or I need to save and invest in a new one. But Topaz is on my radar along with DxO. I don’t want the monthly subscriptions of LR or PS.
Have a grand Sunday, and again thank you for taking the time to reply. I look forward to future content, I signed up to your newsletter too. Normally I just leave your webpage open so I can gaze at your pictures but Newsletter is an extra nudge to keep up the learning.
Marc
Posted at 18:31h, 23 DecemberHallo,
ich möchte mir einen Diffuser zulegen, brauche dazu aber auch einen neuen Blitz.
Kamera ist OM1 II mit 90 mm.
Wäre da der Blitz von OM besser? oder Godox?
wildmacro-chris
Posted at 00:23h, 24 DecemberHallo Marc, es tun beide, ich pers. mag die Godox V Serie sehr wegen des Akkus. Für die Om-1 II mit 90mm würde der V860III am meisten Sinn machen, wenn´s Godox V werden soll (stark, zuverlässig, super Fokussier-/Einstellicht) – oder der V1 (ruhig Mark I), wenn du lieber einen runden Blitzkopf haben möchtest. Im Blog findet sich auch ein Review zur V Serie und den Blitzen als einzelne.