
05 Sep The Best Flash Diffusers for Macro Photography
One of the questions I get asked the most is: “What is the best diffuser for macro photography with flash?”
Light is the most important ingredient for sharp & high quality macro photographs.
There are both professional and DIY diffusers available, but only few traditional light modifiers that really work for macro photography.
Since the requirements are very specific here, I would like to spare you a lot of trial & error and share this complete guide to different flash diffusers and their pros and cons.
I will also explain what works best and why – photos for reference included, of course.
Quick navigation
- Why do we need a diffuser for Macro photography?
- What features does a great macro diffuser need?
- Professional product or DIY?
- AK Diffuser
- Cygnustech Diffuser
- Beetle Diffuser
- Macro Diffuser by Trick Bits
- Popeshield
- Final thoughts
Why do we need a diffuser for Macro photography?
Using a diffuser for macro photography brings many benefits.
It will soften the light, prevent harsh highlights and hotspots on reflective surfaces (which we find on beetles very often) and helps channeling the light towards our macro lens and subject.
Since using a flash is often essential when it comes to photographing moving subjects, a diffuser is needed to produce an evenly lit photo and make sure we can capture the maximum of details & textures of the subject.
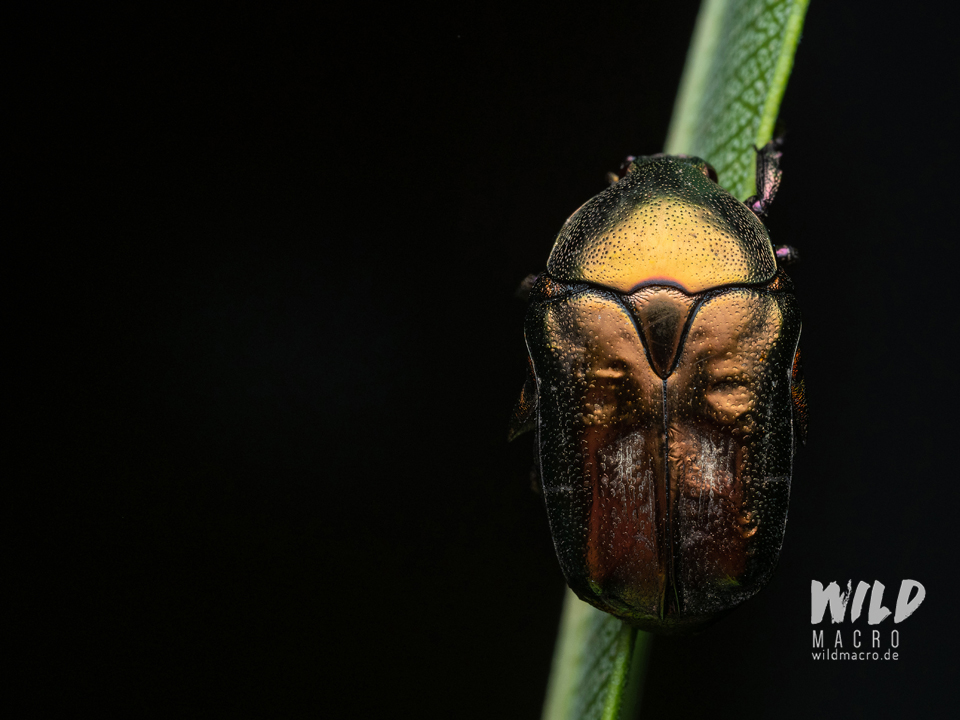
Subjects that are highly reflective and shiny, as well as white ones, are a classic challenge to photograph with (an undiffused) flash.
What features does a great macro diffuser need?

- Quality of light. The amount and efficiency of diffusion is determined by the surface area of the diffuser panel and the material it is made from.
- Yield. How much light hits our subject and how much gets lost? We want as much light as possible, while having the best diffusion at the same time.
- Flexibility. Does the diffuser work with lenses of different sizes? Does it work off-camera, too, and is it adjustable?
- Size. Can we work with the diffuser in foliage? Will it touch branches and twigs, if we get close to the subjects and hence potentially scare them away? Is it easy to pack and to setup?
- Extras. There are a lot of handy add-ons that can literally make your diffuser a swiss-army-knife. Some have holders for your Raynox clip-on lens, some have LED-focusing-lights, that can be powered by a power bank, some even have velcro patches to attach these to, and so many more.
Professional product or DIY?
Back when i was doing portrait photography and started experimenting with flashes and strobist-setups i realized one thing:
If you buy cheap, you buy twice (at least).
While there is good equipment available for reasonable prices, cheap solutions often lack quality and durability.
If you want to save money you can even build a diffuser yourself – but this is only cheaper at first glance: the time invested, the cost of the materials, the numerous trial & error sessions to finalize a working design will be much more expensive in the end than you expected at first.
Starting with a DIY diffuser is great though to understand the designs, and, depending on what image and lighting quality you are going for, may be more than enough..
DIY diffusers range from the simple use of paper towels / kitchen roll, to self-made little softboxes or pringles cans, used as a light tube.
A quick google search will bring up lots of examples of how these might look.
The advantages of a professional diffuser are:
- they are tested and fine tuned with dozens or hundreds of hours invested
- they offer features like adapters, reflectors, Raynox-holders, magnetic attachment-systems or even focusing lights with powerbanks.
Before you build something like this yourself, it is definitely cheaper and faster to buy a ready-made diffuser.
Except you are doing it for the fun or have enough free time and motivation.
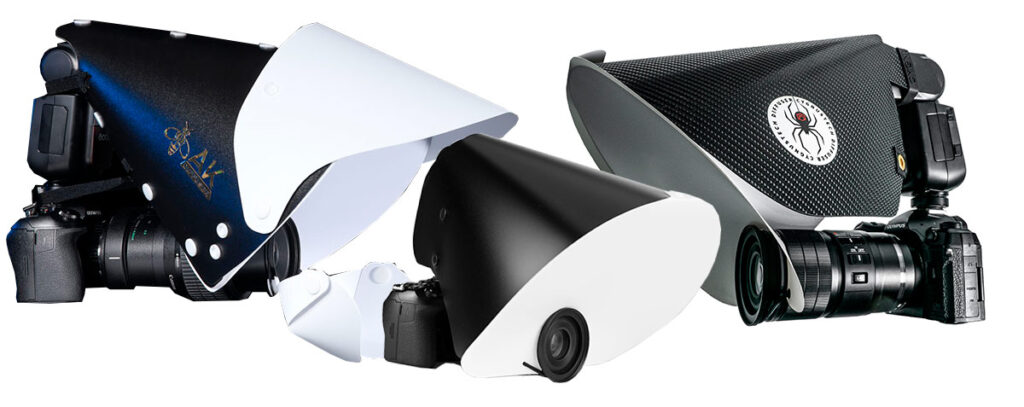
Below you find the diffusers that I currently use and can recommend to have a look at (in alphabetical order).
I might update this post when one of these have new versions released.
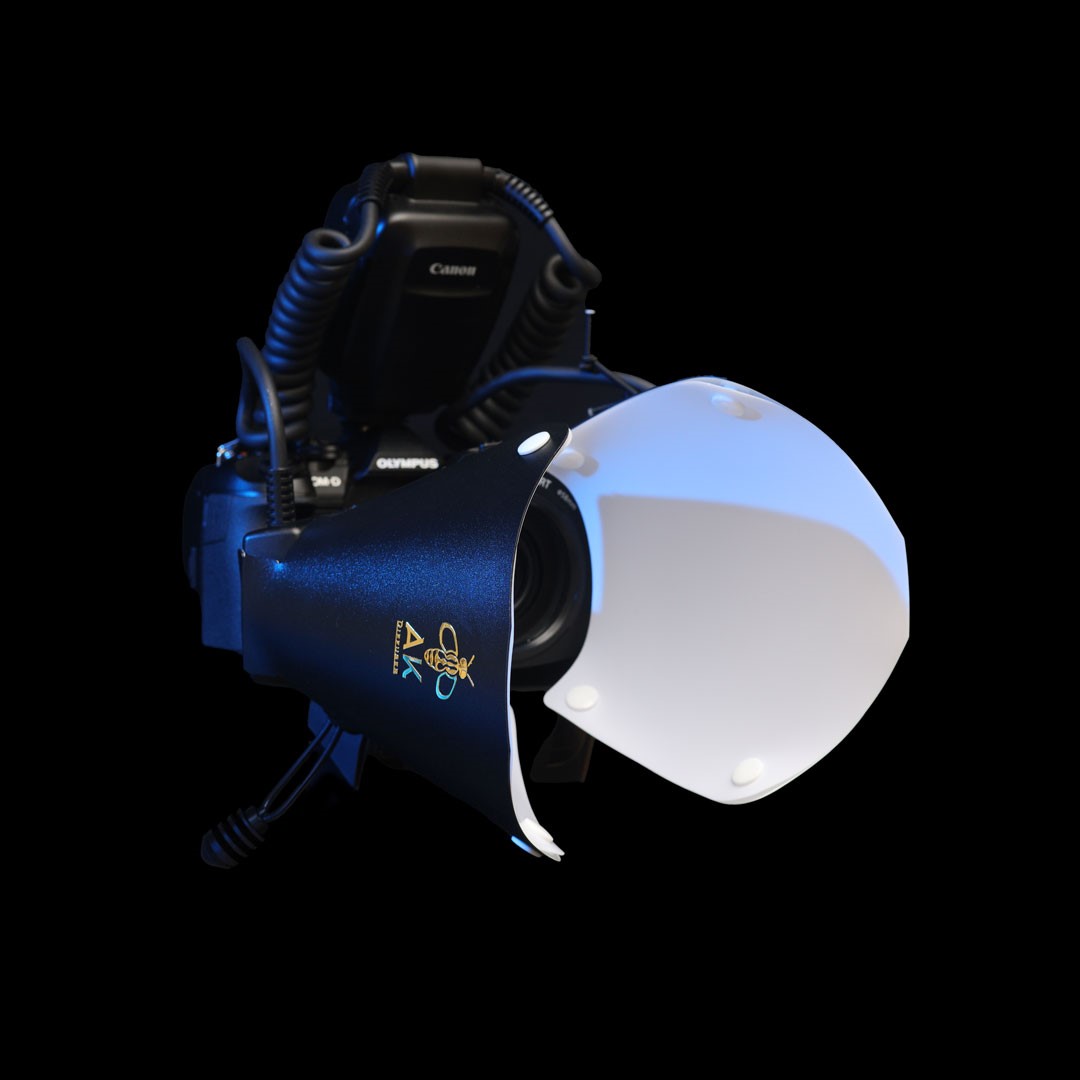
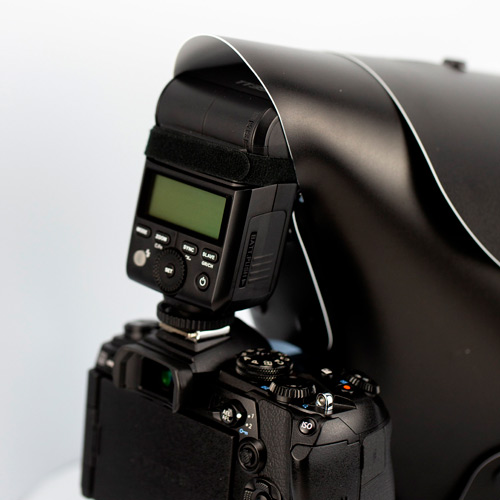
AK Diffuser
The AK Diffuser is designed by Zamir Pena (Florida, USA).
He customizes the diffuser to match the exact setup you are using. This includes measuring the height of the flash, the length of the lens and more.
The diffuser can also be used with other lenses and flashes of course, it is just that it is optimized for the measurements you order it with.
It is available in multiple versions currently: The sizes Large, Medium and Mini cover a broad range of Micro-four-thirds (specifically OM System / Olympus) & mirrorless setups with various body+lens combinations as well as your custom DSLR setups.
For the popular Canon MP-E 65mm there is a tailored diffuser as well.
An improved Pro version, optimized for an OM SYSTEM MFT Setup with the 1:1 M.Zuiko 90mm lens, has been added recently.
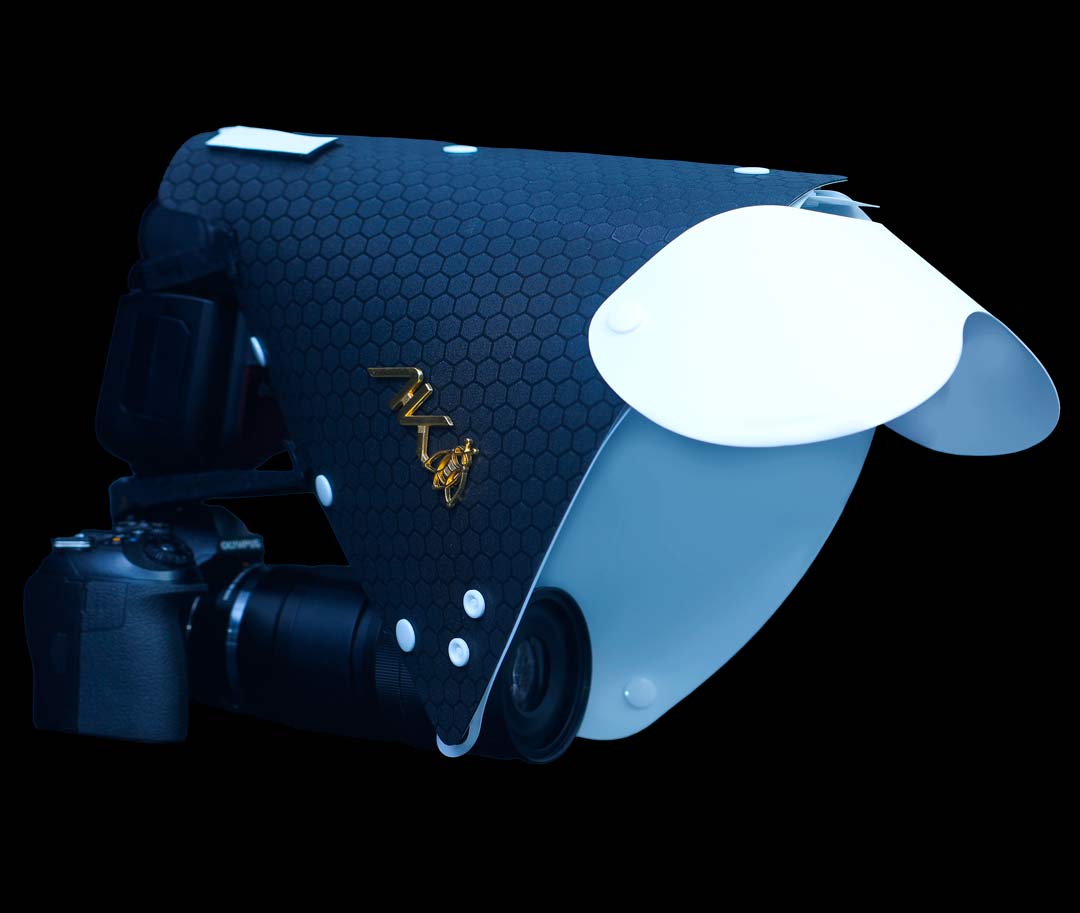
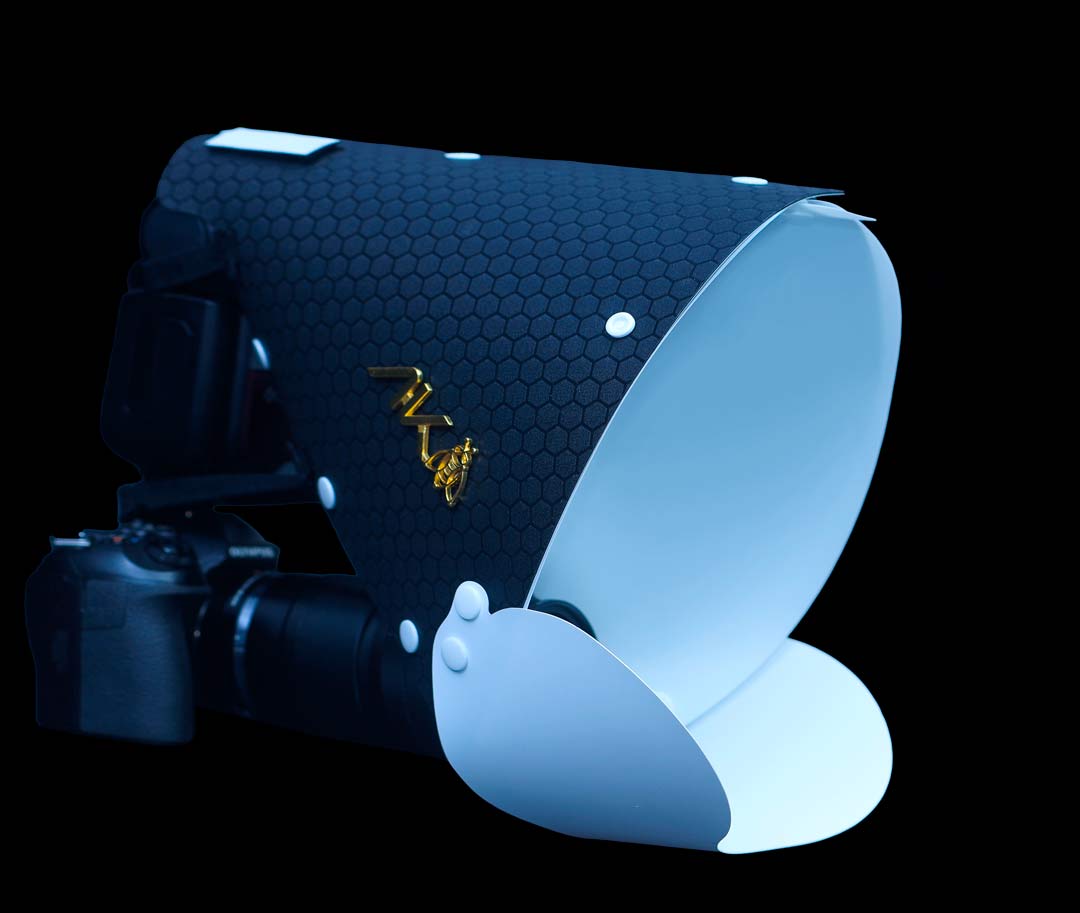
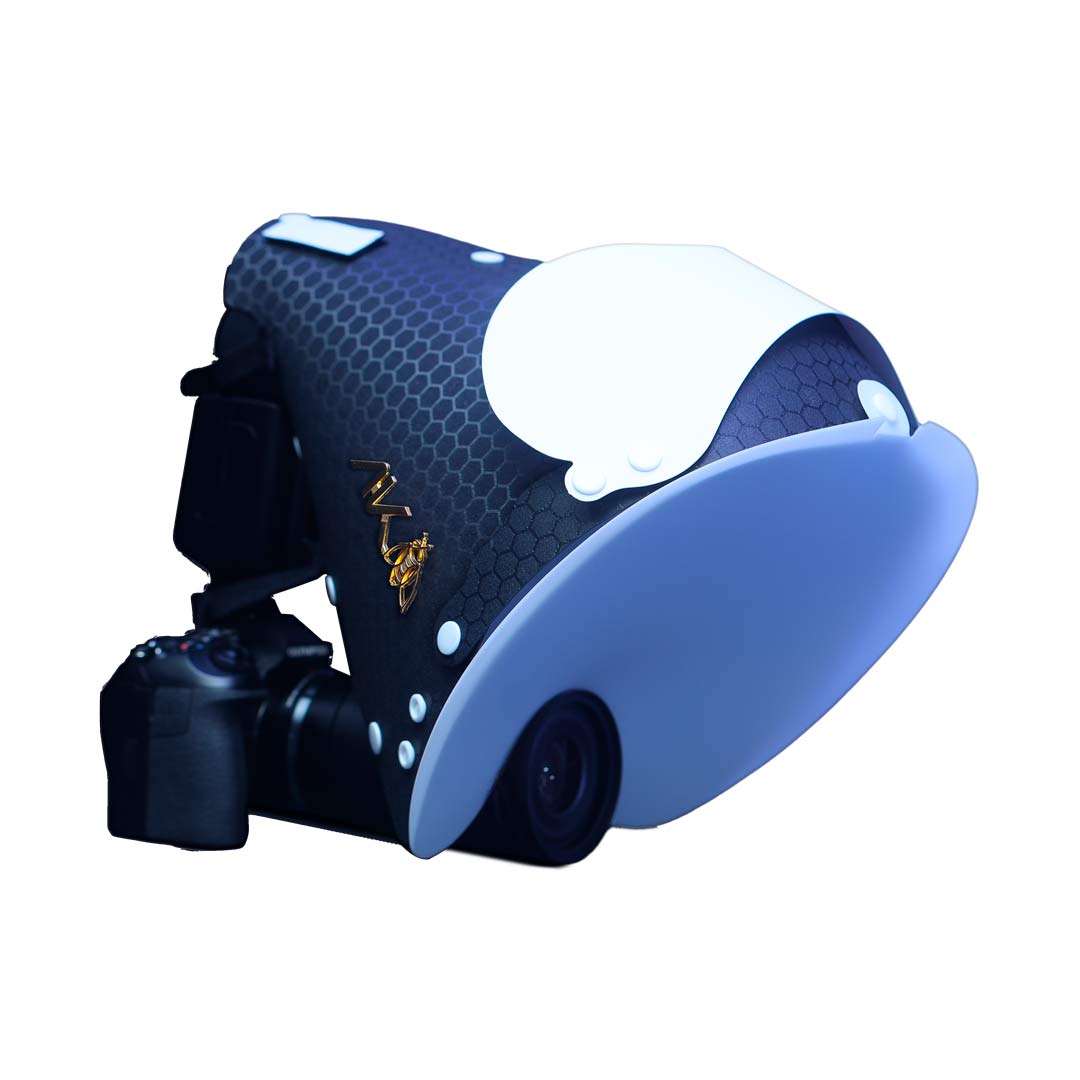
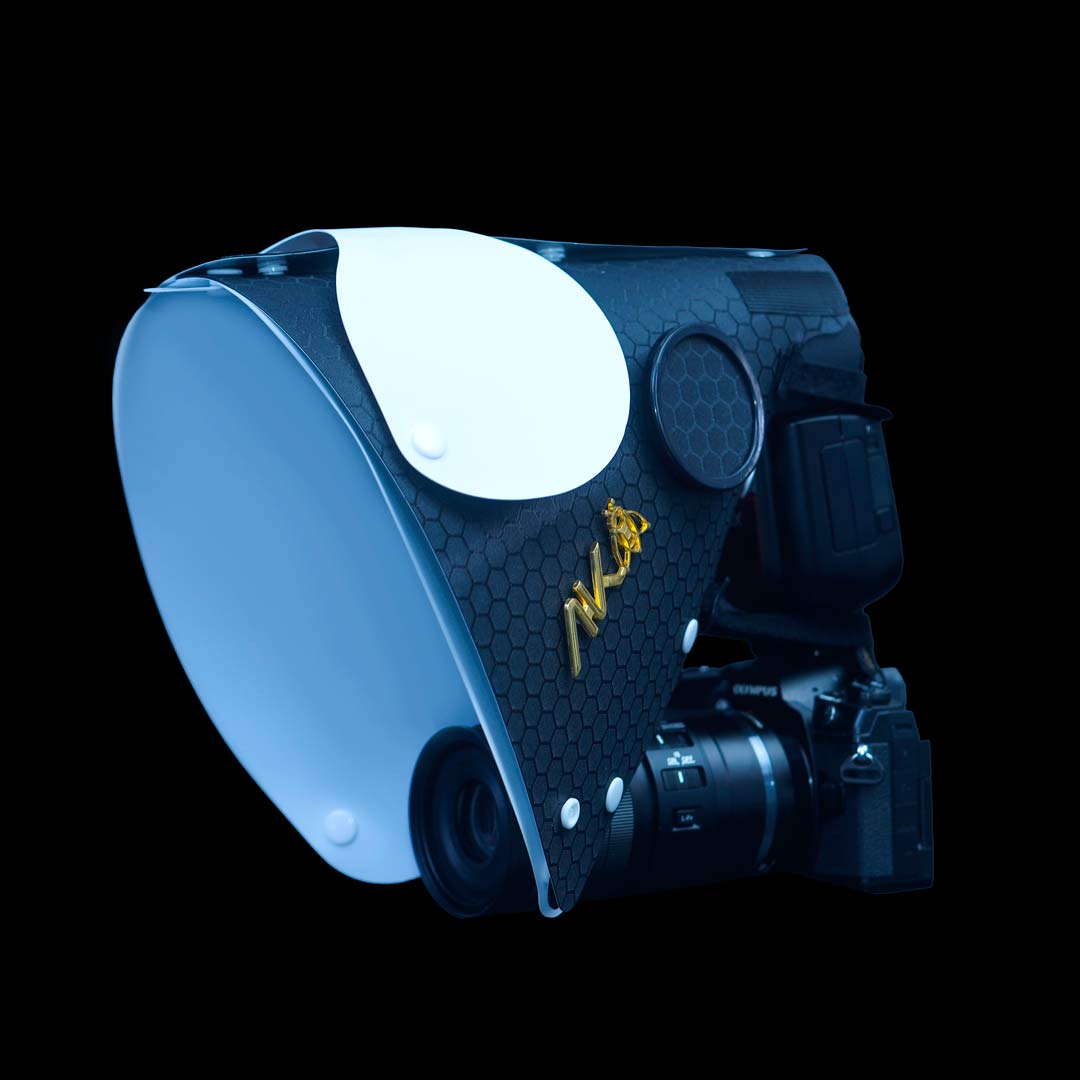
The AK is a sturdy diffuser to assemble via snaps.
It features a well designed reflector and kicker as well, to give you all the tools you need to create a perfect lighting scenario.
Whenever you do not use the reflector/kicker you can simply attach them to the diffuser with the snaps and have them ready at any time.
The website features instructions and assembly videos as well.
Build quality and materials are all high quality and all diffusers come with a transportation bag.
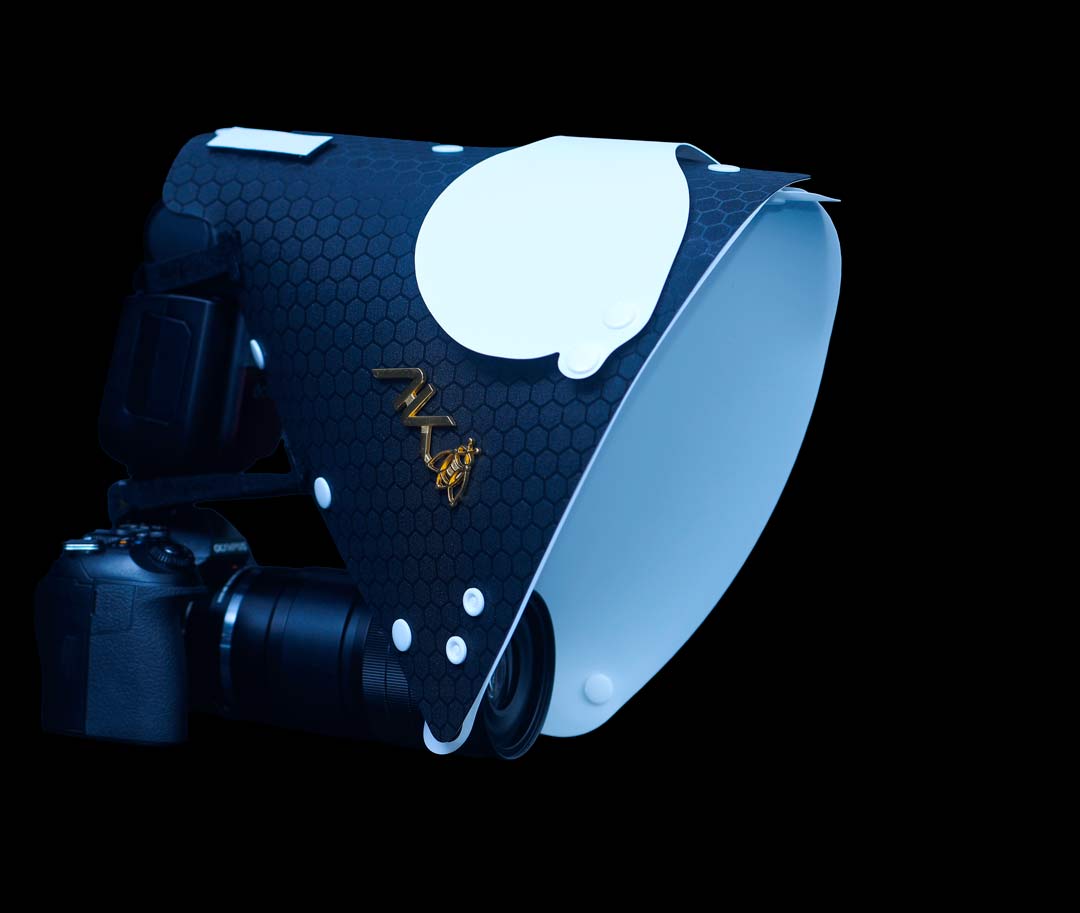
Release Update 2024-09
AK has just released its latest model, which was created in collaboration with OM SYSTEM Ambassador Ben Salb, to provide optimized lighting for focus stacks.
The AK PRO introduces a brand new finish and underscores the high quality of the diffuser´s production.
With a completely re-designed top reflector, it now channels even more light onto the subject and also the background.
An improved diffusion layer also enables you to dial down the flash power even more and get a better motion-freeze effect for action shots or simply save battery power.
This is without any question the best AK Diffuser model to date, if you are not focusing on compactness alone.
It is available for 117.75 USD.
Release Update 2023-10:
AK released a new range of diffuser models, that are the most optimized version yet and show a couple differences to the older models.
They do pack perfectly flat now.
The new variable bouncer, can be used for both reflecting the top and the bottom light.
Small flash Diffusers:
For small and off-camera flashes, the AK Diffuser Shop offers a custom dual diffuser for the Godox MF12, which are usually attached to the filter ring of the lens.
A Diffuser set for Canon MT-24Ex and MT-26EX twin flashes is also available.
You can find an overview with all AK Diffuser setup combinations available, here.
Website and Ordering:
(using my referral link for your purchase of an AK Diffuser will support me a bit, in keeping up high quality content for this website)
Price:
From 103 USD or 90 EUR depending on model + shipping (guaranteed processing+shipping within 2 business days)
SAVE 5% OFF when ordering an AK Diffuser with my Code wildmacro-ak

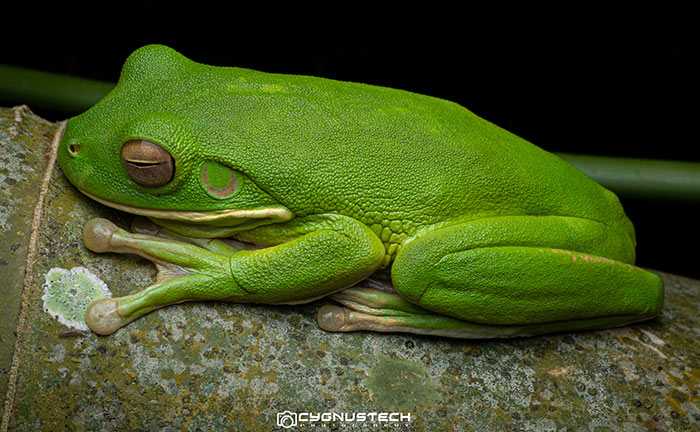
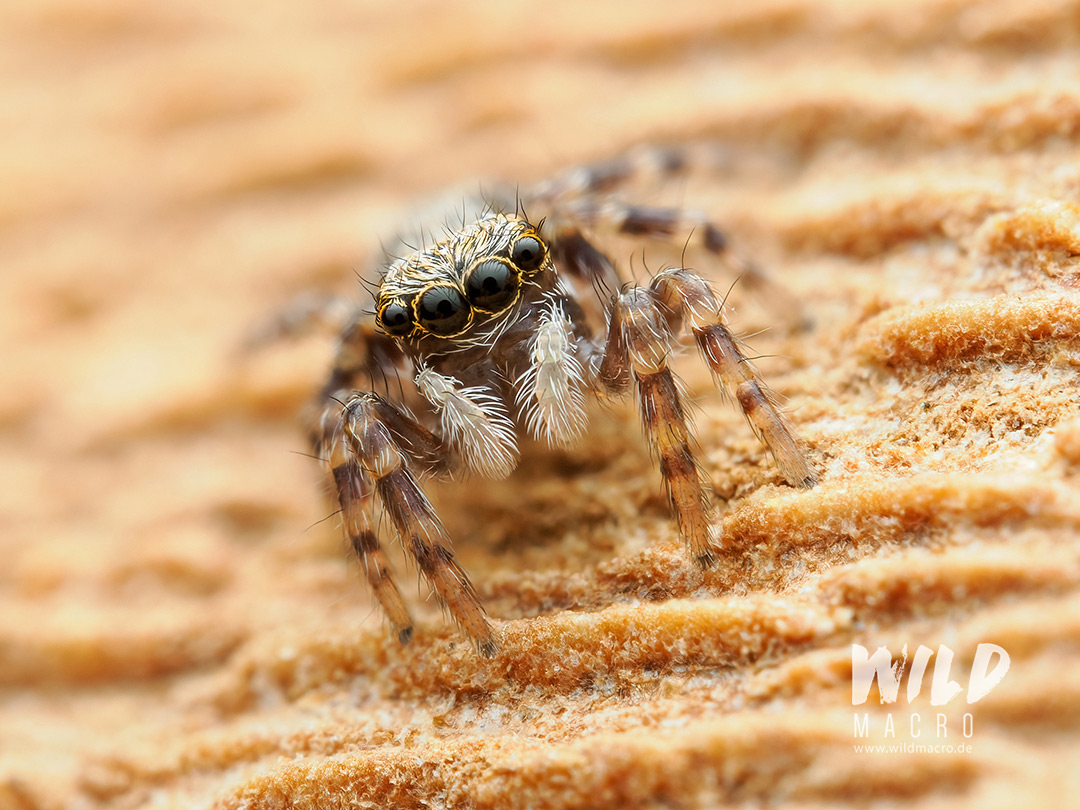
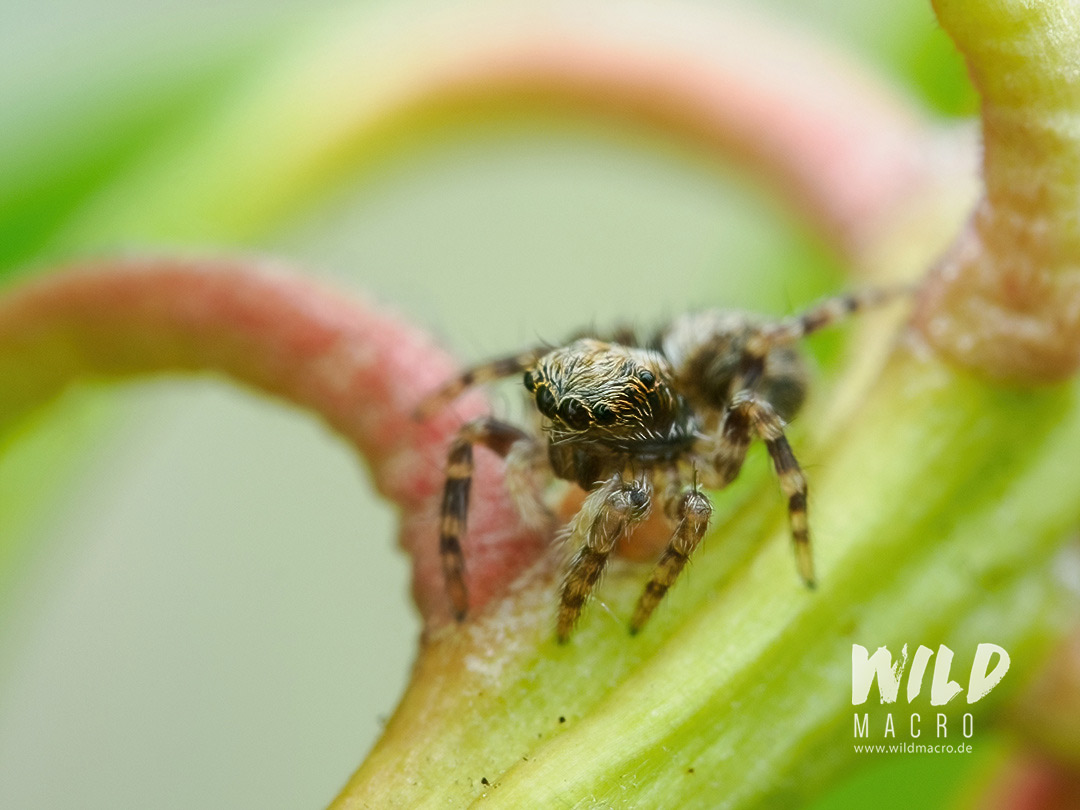
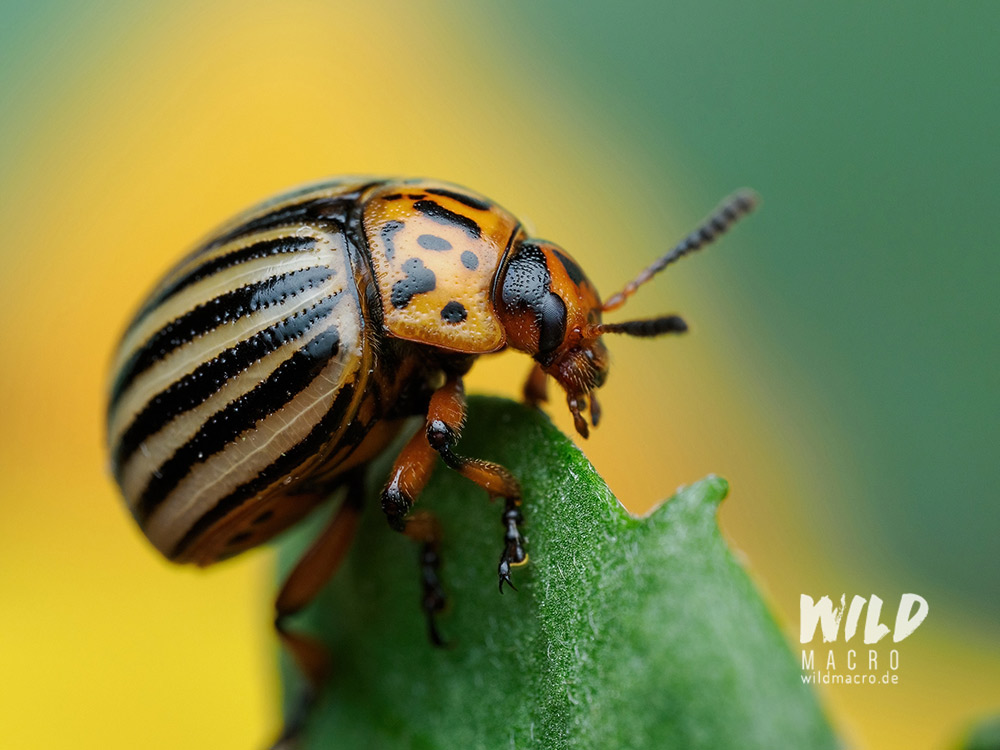
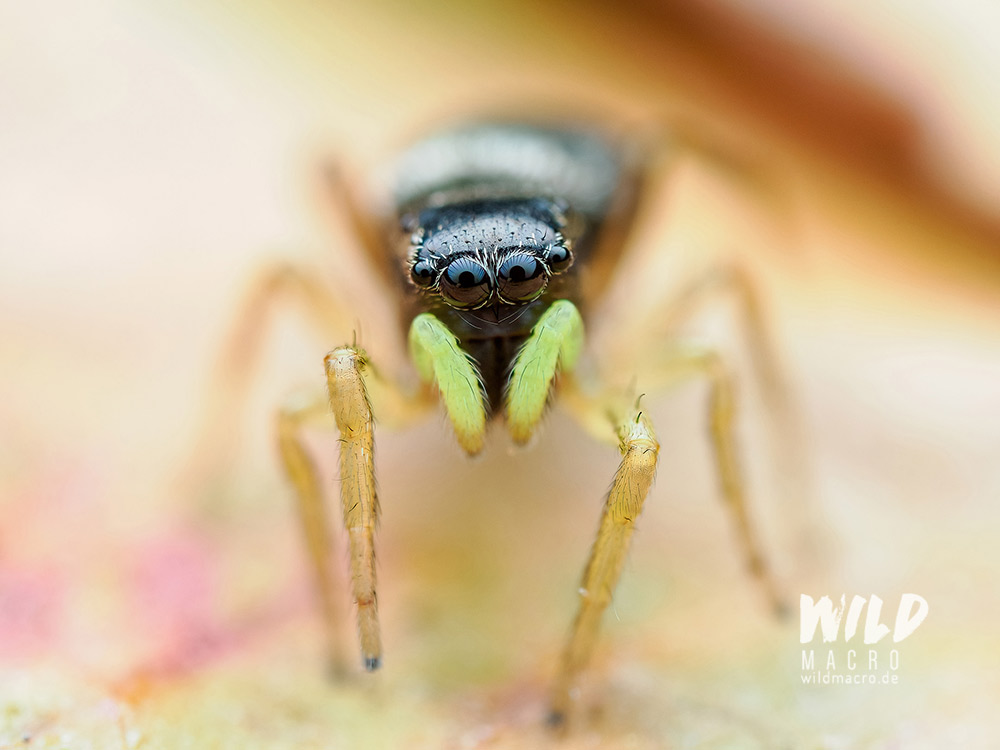
Example photos:


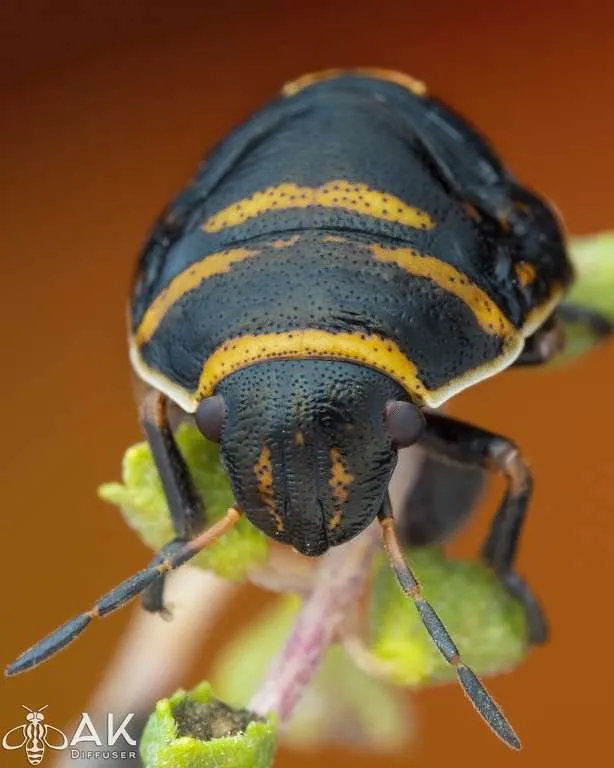


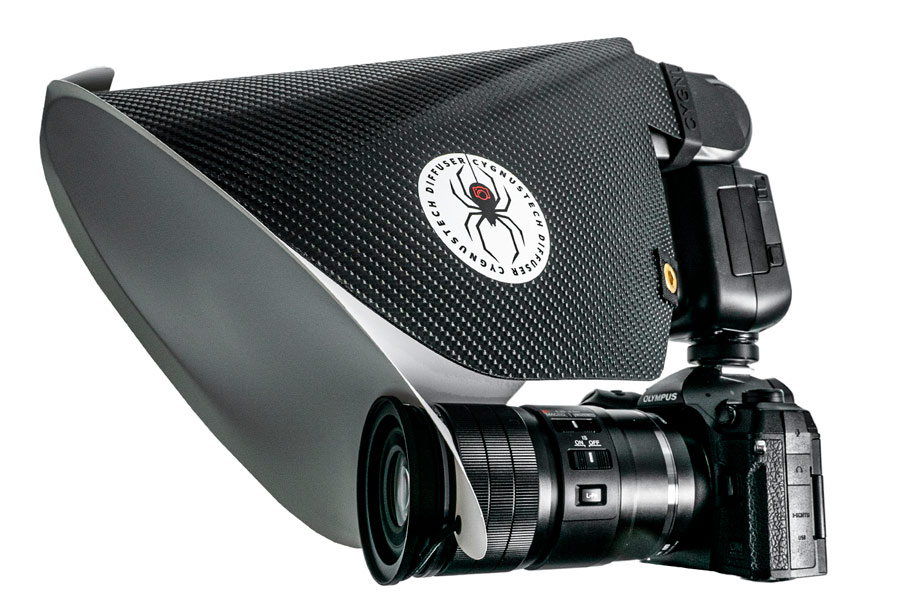
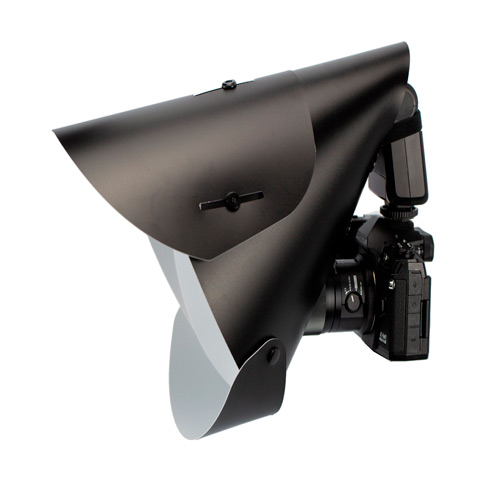
Cygnustech Diffuser
The Cygnustech Diffuser was designed by Brendan James (Australia).
He is a well-known photographer in the macro community and has spent lots of hours and dollars in his “search for the perfect light”, as he states himself.
The Cygnustech diffuser tries to provide the best diffusion while still being compact, portable & easy to setup and use.
Does it deliver on the promises?
It certainly does – and gets full marks.
If you are looking for a lightweight diffuser that folds completely flat and can easily be traveled with, then the Cygnustech diffuser is a great choice.
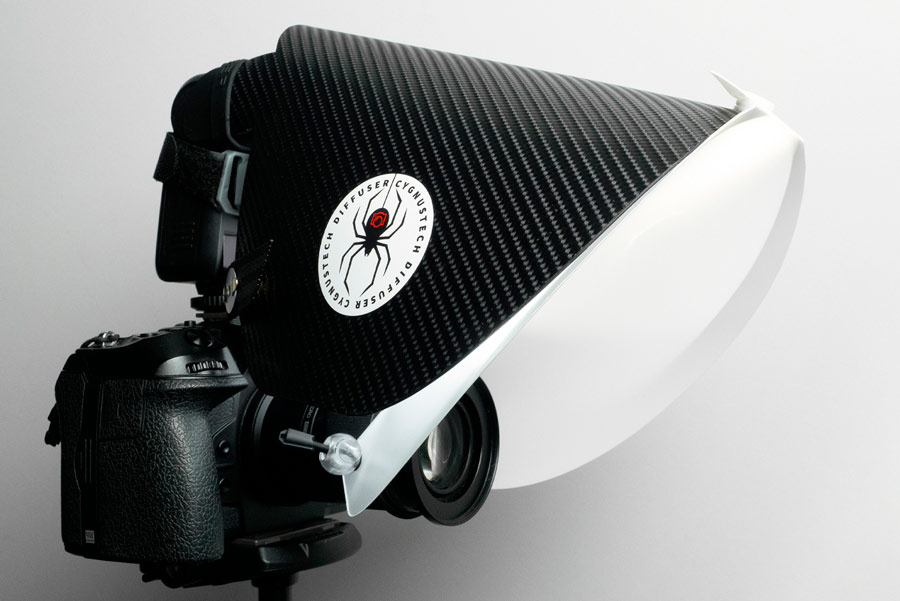
It is attached to the flash by a simple rubber band and gets its stability by the diffusion layer being attached to the front lens element as well by another rubber band.
Do all the fancy features some other diffuser brands come up with make the diffusion better?
Not necessarily – so the Cygnustech is really all you need if you are looking for the best combination of compactness, flexibility and perfect diffusion.
The Cygnustech Diffuser will be tailored to fit your setup and its measurements exactly.
Brendan buys new gear all the time to make sure his diffuser provides the best light even for the most exotic body+lens+flash combinations.
The latest generation of Cygnustech Diffusers can change the angle in which the light hits the subject and has an upgraded focusing light, which can also act as an additional strap to attach the diffuser to the flashhead.
The filter ring, to keep the rubber cord in place, allows to use the original lens cap and also attach Raynox diopters.

Website and Ordering:
https://cygnustechdiffuser.com
(using my referral link for your purchase of a Cygnustech Diffuser will support me a bit, in keeping up high quality content for this website)
Price:
180 AUD (Australian Dollars) or 103 EUR + shipping
SAVE 5 AUD OFF when ordering a Cygnustech Diffuser with my Code WILDMACRO5

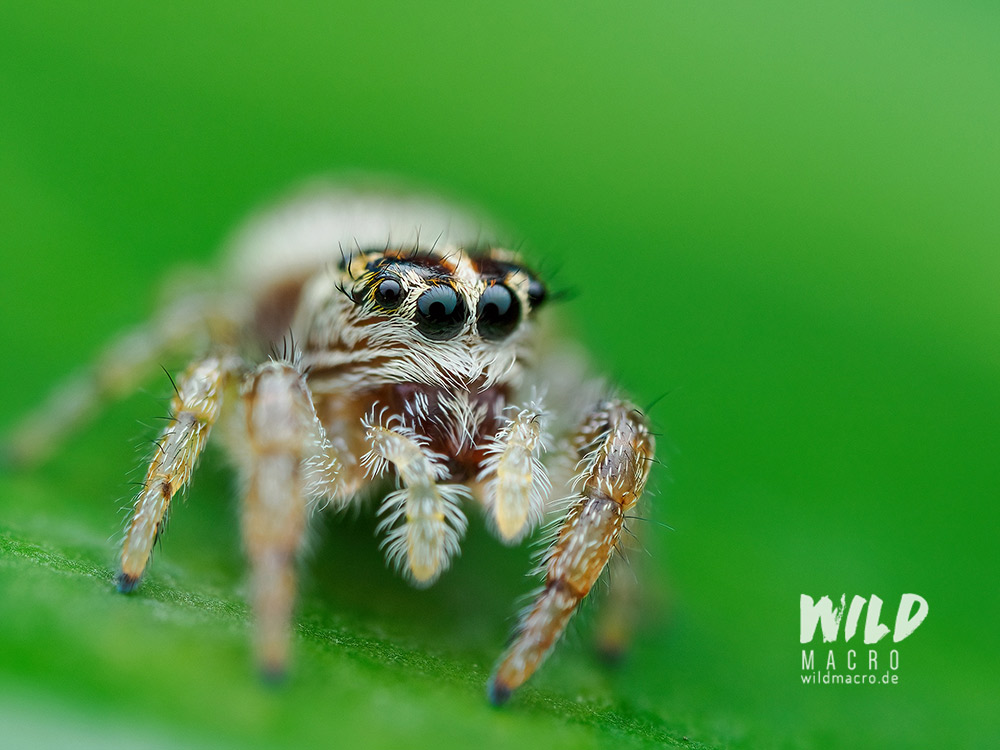
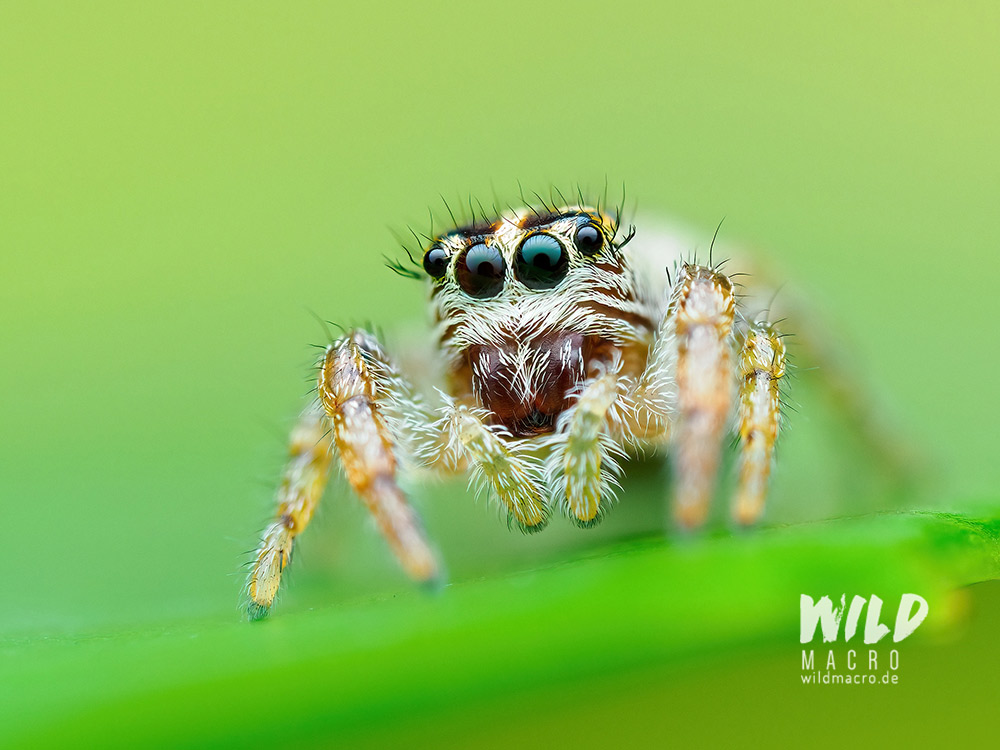
Example photos:


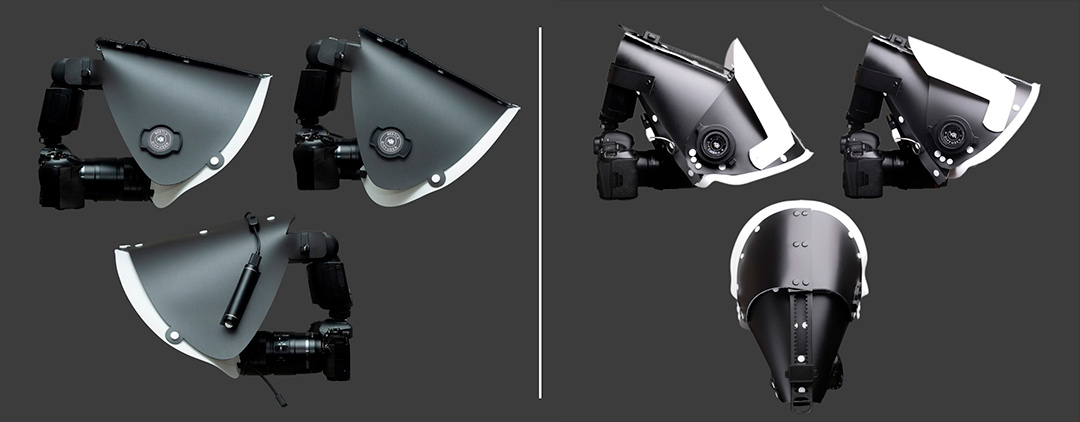
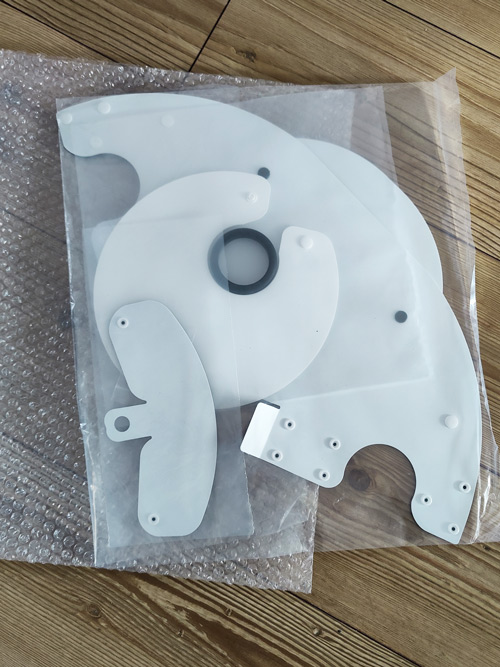
Beetle Diffuser
Lately I have been testing and using the Beetle Diffuser from India.
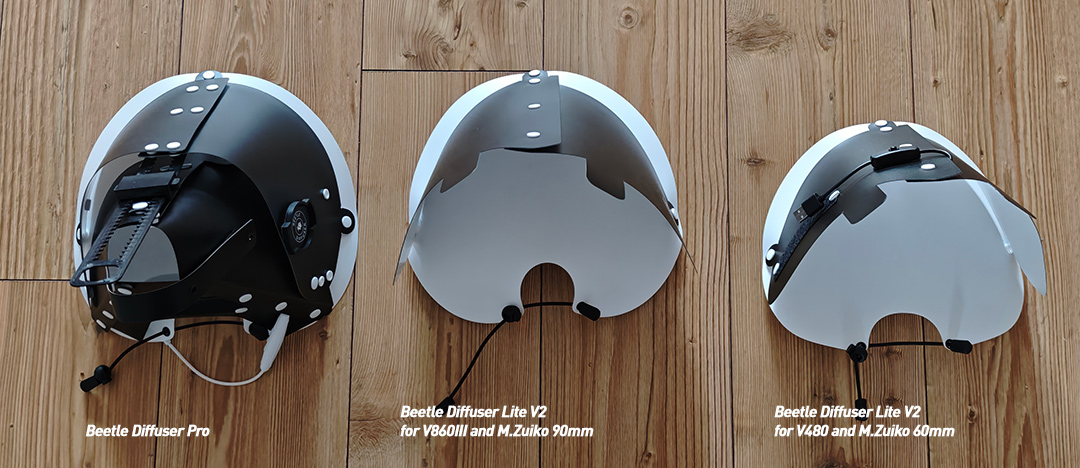
Coming in a Beetle Diffuser Lite V2 and Beetle Diffuser Pro V2 variant, there is a suitable diffuser for every situation.
All models provide top notch diffusion, pack flat, and are professionally produced from quality material.
The Lite V2 models, available in different sizes depending on your camera+lens+flash combination, combine portability with efficiency.
Despite having a 2-part reflector, assembly is easy and quick.
If you don´t have a flash with focusing light, the Lite models can be equipped with an LED focusing light.
Without LED the Lite V2 weighs under 100 grams.
Both Lite V2 and Pro V2 model are attached to the lens via a rubber cord, which is held in place by a customized filter ring.
That´s another neat detail of the Beetle diffusers, as this so called Beetle ring is more than just a classic step-up ring: it has the lens filter thread diameter on both ends, so you can still use the original lens cap and also use additonal filters, if needed – awesome!
Pulling back the rubber cord on the Lite diffuser allows to change the angle of the diffuser to degree.
The Beetle Pro V2 is considerably larger than the Lite and is equipped with a very smart and unique angle adjuster mechanism.
Other than the Lite models, the Pro is a bulky diffuser, best used for statíonary work or confined areas, as it might be a bit too big for a full-day field trip.
It comes with additional reflector parts.
Different to other diffuser brands, the optional LED focusing light of the Beetle Pro V2 sits on the backplate and not inside the reflector part.
There is an alternate backplate with cut-out available, if you are using flashes like the Godox models with modelling light.
The centerpiece of the Beetle Pro V2 is, without any doubt, its innovative angle adjuster.
It is a 3D-printed rail mechanism, that combines the 2 parts of the top reflector.

By sliding the fastener along the rail, you can change the angle of the front part to either shine more light directly towards the front lens, or have it illuminate more of the background.
It is the only professional diffuser I have seen so far, that can create some kind of light box around the subject and combine both frontal and top lighting.
Despite being a thoughtful design with these extra parts, the diffuser sits tightly and does not fall short in comparison with other bigger diffusers when it comes to handling or stability.
I have ordered the Beetle Pro V2 and one Beetle Lite V2 for a V860III+90mm and V480+60mm setup each.
Info: The seller recommends using the wide panel of the flash to enhance the diffusion even more.
As it is still late winter here in Germany as I am writing this, I eagerly wait for spring and the re-appearance of insects and spiders, to test these diffusers more.
From my first experiences, I enjoyed using the Beetle Lite V2 and Pro V2 a lot, with the lighter Lite V2 to be tested a lot during upcoming spring.
Update 2026-04
The diffusion layers of the Beetle diffusers seem to need 1 stop of flash power more than comparable diffusers.
Personally, I can still shoot at relatively low power settings, though.
Orders will be shipped directly from India via fast Fedex Express shipping, which is included in the prices already.
Ordering multiple items will add further discount on the order.
This makes the Beetle Diffuser a cost-benefit-ratio winner in my eyes.
Website and Ordering:
Price:
100 $ (84 Euro, Fedex Express included) Beetle Lite V2
130 $ (110 Euro, Fedex Express included) Beetle Pro V2
110 $ (93Euro, Fedex Express included) Twin Beetle for Laowa/Kuangren twin flashes
Delivery time (Fedex Express): 3 Business days (may vary slightly depending on your location)
Use the Code WILDMACROBD5 during Checkout to get 5% OFF your order!
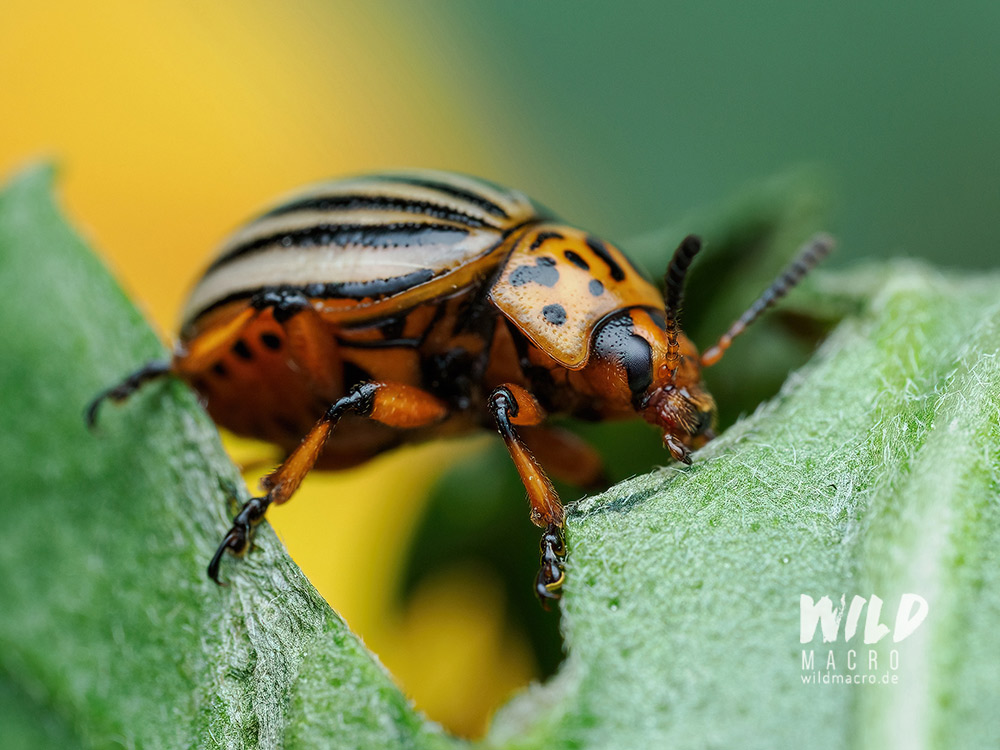
Example photos
More photos following as soon as there is more diversity after our cold german winter months.
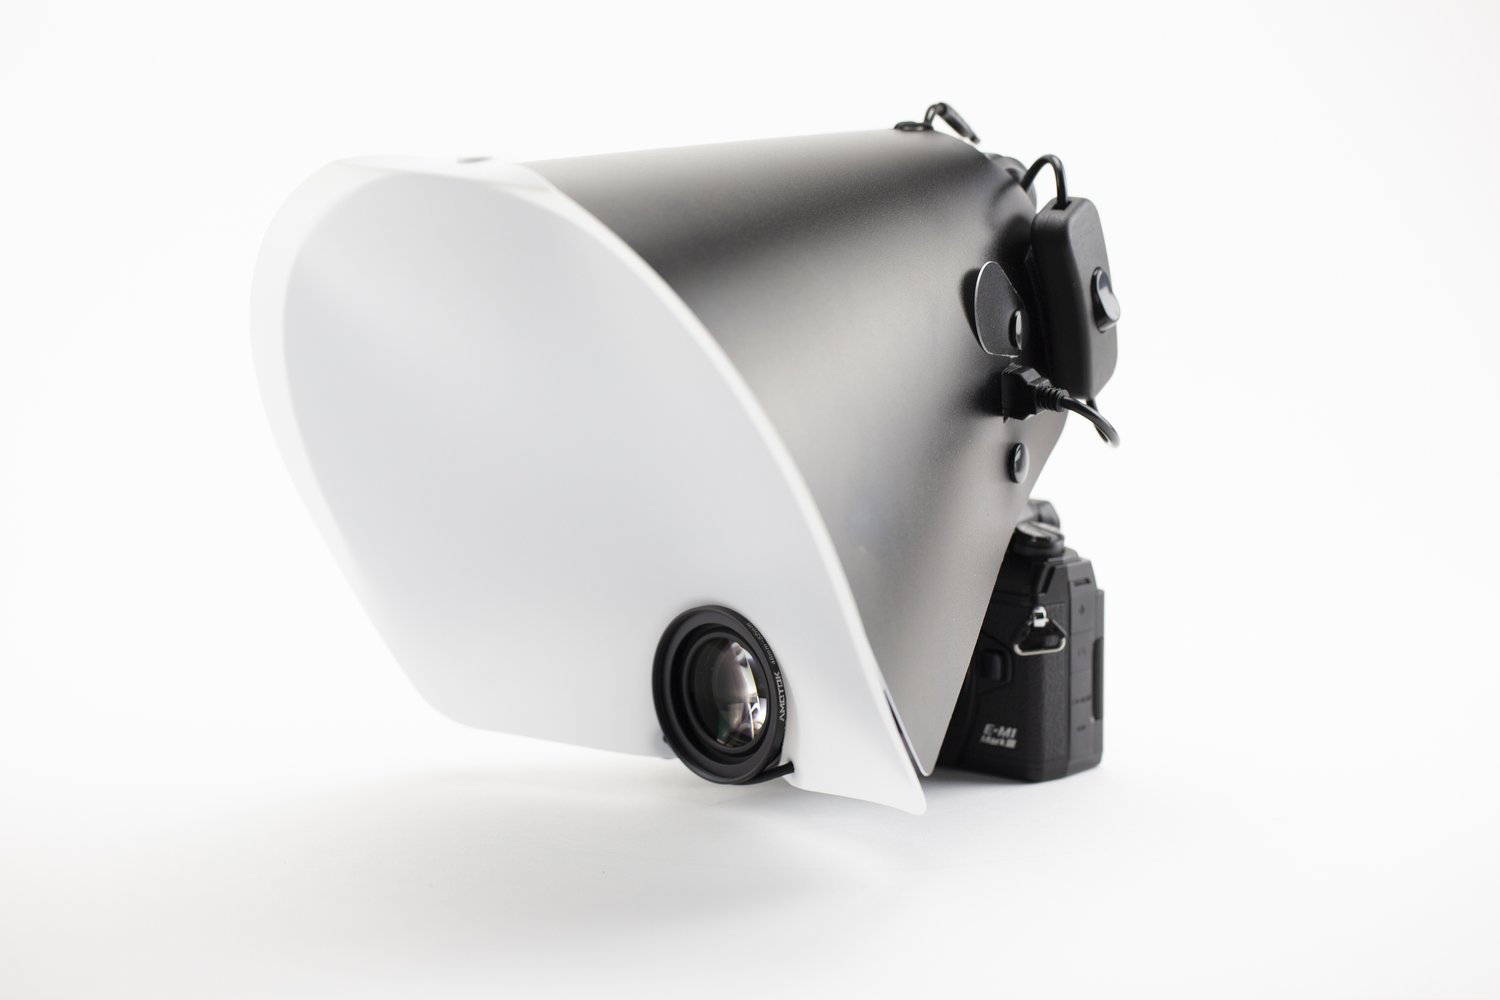
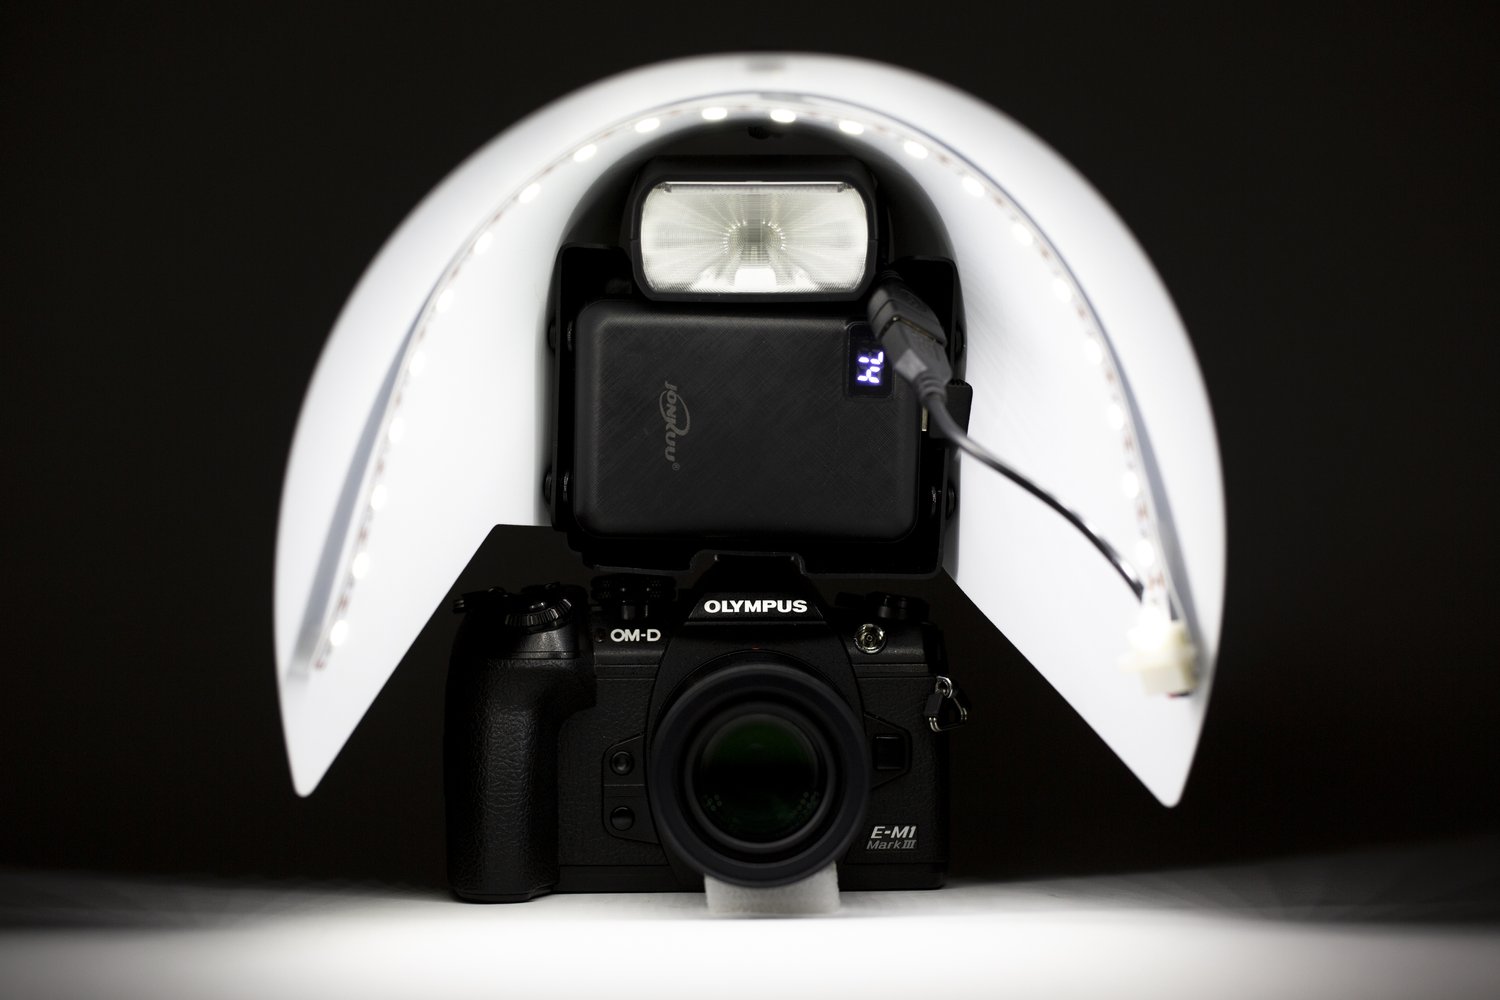
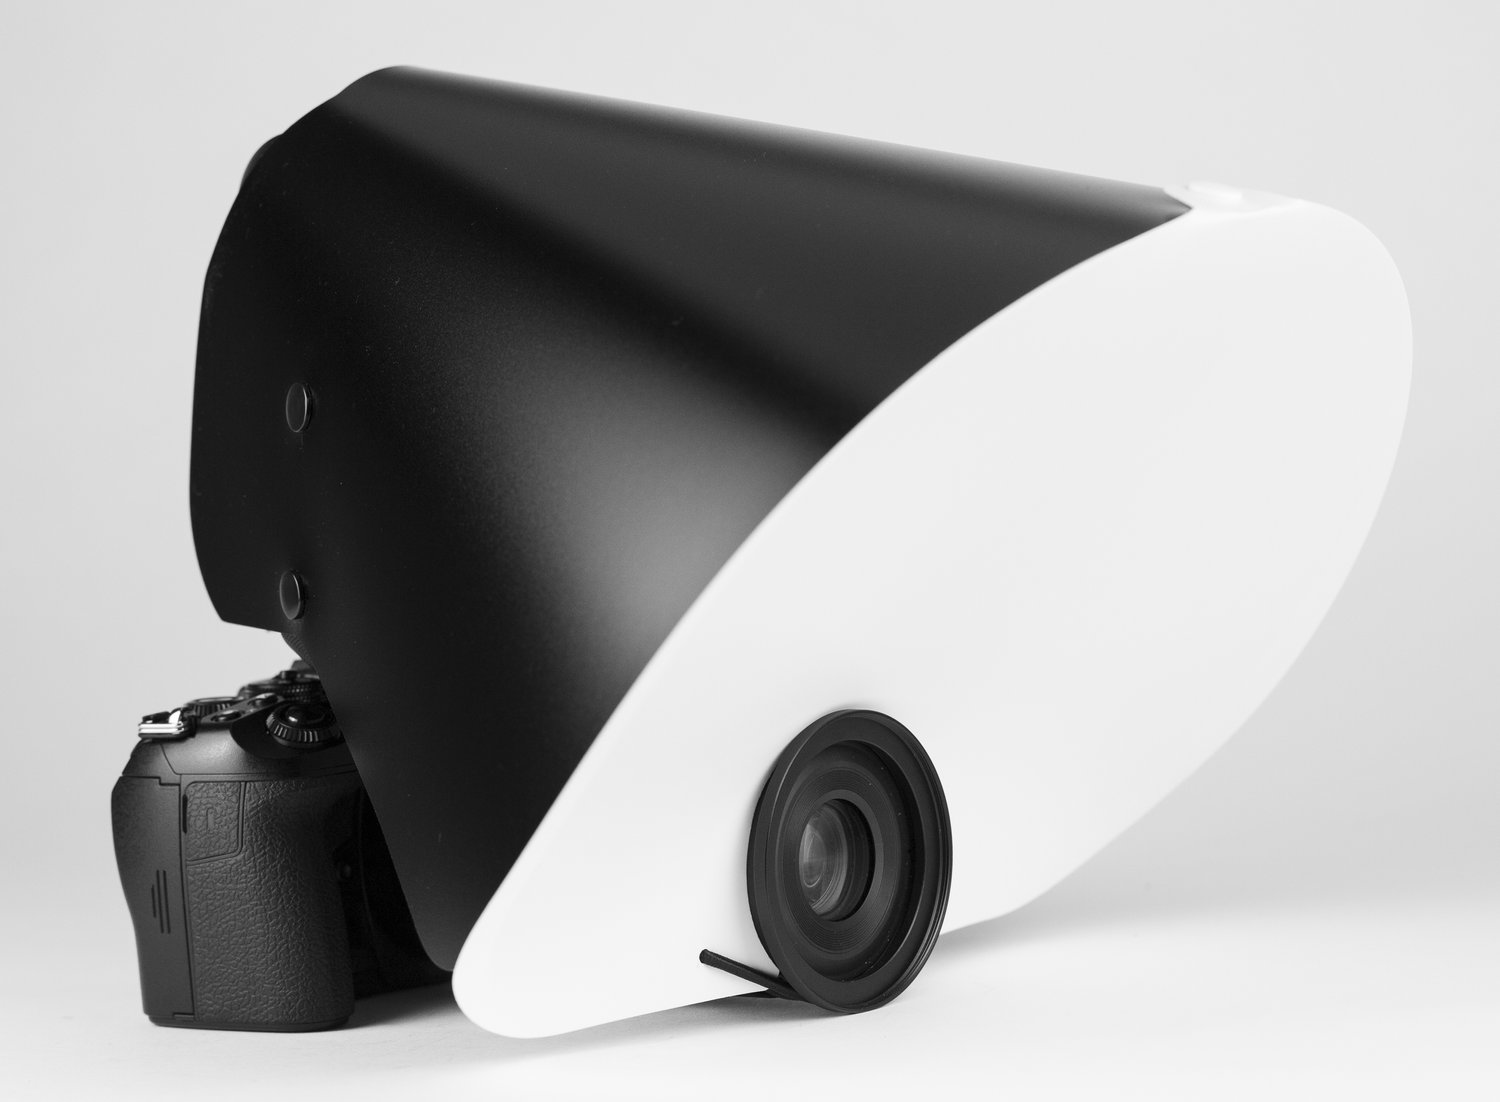
Macro Diffuser by Trick Bits
Some diffusers with innovative twists which I found just recently – particularly designed for compact OM SYSTEM Olympus setups.
The Macro Diffusers by Trick Bits have some nice features, which seperate it from the many other competitors on the growing diffuser market.
When it comes to its size and diffusion efficiency, they are not any worse or better than the others i tried.
They fold perfectly flat for transportation and can be assembled relatively quickly, which is a big advantage in the field and a must.
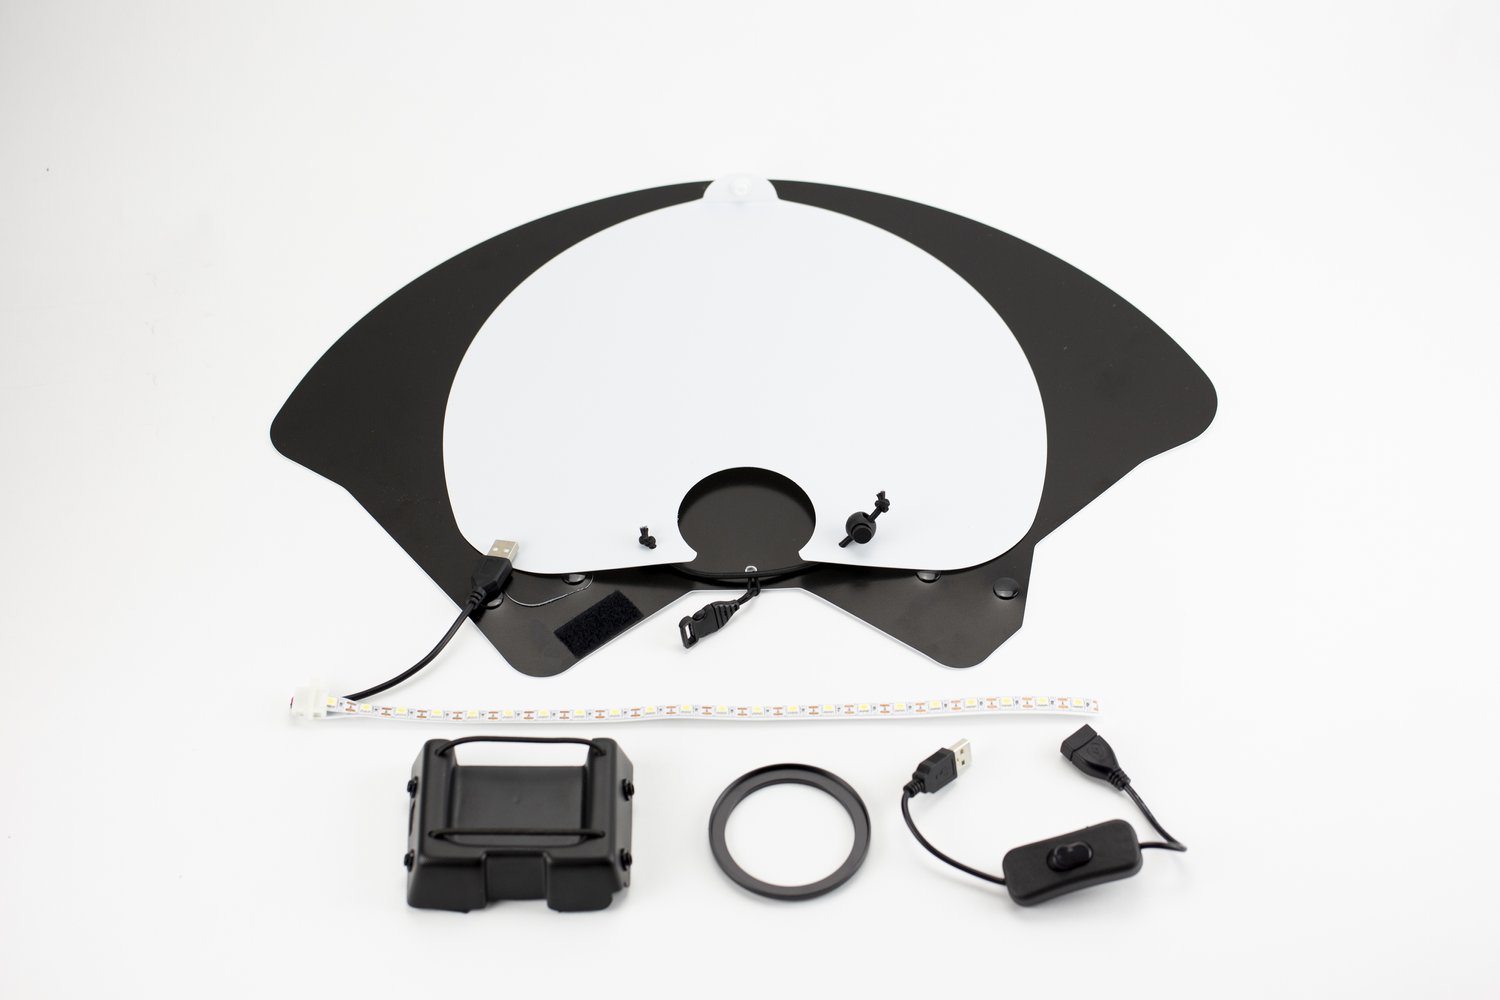
Latest Trick Bits model Update 2024-09:
With another update the new version of the Trick Bits Diffuser models now have a focusing light added.
These are specifically for macro photography setups with the Godox V350 and TT350 flashes, as these have no integrated modeling light.
The light can be turned on/off with a switch on the outside of the diffuser and is powered by a slim powerbank, which finds space inside the holder that is attached to the flash.
I really like how much work went into the details for these diffusers: there is even a small flap that can be used to hide the opening for the USB port, if you prefer to not use an extra focusing light.
There is a new diffuser model for using both the M.Zuiko 60mm and the M.Zuiko 90mm setup with the Godox V860III flash.
To make this work, the diffusion panel´s position can be changed.
For transportation, the diffusers have a hanger that can be attached to your backback easily.
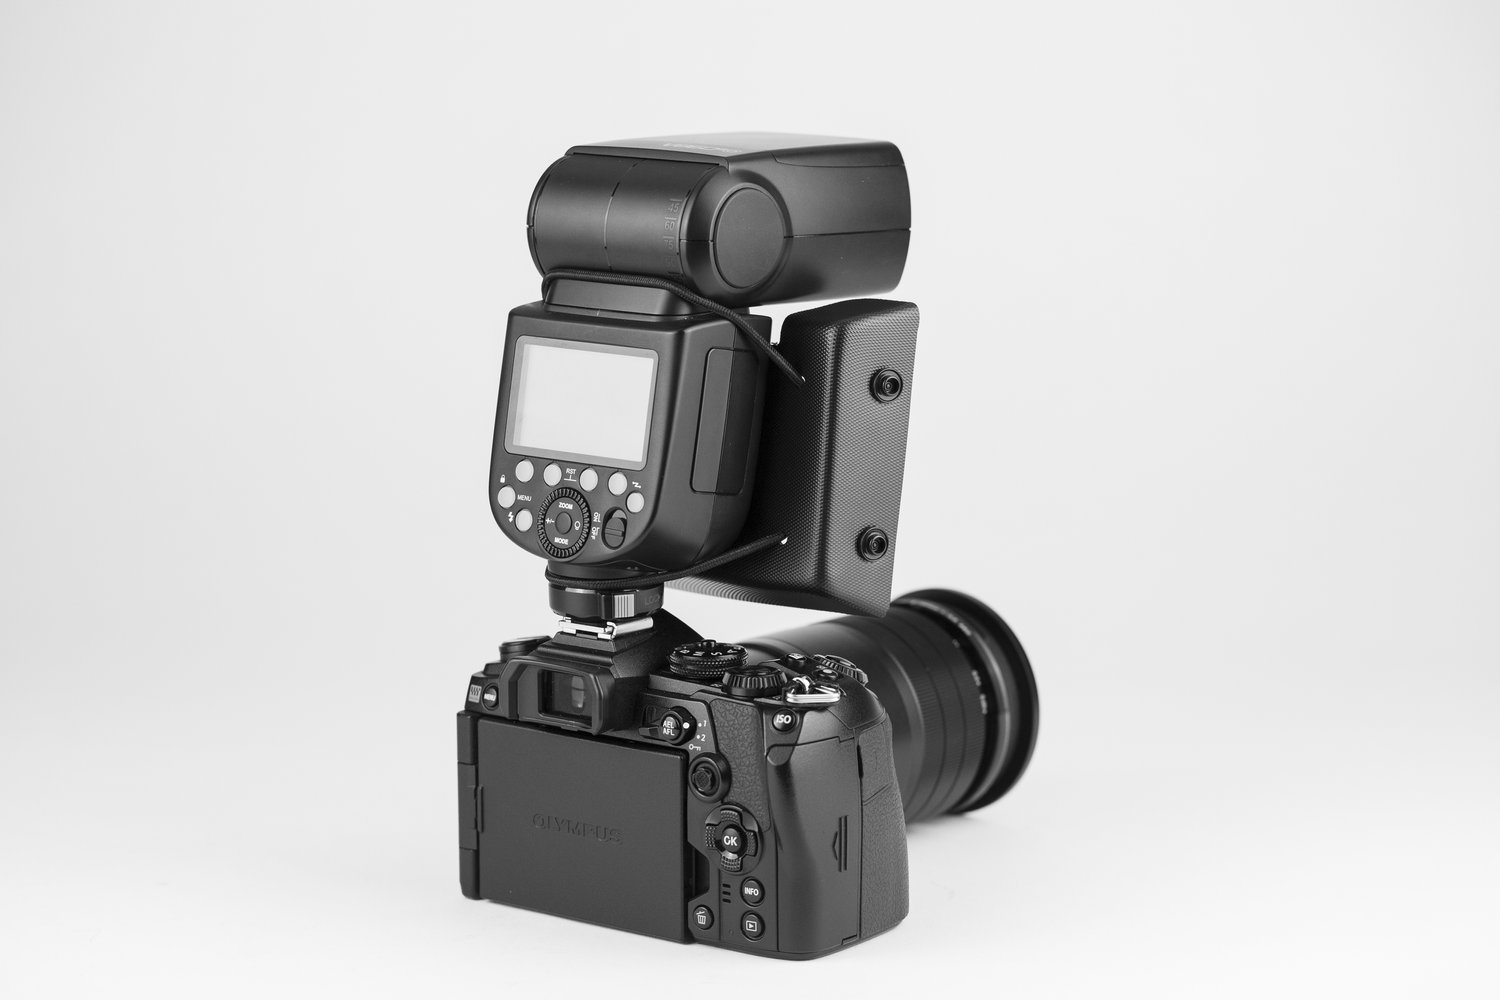
Latest Trick Bits model Update 2024-06:
The new Trick Bits models feature a completely new attachment system, which is unique on the market.
The updated diffusers come for a taller M.Zuiko 90mm IS PRO setup with the V860 and a shorter setup with the V350.
These instantly got me stoked when I discovered them on the website – I love the unique approach to have a fixed mount for the macro diffuser on the flash.
After the first tests I must say it delivers on the promising first look, and definitely is a great budget solution.
However, there also is potential for more improvement and I dearly hope the unique top reflector will make a return for an updated version.
The diffusion layer is maybe a tad to vertical for me, thus why I am experimenting if it can be tilte more, when the rubberband gets pulled back on the lens barrel.
With some minor tweaks this could be a real new favorite.

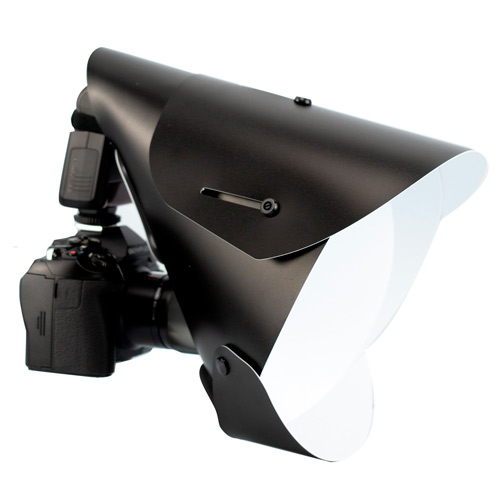
Old model (only for M.Zuiko 60mm)
The first version of the Trick Bits diffusers that i tried, was for an OM-D EM1 II and III setup with the M.Zuiko 60mm macro lens and a Godox 350 flash.
What stood out here, was the extentable/retractable top reflector – a concept which i like a lot and wish to come back in some form for the latest generation of diffusers.
Different to other diffuser brands, with this model the lens is literally enveloped by the diffusion panel, as it uses a thick rubber ring to fit on the lens front end – but without the need to screw it into the filter thread or use a rubber band.
The only gripe for me was that it was for one specific setup only and the diffusion panel adds to much to the bottom and will make shots more difficult when lying flat on the ground.
Since i photograph from very low angles a lot, this would have reduced my flexibility considerably.

Small flash diffusers
The Trick Bits shop offers a wide range of diffusers for twin-flashes and ring-lights as well – all custom printed and with almost industrial quality, perfect fit and a professional look and feel.
From Godox MF12 to Canon MT-24Ex and MT-26EX and Yongnuo YN-24EX, there are a lot of diffusers to choose from.

Website:
https://www.macrodiffuser.com/
Price:
65 £ (77 Euro) Standard Version
88 £ (105 Euro) LED-focusing-light Version
Delivery time (UPS Express): 2 days USA, 5 days EU+INT
Use the Code WILDMACRO during Checkout to get 10% OFF your order!
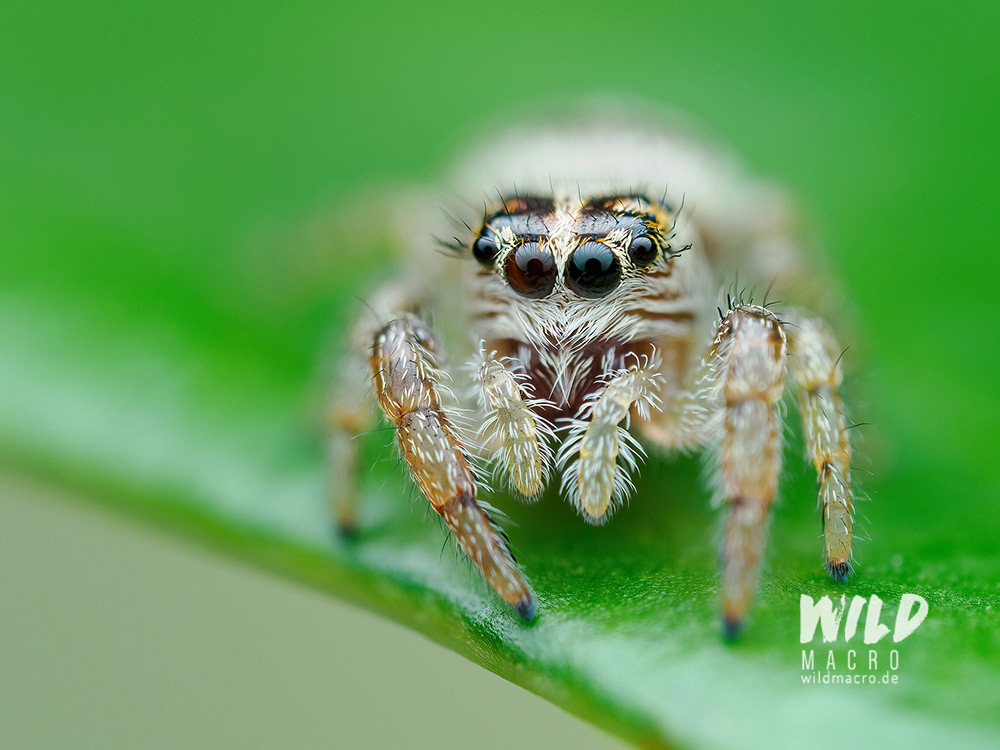
Example photos:
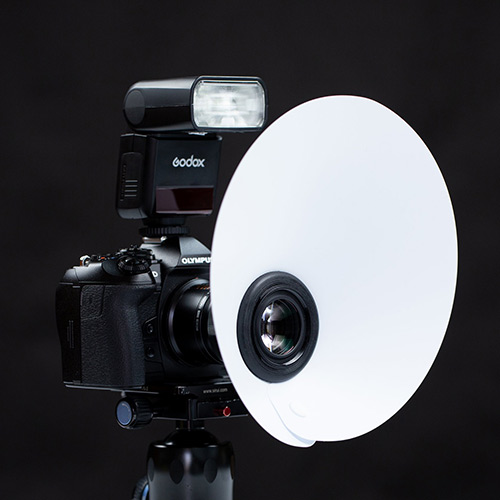
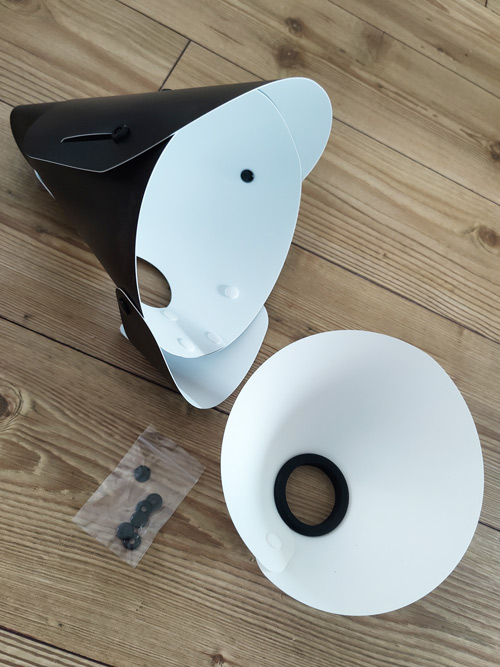
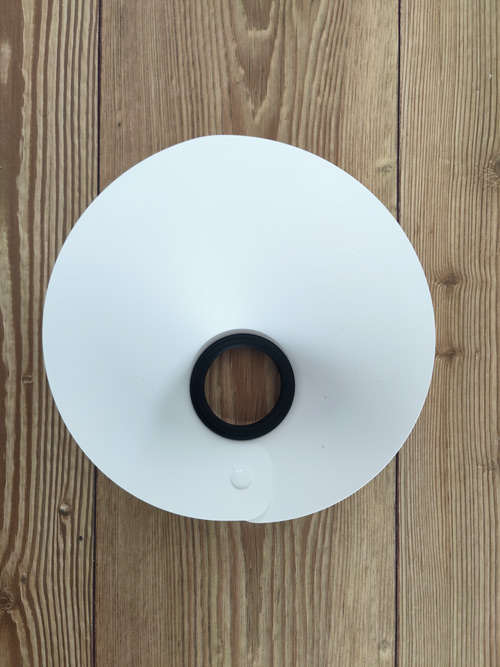
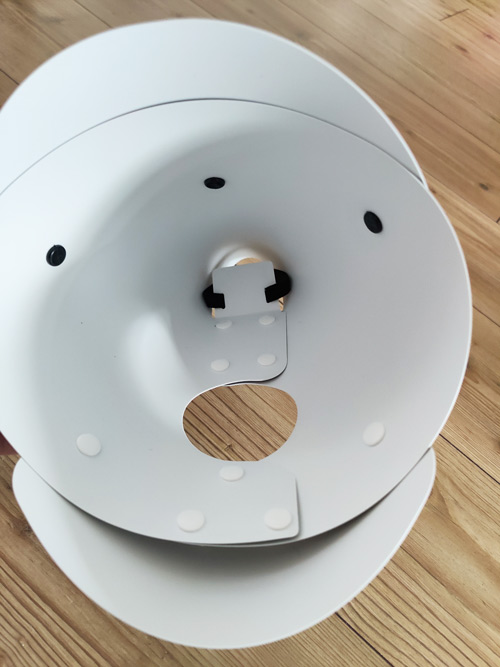
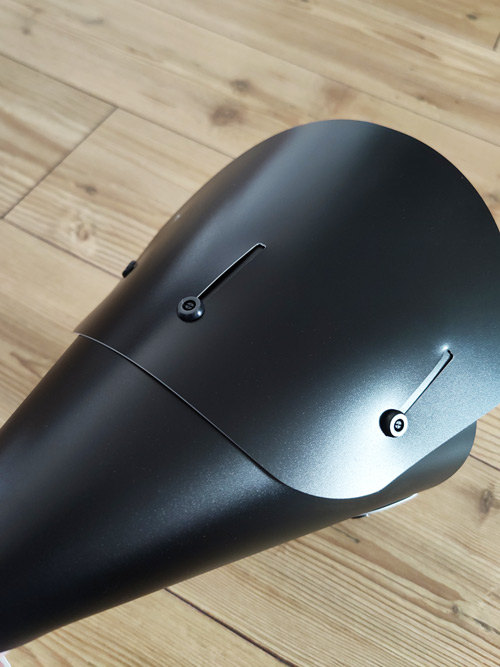
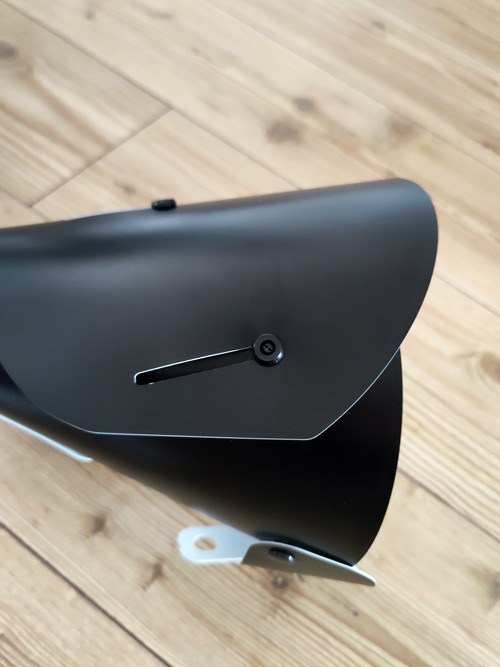
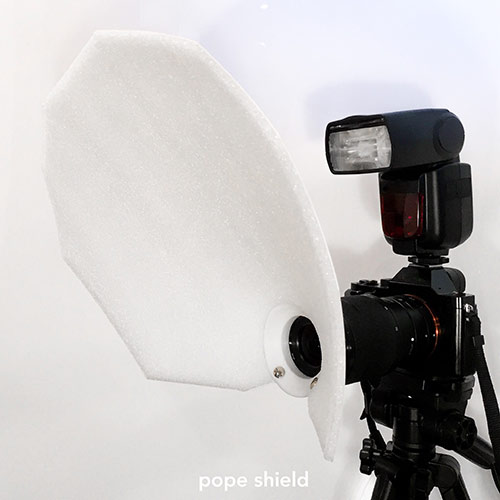
Popeshield
The Popeshield uses a different method to attach the diffuser: it can be screwed directly into the filter thread of the lens.
Its latest version comes with a magnetic 2-part system, so that the diffuser can easily be detached from the filter-thread-holder.
Basically this is a brilliant idea, but the Slovakia-produced concept lacks a full concept.
The diffuser is very fast to setup and, with the magnetic system, offers a lot of flexibility.
Different from the other brands´ models though, the diffusion layer has to be connected to the filter-ring-adapter (or the magnetic counterpart) with 2 screws, which makes the initial setup a bit more fiddly and time-consuming than the others (speaking about a minute here, max, so it is still not a big deal).
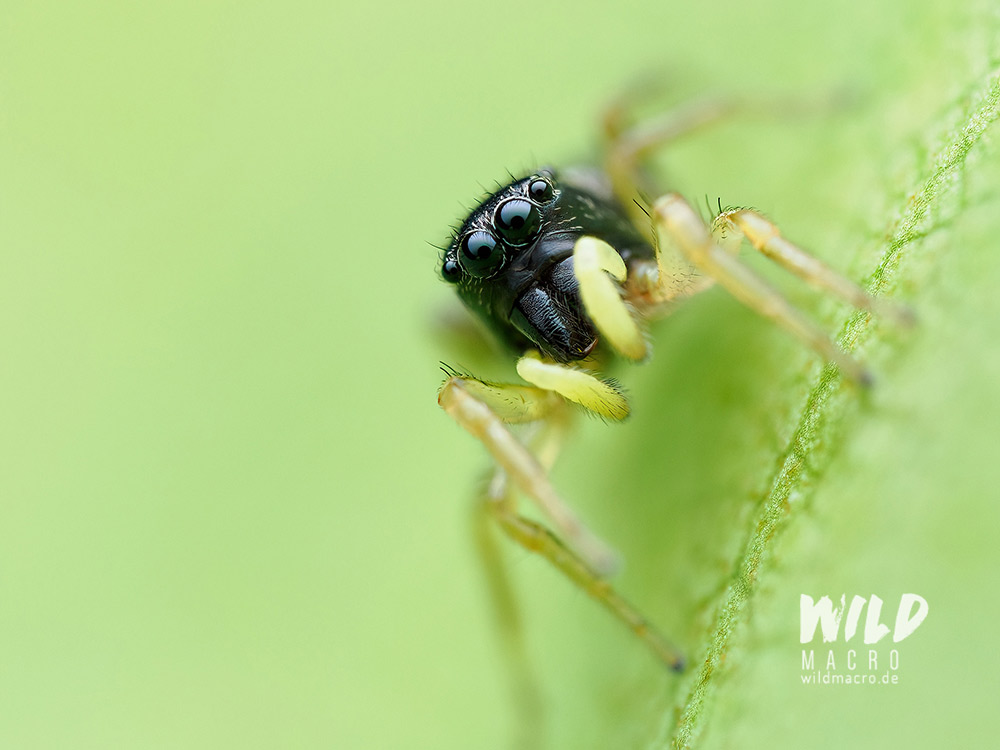
The attachment ring gives a very unique look in reflections in spider´s eyes in particular.
It also does not pack completely flat, once assembled – you would have to unscrew the diffusion layer form the holder.
If you are using one or more Godox MF12 flashes, this can be a great system as it will not interfere with the small flash units.
It is by far the cheapest of all three, regarding the price!
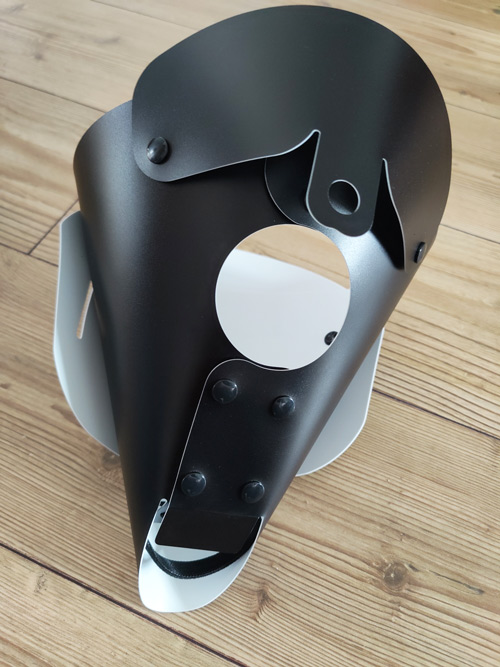
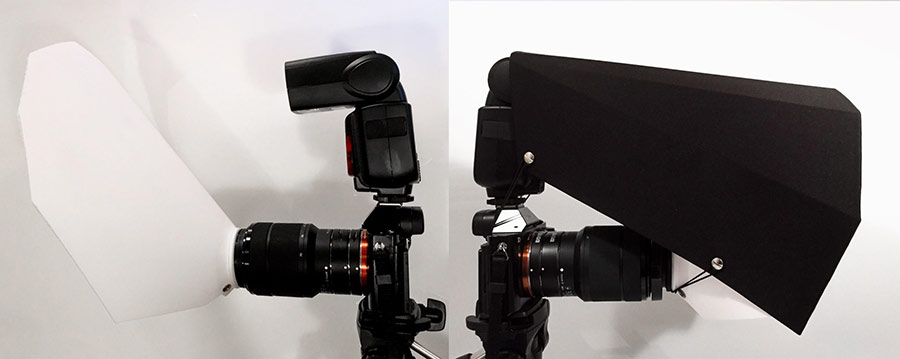
What I did not like so much, in comparison with other diffusers, is the separately sold ‘roof’, which is supposed to channel the light towards the front and intensify the light output.
It is too wobbly and bulky for my taste and way too unreliable for me in the field.
The white balance also seems to be a bit tricky sometimes, as my photos come out with a bit of a yellow color cast, but that could be easily corrected via white balance (WB) settings or in post.
Website: https://popeshield.com
Price: 30 EUR normal version, 35,90 EUR magnetic version + shipping

Example photos:
Final thoughts on choosing the best diffuser for macro photography
I own all of these diffusers, some even in different versions.
All have their advantages in specific situations or workflows.
Which one works best for you, depends on what you are looking for and what your personal style and approach look like.
The most important take-away is to actually use a diffuser!
No matter which one you choose, the results it will give you, will be considerably better than using none at all.
I can only offer inspiration and here is when and why i use the above mentioned diffusers:
When I go on simple and short field trips and do not have much space to pack my camera and additional gear, often by car, just for a couple of hours, I usually grab the Cygnustech diffuser.
Lately I am also bringing the Beetle Diffuser Lite V2, as I am undecided if I prefer one over the other.
Both offer the best compromise of being compact while offering superb diffusion.
The diffuser-holder-ring of the Popeshield creates an interesting reflection in jumping spider eyes for example, which is definetly unique and can look nice, but does not make up for the missing reflector, hence why I currently rarely take it with me, if ever.
If i go on a planned fieldtrip my primary diffuser is the AK, simply because I will leave it on the camera setup all the time and it is stable and offers me the most freedom and flexibility in my personal workflow.
Both the AK Pro and Beetle Pro V2 are my first choice if I have some kind of static camp in the field, their styling options are unmatched.
The extra reflectors and options for a power bank make it the swiss army knife of macro diffusers.
After having tested the Trick Bits diffusers as well, I was pleasantly surprised.
I have not taken it out to full day field trips often, but it is definitely (with the latest update in particular) also become a favorite.
The holder is the only drawback, as it takes time to put it on the flash, if you need to assemle and disasseble your setup regularly during a field trip.
Regarding the results I think the AK, Cygnustech, Beetle and Trick Bits diffusers are on the same level, with the Cygnustech giving slightly deeper shadows.
You can read an ever-updated article with a comparison of their diffusion qualities, here.
Given how expensive photographic equipment can be, I think owning several diffusers is absolutely fine (if you can afford it) and increases the versatility of your equipment.
If you ask me, the diffuser is probably the most important ingredient for macro photography with flash.
It will skyrocket image quality immediately.
Quick tip for Diffusers that directly attach to the lens with a rubber band:
Get a step-up ring that is considerably wider than the filter thread, so that the rubber band/cord can not slide off the lens.
Sign up for the newsletter mailing list & free ebook

Did you enjoy these tips and want to learn more or improve your macro photography skills?
Stay up to date with new blog posts, reviews and tutorial- and ebook-releases.
Sign up below to get notified when the free edition of my ebook
‘How to master spider & insect macro photography’ is ready for download.
Helen Smith
Posted at 10:57h, 29 SeptemberWhat would you suggest for a constant light like the Godox LED126 please?
wildmacro-chris
Posted at 19:01h, 19 NovemberAny diffuser would help, I´d say. maybe a small softbox, or octabox. You could even start by using some sort of diffusion layer in front of it and then experiment with it. But be careful not to set fire, if the layer is to close to a light source that gets very warm 😉
Zohair Mohsen
Posted at 15:52h, 22 DecemberWhere can I buy this macro diffuser
Zohair Mohsen
Posted at 15:54h, 22 DecemberWhere can I buy this macro Cygnustech Diffuser
wildmacro-chris
Posted at 09:13h, 23 DecemberHi, you can message Brendan, who makes & sells them via the contact data that i included in the post.
Peter Bader
Posted at 20:21h, 01 FebruaryA pitty only the PopeSchield is available in Europe (NL)
wildmacro-chris
Posted at 21:16h, 08 FebruaryHey Peter, you can also order the Cygnustech, AK and/or many other diffusers to be shipped to Europe – it is just a bit more expensive as shipping does cost a considerable amount – it is, in my opinion, absolutely worth it, though. A good diffuser boosts image quality to new spheres.
Tano Caperna
Posted at 19:25h, 13 FebruaryHi there, you said in the description that the pope works well with the mf12 flash, that i’m counting on purchasing very soon. Can you really mount it even though the mf12 uses a ring that blocks access to the filter thread ? Anyway thanks for this great article !
wildmacro-chris
Posted at 20:06h, 17 NovemberI missed this comment/question, but just in case someone with the same question reads the comments: yes, the earliest version required you to just connect the holder with sticky tape to the MF12 ring, the follow-up versions have an even better connection mechanism i think – to make sure, check out the pope shield website.
Guy Hulin
Posted at 00:59h, 15 Maylooking micro diffuser for my Canon eos r5 100mm micro lens!
wildmacro-chris
Posted at 08:54h, 05 JuneHi Guy, check out the AK or Cygnustech in my diffuser comparison article, for example. The makers will generally customize their diffusers for your specific setup anyways.
Aniruddh
Posted at 07:32h, 18 AugustInterested to buy diffuser
wildmacro-chris
Posted at 10:49h, 18 AugustHi, feel free to do so!
All the contact data can be found in the article.
Wishing you great results with it 🙂
Sara Markese
Posted at 14:45h, 03 SeptemberI like the unique look of the Popeshield diffuser and am wondering if it’s effective to use the Popeshield diffuser element alone without the bulky roof for quick trips?
wildmacro-chris
Posted at 21:22h, 03 SeptemberHi Sara, yes, that is poissble and will give you better lighting than just a bare speedlite BUT you will lose a considerable amount of light. I would recommend making some basic reflector on the top, even if it just a reflective piece of cardboard that you put on top of the flash head to channel some light forward to the diffuser layer.
Antonio Rodrigues
Posted at 23:03h, 16 SeptemberHi I have a Nikon D800 and speed light SB800. Would it fits this camera and flash? Also I live in London, how much would cost?
wildmacro-chris
Posted at 10:32h, 18 SeptemberHello Antonio,
can you please share, which diffuser you are referring to, as this article shows 3 of them.
Generally speaking all 3 can be custom fit to work perfectly with your specific setup.
Just contact the sellers/makers and they will ask you for your gear and then provide the tailored solution.
They all ship to London/UK as well, of course – for the complete price you would also need to directly ask them. I included contact data for all 3 makers.
Hartwig Bachlechner
Posted at 16:20h, 13 OctoberI would be interested in having such a difusor for macto-photos. I am using Canon equipment:
Lense: Canon RF100, f2.8:; Camera flash: Speedlite EL-5
Russell Chambers
Posted at 00:47h, 27 OctoberHi, my home made diffuser struggles with windy conditions, how do these go?
wildmacro-chris
Posted at 07:38h, 29 OctoberHi Russell, i didn´t have issues with the Cygnustech and AK so far – but i must also say i never photographed in heavy windy conditions. The cygnustech is attached to the rubberband around the flashhead and to the lens, so this is a 2-point fixation. The Ak is more lying on top of the lens, but the velcro attached to the flash on 2 heights, so this is also pretty stable.
Nigel Addecott
Posted at 15:41h, 21 NovemberCould you review this diffuser please? I bought one (I’m a bit of a macro newbie) as the price is considerably cheaper than many others, it’s also British made and was delivered in a few days.
https://www.macrodiffuser.com/shop/olympus-om-d-em1-mkii-iii
wildmacro-chris
Posted at 17:35h, 21 NovemberHi Nigel,
if he provides a testing sample, I could of course review it.
It looks like a decent diffuser from the first impression, though i have my doubts when it comes to take photos close on/to the ground, as the diffuser will always angle your setup due to how it is constructed and embracing the complete lens.
Aside from that it looks good.
Vyankatesh
Posted at 10:26h, 23 FebruaryHI I’m from India I was looking for a good diffuser in India for a Macro Photography of Insects. However, India lacks diffusers for macrophotography. Why? There are many gorgeous insects to photograph in India as well, but the diffusers are not as good as they are. I’m trying to find a CYGNUSTECH DIFFUSER. Could you please assist me with that?
wildmacro-chris
Posted at 12:06h, 29 FebruaryHi Vyankatesh, if you check the section for the Cygnustech Diffuser again, you will see there are contact details to reach Brendan directly and order the diffuser from him. He will also support you in finding the best version for your personal setup combination (camera body, flash, lens). Good luck, and let me know if i need to assist more.
Coffee machines
Posted at 06:12h, 14 MarchThanks for putting this together, I am currently on the market for a good diffuser and this article was just what I needed. I am thinking about giving the Cygnus a go being in Australia too means that delivery will be quick.
wildmacro-chris
Posted at 10:43h, 18 MarchHi and thank you for the feedback, very glad the article helped. Choosing a product made in the same country/on the same continent definitely is a good aspect when it comes to delivery times 😉 I am sure, you will be happy with the Cygnustech Diffuser. Feel free to let me know how you liked it after the first couple tests.
Helen Davies
Posted at 08:32h, 16 MarchHi , I’m getting into macro photography ,particularly interested in insects and I’ve got the 60mm and 90mm Olympus lens – which flash and diffuser would you recommend? Do I need to buy 2 different size diffusers for each lens .
Thank you in advance- just discovered your site and busy reading everything
wildmacro-chris
Posted at 18:38h, 18 MarchHello Helen, i´ll try to help out, but please keep in mind that this is onlöy my opinion and experience and you might very well get along with different choices and gear/diffusers 😉 As the 60mm and 90mm are very different in length, the height of the optimal flash for them also varies – think of the angle from which the light shines down towards the front of the lens. So, the 60mm will do fine with a shorter flash, while the 90mm will best work with a flash that is a bit taller. For the 60mm i use the Godox V350 while for the 90mm i use the big Godox V860III. I also have different diffusers for these two setups, yes. It could/would probably also work with only 1 diffuser but, i prefer to have a fully customized solution. What i like about the Godox V series flashes in particular is the Li-Ion battery – you can read more about that in the many reviews i have on the flash models in the blog section. I hope that helps as a starter, for more questions feel free to send me an email 🙂 have a good start into the week.
Alexis
Posted at 10:43h, 01 AprilHello, among these diffusers, are there any that can be used with a remote flash ?
Thank you for this high quality comparison !
wildmacro-chris
Posted at 11:44h, 02 AprilHi Alexis, this depends on the flash – you mean triggering an off-camera speedlite/flash via radio trigger/remote?
The one from the article that would fit best, would probably be the AK Diffuser, as this is the one that is working like a standalone softbox the most (and does not have to be attached to the lens, like the others).
For a Godox MF12 for example, which is often used as an off-camera flash in macro, AK also offers dedicated diffuers – just check them out on the website.
For more feedback I would need to know what flash you want to use and what you want to do with it.
Alex martin verner
Posted at 09:39h, 30 Aprilhey, how can a get my hands on this beautiful diffuser?
I live in denmark, can you or some other person send it to denmark?
wildmacro-chris
Posted at 10:01h, 30 AprilHello Alex,
Which diffuser exactly are you referring to?
They all ship worldwide.
And contact data and/or Websites to order are all included, check the specific diffuser sections again, please 🙂
Alex martin verner
Posted at 11:06h, 09 MayI am sorry, but I need some help. I am interested in the black macro diffuser with no Lines. and I am not sure about were to bay.
can you help?
wildmacro-chris
Posted at 20:49h, 09 MayHi Alex, do you read my replies to your comments (including the previous one)?
I have already pointed out, that you find the info/contact for ordering in the descriptions of the diffuser sections of the article.
If you need more assistance or have more questions, please send me a direct email. Thanks a lot.
Bryan Conner
Posted at 12:32h, 08 JuneI can recommend Radiant Diffuser. It is well made, high quality, and easy to assemble. Communication after the sale was excellent and very helpful…and very fast to respond. Highly recommendable!
wildmacro-chris
Posted at 09:25h, 09 JuneI´d love to add it to the list, but unfortunately don´t own it. If i get my hands on one, I will gladly compare it to the other available models.
Jason
Posted at 22:41h, 08 JulyHI!
I have the Pope diffuser
Although you are not a big fan of its roof implemenation, and regardless of the vendor of the diffuser – in your experience, does a roof (basically the internal reflector) worth the extra bulk + time to setup? If all other aspects remain unaltered, should I expect to see noticeable improvement in the quality of the light with the roof (as opposed to not having a roof)?
wildmacro-chris
Posted at 22:01h, 11 JulyHi Jason, well, using a reflector in addition to the diffuser will lead and channel more light towards the front, onto the diffusion panel, so yes, this would always be beneficial.
It´s never bad having more light available.
As stated though, I do not like the provided “roof” much and would instead build a simple custom reflector, similar to the Cygnustech for example.
Hope that helps, best regards
Andreas
Posted at 14:31h, 11 JulyHey, thanks for the great overview! I made the switch from Canon to OM System for Macro and got myself the OM1 Mark II with the 90mm lens and the Godox V350O. Now I’m torn between the AK Diffuser and the Cygnustech Diffuser.
Does the Cygnustech Diffuser work well with the manual focus switch of that 90mm lens? It is attached to the lens with a rubber band as far as I understand it. I wonder if it would be in the way when I use that ring.
Also I still got an AK Diffuser from my Canon RF 100mm. it somewhat fits on that new setup but feels a little wobbly. What’s your experience with an AK Diffuser made for the OM-1 + 90mm setup?
Cheers!
wildmacro-chris
Posted at 21:59h, 11 JulyHi Andreas,
as I described in the post, it really depends on the use case for me. Both diffusers are great, both producce wonderfully diffused lighting.
Regarding the manual focus clutch of the M.Zuiko 90mm, I use a step-down ring for the lens, so that the rubber band which holds the front panel of the Cygnustech Diffuser in place, will sit there safely, and not mess around with the focus clutch.
However if you want to do the changing angle, which is possible with the diffuser, you would have to pull back the rubber band and this could mess with the clutch – i don´t use/do that though AND you can always disable the clutch in the camera settings completely.
I also feel that the Cygnustech sits a bit tighter, compoared to the AK although i must say if you tighten both velcro straps of the AK (the one on the flash head and the one around the hot shoe, it also sits firm and tight and both never felt wobbly for me.
I hope that helps – best regards
Klaus
Posted at 11:33h, 26 JulyThere is one major issue with the Popeshield diffuser, when the working distance is small, I’m using a Sony A6700 with a Laowa 65mm. When shooting at the highest possible 2:1 magnification, the working distance is just about 6cm, which is simply too close for the Popeshield to direct enough light to this area unless you operate the flash at almost maximum strength – which makes it unusable for continuous shooting at rates like 11 frames/sec.
wildmacro-chris
Posted at 12:31h, 26 JulyHi, yes, the Popeshield is only working for very specific situations and scenarios, hence why i write that it is my emergency fall-back diffuser that´s always in the car. For settings like the one you described, I would recommend using a different one. I will update the article with these infos to make it stand out more. Thank you for the feedback, very much appreciated.
Gordon Harveson
Posted at 02:45h, 15 AugustHave you ever tested the KR diffusers from Kev Russel?
wildmacro-chris
Posted at 10:26h, 15 AugustHi Gordon, no i have not tested it, but have seen in online. For me personally, the design is a bit too slim and snoot-like. I prefer a wider diffusion panel and reflector.
Craig
Posted at 03:36h, 10 NovemberThe discount code doesn’t work at Cygnustech.
Craig
Posted at 03:39h, 10 NovemberNever mind. 5 looked like an S to me. haha
Martijn
Posted at 21:06h, 01 DecemberHi, nice article. I was wondering, does the physical height of the flash have a lot of an impact on how the light diffuses? I also wonder how much the zoom of the flash matters?
wildmacro-chris
Posted at 21:50h, 01 DecemberHi Martijn, glad you enjoyed reading the article. The height is of importance when it comes to the relation between flash height and length of lens: the longer the lens, the more height of the flash is beneficial to achieve an even spreading of the light and also having enough distance for it to travel to reach the front of the lens in the best angle possible. The same applies for the zoom of the flash, as here you can control if you want it to spread more (widest zoom setting) for softer light, or getting more intense light (tighter zoom setting). The latter might cause highlights / a spot in the reflection of the diffuser in reflective spider eyes or on beetles, for example. I am currently planning an article that shows sample photos and comparisons of all these different settings, to get a better idea how and if the settings really make an impact.
Martijn
Posted at 13:56h, 03 DecemberCool, I have a sony 90mm macro, I use a Meike MK320 now, which I believe has a fixed zoom of 24mm. This is a short flash, so I guess I would benefit from a taller flash if (also at 24mm) to enjoy more even diffusion? I mostly photograph snakes, which are often shiny, so even diffusion is best for me. Given that snakes are sometimes big, I also have to stand a bit further back, even for that purpose an AK diffusor will work the best, no? I understand I will lose light and therefore have to increase flash power.
Matt
Posted at 07:20h, 22 DecemberHi,
I‘m Using a Canon R6 with an Ef-Rf Adapter and Canon MPE 65mm plus MT26Ex.
Which Diffusor would you recommend?
wildmacro-chris
Posted at 11:49h, 22 DecemberHi Matt, the only seller which i know of, that offers a dedicated Diffuser tailored for the measurements of the MpE65 is AK Diffuser. I have used his MpE65 Diffuser myself for years and liked it a lot. Maybe the others can make one for the specific dimensions as well, but AK has one out-of-the-box.
eduard Bello
Posted at 17:36h, 05 Januaryhoi,
Ik heb een omd em5 II camera met standaard flitser.
Ik gebruik regelmatig mijn 30 en 60mm lens.
past de Cygnustech Diffuser hier op?
Of graag advies.
wildmacro-chris
Posted at 00:20h, 06 JanuaryHi Eduard, yes, sure, the Cygnustech Diffuser will work – but you have to decide for a lens+flash combo so the Diffuser will speficially designed to fit this combination. When you order it, you can enter your body+lens+flash. If you have more questions regarding this, let me know.
milton amorim da silva
Posted at 06:25h, 19 Aprilolá wild, gostaria de saber como se faz para o flash fazer varios disparos (rajadas) para iluminar varias fotos para posteriormente fazer empilhamento?
wildmacro-chris
Posted at 22:31h, 19 AprilOlá, basta configurar a câmera para o modo de disparo contínuo e o flash para manual: depois é só disparar!
Mova a câmera lentamente para frente para que o plano de foco se mova.
Depois, calcule tudo em um software (por exemplo, Helicon Focus). (Traduzido com o Google Tradutor, pois infelizmente não falo português)
GuiPETIT
Posted at 10:28h, 09 MayHello,
Trying to DIY a diffuser, can you tell what material would be best for the flash diffuser?
I cannot figure out where to get the right material, A material that would be splash proof and would offer good light diffusion
I’m located in France, I’ve tried a couple of photo/video specialized shop here but they do not seem to be able to help me in any way.
Any help would be much appreciated
Thanks
wildmacro-chris
Posted at 13:39h, 09 MayHey,
I have worked on countless diffusers myself in the past 15 years and it all boils down to the fact, that all the diffusers you can buy are somehow similar and all give great lighting. Investing time and money to build a DIY diffuser is a waste of those, except you´re up for the fun of the actual building and inveting process, then go for it 😉 But that´s just my personal opinion. Most diffusers use 3mm/5mm polypropylen or PVC-foils for the outer reflector part. For the diffusion layer you can use the same, but in translucent variant. I hope that helps – happy building 🙂
Jim Orcheson
Posted at 13:43h, 26 JulyIt is now July 2025 and time for another update to this post. All CygnusTech diffusers are now priced at $180 AUD + shipping.
It would be useful if you published the full date of posts an comments. For example, the “date” for this post is given as “Posted at 18:42h” No idea what day, month or year, so I can’t tell if the information is current or not. You do give the year and month of any updates, but I have no idea when the original article was posted.
Also, you give the time, day, and month when a comment is posted, but again, no year., As comments age, I give less value to their contents as they may contain content that is now out of date,
wildmacro-chris
Posted at 14:50h, 26 JulyHi Jim, first rergarding the price update: yes, I´ll do an update soon, good that you brought this up to remind me.
That does make sense.
Then regarding the display of the year: I am absolutely on your side, this has also and always bothered me a lot, however it was what was the custom setting and to change it meant digging into the php code, which I wasn´t really motivated to do – and noone has ever ciritsized that.
Now that you bring it up, I did some searching and did add the display of the year in the single blog page and also in the comments.
A lot better 😉 I hope that helps.
Have a great weekend
Terry McDonald
Posted at 18:15h, 24 DecemberGreat article. Most helpful one of the ‘Net for macro flash diffusers. Thanks for preparing it!
wildmacro-chris
Posted at 21:01h, 24 DecemberThanks a lot for the kind feedback Terry, very much appreciated. I will update the article soon, and also add new diffuser brands.
I am also writing an ultimate buyer´s guideto macro diffuers and hope to finish it in jan/feb.
Merry Christmas and a happy new year.
RW
Posted at 14:37h, 30 DecemberWhich diffuser would you recommend for a Profoto A10? Thanks
wildmacro-chris
Posted at 12:06h, 31 DecemberHey Raife, für die Profoto A10 wth its round flashhead the AK Diffuser will definitely work. The Cygnustch should also fit the rounded shape, but better make sure and send an email to Brendan before ordering. Both Diffusers are great, best decide between them according to your primary needs, like portability/packing flat (Cygnustech) or most features, reflectors, focusing LED and so on (AK). Hope that helps, best regards.
Ernst Hohmann
Posted at 14:40h, 16 MayHallo
ich wusste nicht, wie kompliziert die suche nach einem Marco Diffusor ist,
Ich habe die om1 und die 60mm Marco Objektiv. Manchmal mit eine Renox 250 und manchmal mit Zwischenringe. Also, mein Setup verändert sich manchmal.
Brauche ich nun verschiedene Diffusoren?
Ich bedanke mich im voraus für eine Antwort
wildmacro-chris
Posted at 12:39h, 17 MayHallo Ernst, für die Kombi OM-1 + 60mm und ab und an mal die Raynox DCR250 drauf reicht eigentlich 1 Diffuser, zB Cygnustech oder AK. Die haben bei den aktuellen Versionen sogar einen Raynox Halter, d.h. du kannst den dort an- und abclipen.
Verschiedene/mehrere Diffuser bieten sich eher an, wenn man Höhe des Blitzes und Länge des Objektivs ändern, damit man wieder einen optimalen Winkel hat.
Beste Grüße
Frank Lopez
Posted at 18:25h, 23 MayWill the ESDDI flash work with the Cynustech diffuser?
wildmacro-chris
Posted at 17:36h, 28 MayHi Frank, sorry for the late reply: yes, of course you can use a Cygnustech Diffuser with the ESDDI flash, as Brendan customizes your diffuser following the input you give while ordering. YOu can also message him before ordering and ask for a recommendation which model might fit best. If this particular flash is not listen, there is a similar flash with similar/identical dimensions which can serve as a guide, I am sure.
Andy Hill
Posted at 16:01h, 11 JuneHi,
I am starting out with macro photography having recently invested in a macro lens.
I have an om system om1, m.zuiko 60mm macro and godox ving v860iii ttl, which diffuser would you recommend for this set up?
wildmacro-chris
Posted at 18:00h, 13 JulyHey Andy, sorry, I seem to have missed your comment. As explained in the blogpost it depends on what´s most important for you personally. If you prefer basic and max. portability: go for the Cygnustech – if you want top materials, reflectors and an attachment without using a rubber band around your front lens, then the AKmight be a good choice for you. Both work great with your setup.
Jonas Gierer
Posted at 18:44h, 14 JulyHallo Chris,
vielen Dank für den ausführlicher Vergleich. Gibt es mittlerweile ein Update zu deinem Review des Beetle Diffuser Lite? Ich bin auf der Suche nach einem neuen Diffuser und aufgrund der teuren Versandkosten bei den meisten anderen Modellen tendiere ich zum Beetle Diffuser. Hast du den seit April nochmal ausgepackt und wenn ja, würdest du ihn immer noch empfehlen?
Außerdem noch der Hinweis dass der Rabbatcode für den Beetle Diffuser abgelaufen ist, wäre natürlich sehr cool einen neuen zu bekommen, andernfalls solltest du wohl den Code aus dem Artikel löschen.
wildmacro-chris
Posted at 10:16h, 15 JulyHi Jonas, ich habe die 3 Varianten des Beetle Diffuser häufiger genutzt in den letzten Monaten, ja, und bin weiterhin überzeugt von allen 3, allerdings abhängig vom Einsatzzweck.
Der Prov2 ist wirklich toll mit dem veränderbaren Winkel des Reflektors, aber wenn ich im Feld viel unterwegs bin, ist er mir eher zu groß, so dass ich den wirklich nur ortsgebunden nutze. Die Lite V2 Varianten gehen stark Richtung Cygnusstech Diffuser und bringen mir auch ähnliche Ergebnisse. Hier ist es wirklich egal, welchen der vorgestellten Diffuser man wählt, da allesamt top Ergebnisse produzieren – man sollte hier nach Faktoren wie Packmaß, Aufbauaufwand, zusätzliche Reflektoren und Optionen wie Powerbank/Raynox-Halter, Preis, Sympathie usw. entscheiden.
Wenn bei dir der Preisvorteil für den Beetle spricht, dann ist das def. keine schlechte/falsche Wahl.
Den gibt´s jetzt übrigens auch bei Foto Koch, kann aber sein, dass er direkt aus Indien sogar günstiger ist.
Der Bestell-Code für den Beetle Diffuser funktioniert jetzt wieder und lautet WILDMACROBD5
Danke für den Hinweis