
02 Mar Understand what you are seeing – tips for wildlife and macro photography beginners
Learning from inspiration and examples
Inspiration is generally a good thing: seeing the work of others gives you an impression on what can be done in that field, and also how broad the creative and technical range of execution is.
Getting an overview of this range provides both an idea of what is the top end qualitywise and also what can be considered the entry level.
It illustrates the learning curve, that can be anticipated.
However, the photos we look at are an end-result, often lacking contextual and technical information.
Our impression is solely created by and from our experiences, knowledge and assumptions – given the above mentioned case.
Being aware of this is an important factor, when it comes to the reception of creative works, no matter if it is photography or other art.
The following thoughts apply primarily for inexperienced and beginner photographers.
My intention is to help understanding where frustration, caused by inspirational images, may came from – how to overcome it – and grow self-confidence in your own work.
The problem with inspirational photos as a blueprint for your own photography
In my opinion, the biggest problem with taking other photographers´ photos as some kind of blueprint for your own photography, is, that we rarely have enough information at hand to really undersatand how a specific photo was taken.
As mentioned before, in most cases we see the finshed result, but rarely know details about the setup, the settings, the specimen/subject and the scenario.
However this information is crucial to truly understand how much effort and also attempts have been invested, to get such a photo, which serves as inspiration and a positive example of what we might want to achieve.
Let´s take a look at some examples of images that create false impressions when no background information is provided:
Focus Stack
A focus stack is a composite image, consisting of multiple images with a shifted plane of focus that are then merged into the finale image that has an enhanced, deepened depth of field.
You will see a photo, which details, depth of field or sharpness would not be possible to capture in a single shot with the same settings.
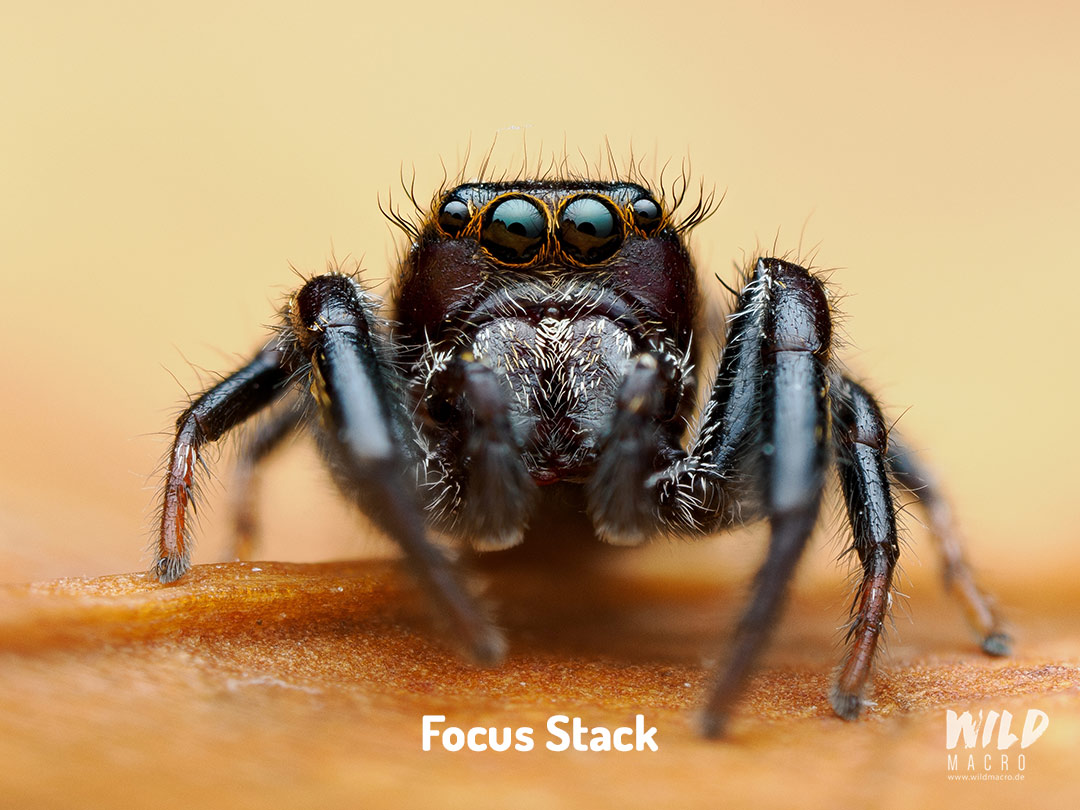

If you do not have this information, trying to recreate this composite image with a single shot and the same gear, will always fail.
You might either feel you lack skill, or get an headache trying to figure out how this image was created.
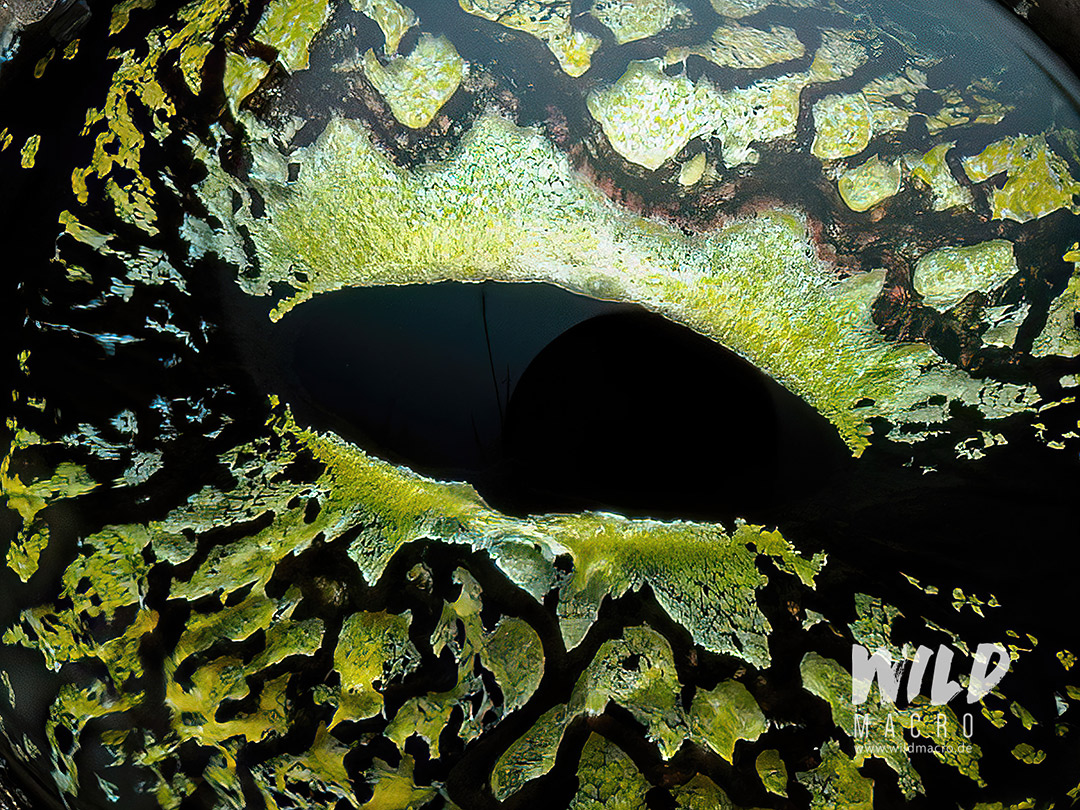
Cropping in Macro Photography
In macro photography, we often try to reach a magnification as high as possible, to show as much details as possible.
As described in the previous paragraph, this results in the depth of field getting extremely shallow.
A common trick is to photograph with less magnification and more distance to the subjedct, which results in more depth of field.
In postprocessing the image is then cropped to make it appear as if it was taken at a higher magnification.
Without having the EXIF data, it is almost impossible to know if the image seen is a crop, or shows the original relations.
When the focus stacking technique is applied additionally, there is a lot of room for creative cropping.


Pet animals versus wildlife
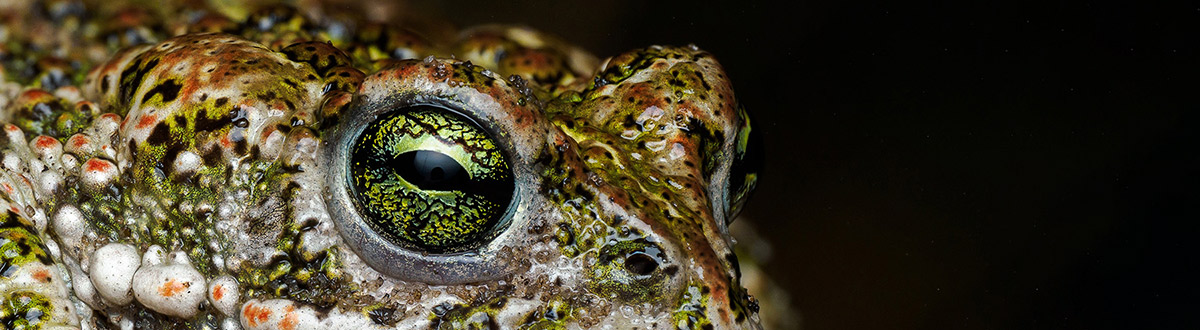
Without any additional info, it can be quite difficult to see if a photographed animal is actual wildlife or a pet.
While wide-angle photos (showing the habitat) can give hints, with extreme close-ups it can be a lot more diffcult to get an idea.
Is it forbidden to photograph your pet, may it be a pet jumpnig spider, mantis, or even bigger wildlife like cats, reptiles and ambhibs or small apes, and share these photos?
No, absolutely not.
But in a wildlife context, photographing a pet and selling it as true wildlife is (ethically) wrong.
Pets can be used a lot more to humans being around, than a free-ranging wild species, hence giving the photo a completely different difficulty level.
At the same time it can be extremely challenging to find a wild species, while their pet counterpart maybe available from an online seller or pet shop.
Controlled environment versus insitu habitat
Very similar to the pet-scenario, a controlled environment can facilitate getting good shots of a species in contrast to photographing it in its natural habitat.
A controlled environment does not necessarily have to be a studio, which is the most controlled form of it though, but can also mean to place a subject in a light tent, enclosing it, transferring it to flat surfaces, on sticks or whatever.
Again, this is not forbidden by any means, but from the perspective of the person that is looking at such an image, it creates false impressions if this info is not provided.
You might wonder how another photographer was able to photograph an elusive species, hiding between leaves for example, while it was actually just a setup where the specimen had limited escape routes and was easier to control.
Interferring elements, like wind, or rain, can also be controlled and evaded by using a controlled environment.
The scenario
Another aspect that can increase or decrease the difficulty level of the photographic process is the scenario or situation which we photograph (in).
Here are 2 examples where it might appear as if the photo was incredibly hard to take, while it may have actually been less of a challenge:
Many animals sleep during the night, while others are nocturnal.
Photographing an insect that is extremely active during the day and even more so with the sun burning hot, can be considerably easier if found sitting totally still during the night.
With the help of a diffused flash and using foliage as a colorful background, reflecting the flash, it is possible to create a photo that looks like it was taken during the day.
Instead of chasing an active insect around, the situation was turned into a almost static setup.
This is actually a clever move and requires a bit of knowledge of the species.
I use this approach as well.
Another example is the photography of dead, and sometimes staged into life-like postures, arthropods.
If mentioned in captions, it is totally fine to photograph dead specimens, especially for scientific and illustrational purposes.
However this connects to the next section where we will take a look at faked wildlife photography.
Using dead specimens that have been posed into realistic postures without being transparent on this, can be very misleading to the viewer.
Even more so, if the viewer is unexperienced.
You might wonder how it was possible to photograph an extremely active species, when in reality, it was a dead and staged specimen.
These posed specimens can look incredibly realistic, given an experienced taxidermist.
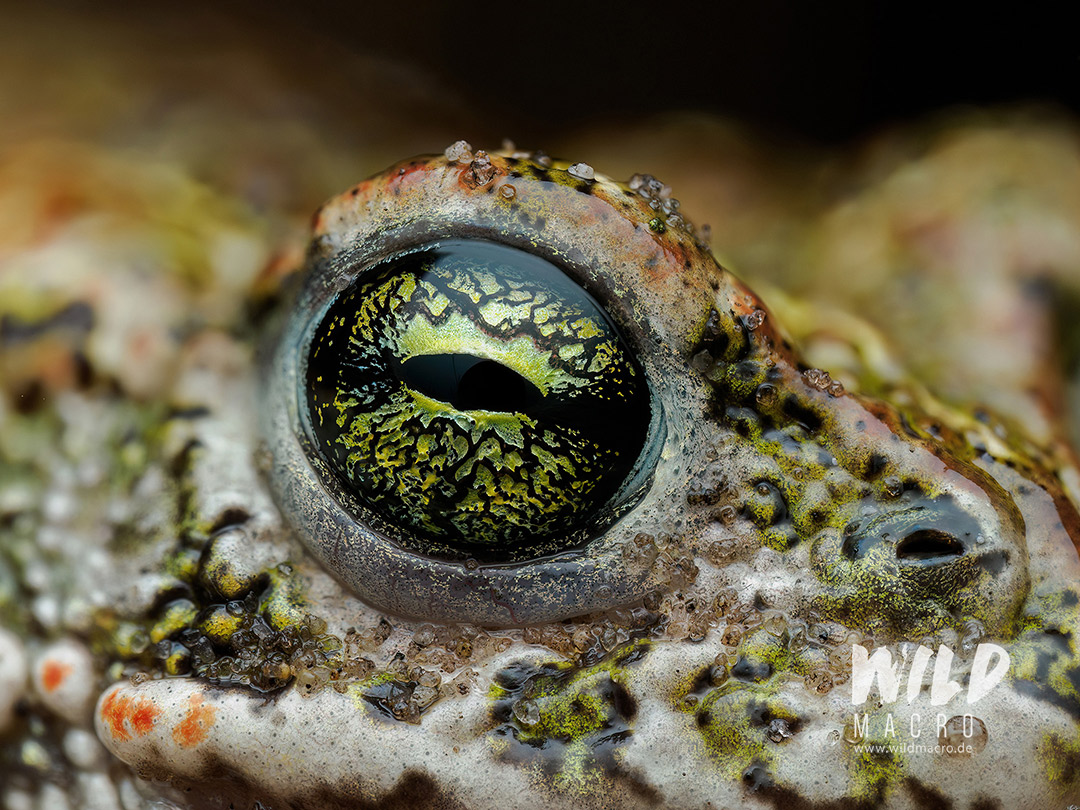
Depending on the photographer´s skill you can sometimes spot a dead specimen.
Spiders, for example, curl up their leads after dying, compound eyes decompose and lose color or crytallize, which can be easily seen in the photo.
Unnatural poses of legs and antennae can also give away the fake.
Knowledge about the species is a big factor when it comes to detect these staged photos.
Faking wildlife photos
The first example coming to mind, when thinking about faked wildlife photos, is using them in prestigeous photography awards and competitions.
Obviously, it goes against all rules of said contests, but as soon as there is price money included, or a prestigeous title awaiting, some (thanksfully definitely a minority) photographers seem to throw their ethics overboard.
There has been a very prominent case some years ago, where a photographer entered a photo of an anteater in the prestigeous Wildlife Photographer of the Year award ‘animals in their environment’ category.
It turned out that said anteater is actually stuffed and standing on display at a visitor centre at the Emas National Park in Brazil.
Photographer and photo have been disqualified and removed from the awards, where the anteater photo had even been awarded a prize.
Other techniques to fake wildlife photos include immobilization of subjects with ice spray, glueing them onto sticks or exploiting specific behavioural traits of species.
Faking wildlife photos is not limited to dead specimens of course as a controlled environment or the depiction of pets are also seen as an unnatural simulation of a natural encounter and situation.
Finding Wildlife Photos on Social Media and in Online Searches
There are many reasons why someone would not want to disclose background information on a wildlife photo.
While some are totally innocent, others may stem from the intend of actually hiding something.
It is not always clear, why someone may leave out information, that is important to contextualize an image.
Sometimes it can simply be contributed to a lack of time, when uploading images to social media or websites.
There does not necessarily stem from bad intentions – probably rarely does, but it is still good to keep that in mind.
Whenever you see photos online and feel inspired, make assumptions, rate them, maybe deconstruct them to get an idea how you could also take such a photo, look for the above mentioned indicators to get a good impression of how a photo was actually taken.
Don´t take everything you see as reality.
Experience, Knowledge and Learning
The toolset to understand and place a photo in context is knowledge about what you see, as well as experience in the field.
In relation to wildlife photography, this includes knowledge about the species, the habitat, behaviour and also the technical and creative aspects of photography.
The more images you see and the more information about the photographic process of specific images you learn, the more you will get an idea of how an image has been created.
AI generated wildlife and nature photos
AI generated imagery has become popular in the past years and while the first attemps of text-to-image generation was error-ridden and could easily be spotted, the latest results look mindblowingly realistic.
With the help of AI an experienced user can generate a Hollywood blockbuster-looking sci-fi scene that would have cost a film studio millions of dollars.
The AI-generated wildlife photos we see today, often do not have that level of realism yet, most probably to it being a niche and lacking training data of the AI-agents.
While some can create images that look realistic, others mess up details or look to comicy.
However, this will most probably change in the near future and also depends on which AI text-to-image agent is used.
Telling a real wildlife photo apart from an AI-generated one, will matter more than it does not.
The more experience in that specific field we have, the easier we will find the errors and mistakes of the AI, that reveal the artificial image.
To give an example, I have seen AI-generated images of jumping spiders, where the AI thought these had real lashes (which they don´t) and hence rendered them.
Another image showed a spider with 6 legs instead of 8, or mandibles that were interpreted by the AI to be antennae and attached in the wrong spots.
There are signs, and the more niche a topic is, the easier it is to spot the lack of experience and knowledge of the AI that generates these images.
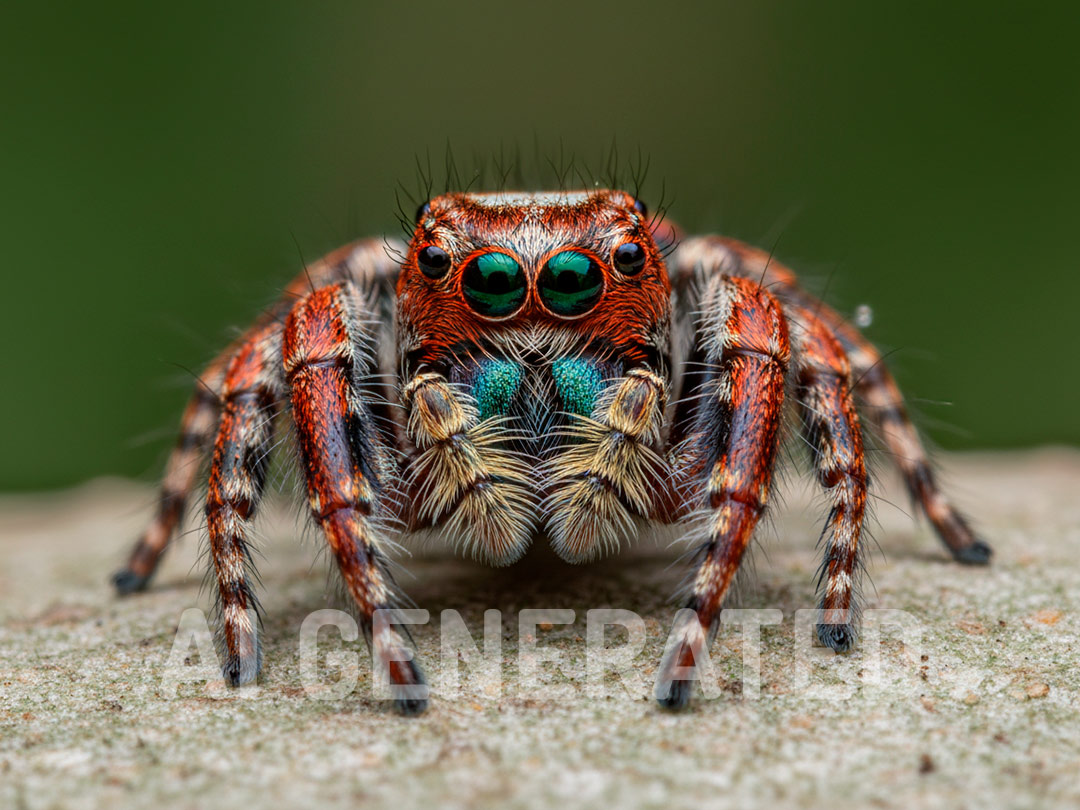
The following example images have been created via Adobe Firefly, using Gemini 2.5 w/ Nano Banana, and do actually look realistic.
Too many pseudo pupils in the mantis eye give the AI-generated nature of the image away, and the jumping spiders has some floating hairs that should not be there.
Aside from that, the result surpised me with how realistic they must actually look to an amateur naturalist.
It is worth noting, that Gemini even included a diffuser reflection in the spider´s eyes, which adds to the realistic look.

These are the promts I used:
“Create a realistic macro photograph of a realistically depicted green praying mantis holding a realistic-looking butterfly of the African monarch butterfly (Danaus chrysippus) species with its two raptorial legs.”
“Create a realistic frontal macro photograph of a jumping spider, similar in shape and color to the species Habronnattus americanus, with a magnification ratio of 2:1.”
Conclusion
Inspiration is a good thing, learning from others and their work is, too.
However in these times, it is crucial to be able to evaluate what we see and to develop an understanding of how a specific photo was created.
This is even more important for beginners, as the above mentioned aspects can create an impression that is not based on reality and facts.
Such a false impression can disillusion, depress, frustate and demotivate an unexperienced photographer considerably.
Don´t let that happen to you – get inspired, learn, try out new things – but be aware of what you are actually seeing in galleries and the world wide web.
Your Feedback
What are your thoughts on this?
Have you felt you lack skills because of photographic inspiration found online before?
How do you handle inspiration?
Sign up for the newsletter mailing list & free ebook
Did you enjoy these tips and want to learn more or improve your macro photography skills?
Stay up to date with new blog posts, reviews and tutorial- and ebook-releases.
Sign up below to get notified when the free edition of my ebook
‘How to master spider & insect macro photography’ is ready for download.
Jeroen Kijvekamp
Posted at 22:04h, 02 Marchi have had the feeling of lack of skills. attending workshops and look at tons of video’s on YouTube i learned a lot. knowledge and practice are in my opinion key words. exif data is helpfull for every one to learn how its done. i like it when People tell how its made so i can learn, practice and become better.
wildmacro-chris
Posted at 00:24h, 03 MarchHey Jeroen, yeah totally, reading, learning, workshops all help a lot. While it is fun experiencing the complete learning curve yourself, a shortcut here and there saves a lot of time, which leaves more time for actual photographing. Nothing wrong with that, quite the opposite 🙂