
13 Mar How to setup your OM SYSTEM camera for focus bracketing and focus stacking
With their ability to create automated focus stacks and focus brackets, the OM SYSTEM cameras have an absolute luxury function for macro photography on board and can save you an incredible lot of time.
At the same time, the automated process increases accuracy, workflow speed and your success rate.
One of the questions I get asked the most during workshops and presentations is, how I actually set up my camera (and flash) for this – and what settings exactly I use.
If that´s what you are looking for, here you go: focus bracketing and focus stacking settings for Olympus and OM SYSTEM cameras explained.
The requirements for focus bracketing and focus stacking with your OM SYSTEM (Olympus) camera
- make sure your (compatible) lens is on auto focus (AF) for bracketing and stacking to work – otherwise the the options will be greyed out and cannot be selected in the settings
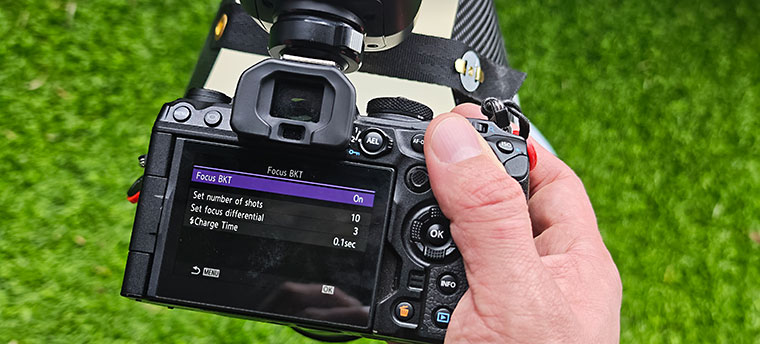
- activate focus bracketing / focus stacking in the camera settings
Tip: to improve workflow speed, you can assign the focus bracketing and focus stacking function to a button.
This way you do not have to into the menu to activate/deactivate it, but simply press one button.
The settings in the Focus Stacking and Focus Bracketing menu
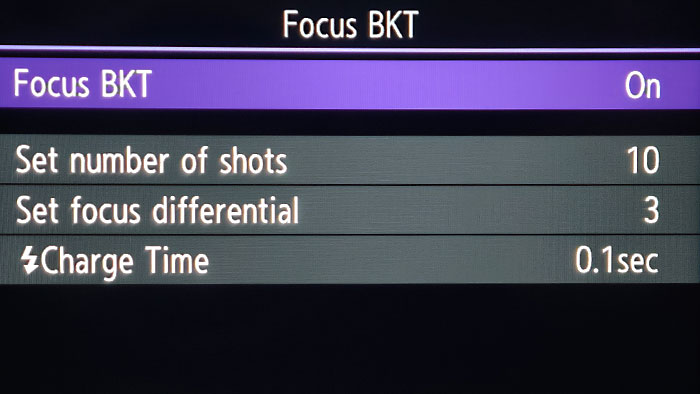
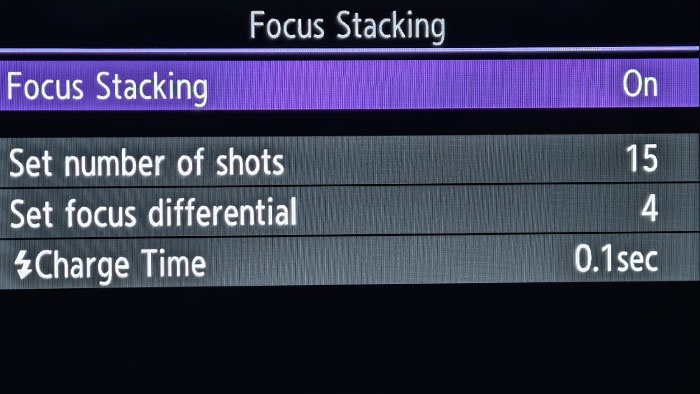
Set number of shots
Focus bracketing allows for a max of 999 shots, while the in-camera focus stacking is limited to 15 shots.
You can set a number of your choice here.
The best result depends on the combination of the number of shots and the differential.
There is no chart available to learn about what setting combination is needed for an insect of 3mm and one of 10mm for example.
It is try and learn.
Personally, I mostly range between 5 and 25, often starting with 10.
If I can use a tripod, or have stable ground to support with the hand and my subject is also not moving, I may create focus brackets with considerably more shots up tp 50+.
Tip: you can easily set a much higher number than needed and simply press the shutter button during the bracketing/stacking process again to interrupt it, when you think your bracket/stack is deep enough. This is a very effective way to be ready for whatever number of shots you will need ultimately.
Set focus differential
The focus differential controls how much the shots overlap each other.
A small number means there is more overlapping, while a high number means that the particular areas in focus connect and follow after each other without much overlapping.
Movement of the camera (and hence sensor) or/and subject will likely make you miss a layer and kill the focus bracket.
With more overlapping, you have more buffer for movement, it is like a safety line.
A focus differential of 10 is typically used for landscape, for example.
For macro photography a lower setting is recommended.
Still, even with more overlapping, this layer is paperthin at higher magnifications and small subjects.
I use a focus differential of 3 most of the time.
Flash charge time
If you use flash, set 0.1 for the flash charge time.
This allows the flash to “breathe” inbetween shots while still maintaining an acceptably fast flash fire rate.
If you need to create a bracket/stack very fast, leave it at 0 – it then depends on your flash and its recycle type and power setting how well and how long it can keep up.
Recommended settings to start with when you are using a flash and diffuser for macro photography
Camera settings
Shutter speed: 1/100 sec (fastest shutter speed available for the electronic/silent shutter used for automated bracketing and stacking. The camera will autmatically override and reduce your set shutter speed if it is faster than 1/100s, as soon as focus stacking/bracketing modes are activated)
Tip: as I photograph agile specimens mostly, my main goal is to freeze their motion, which requires a fast shutter speed. However, if using a flash, the flash will freeze the motion and we can use the shutter speed more creatively. It is now possible to use a very slow shutter speed to get in more ambient light for a mixed lighting scenario, or create streaks of motion in the background, for example. Generally though, I would recommend to use the fastest shutter speed possible, which is 1/100s here.
Aperture: 7.1 (this is just a starting point and will be adjusted depending on the size of the subject and the frame I am going for. Also check for the sweet spot of your lens)
ISO: 200 (ISO200 will enable us to use less flash power, if we use one for macro – and I almost always do. It is still low enough to guarantee good image quality and detail rendering)
Optional settings to help with macro photography
To help focusing on your subjects (at higher magnifications and when using closed apertures for more depth-of-field the viewfinder will be considerably darkened) there are 2 settings that will brighten your image preview.
S-OVF
Turning on the S-OVF (simulated optical viewfinder) will show a bright image in the viewfinder and helps finding and focusing on your subject.
With S-OVF the camera ignores your current exposure and hence does not darken the viewfinder accordingly.
You can find the S-OVF in the LV Mode selection, 3rd tab on the gear symbol.
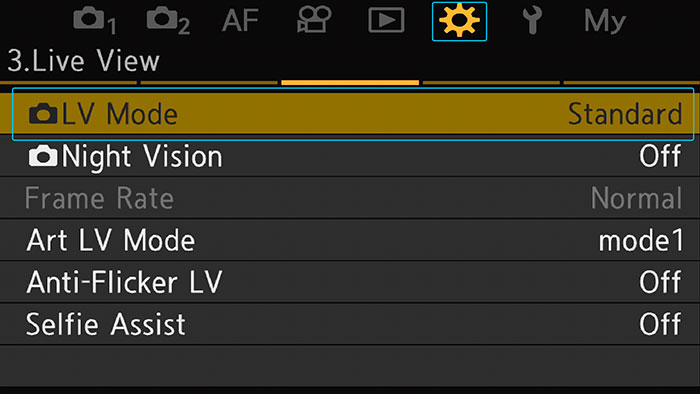
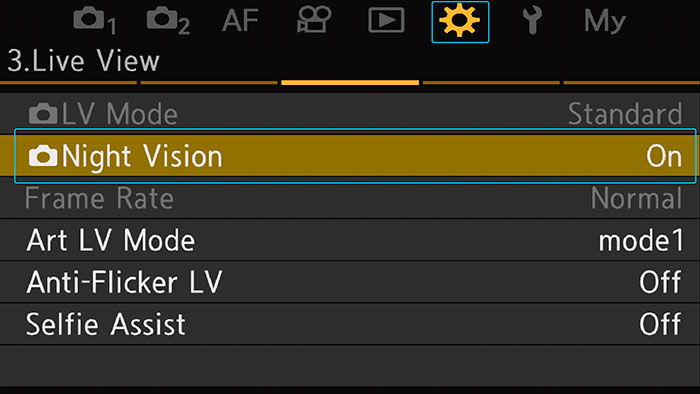
Nightmode /Night Vision
Similar to S-OVF, the Night Vision setting will make sure that you can find your subject and easily focus on it, even if the lighting isn´t too well.
It enhances brightness on the screen/viewfinder considerably, no matter what shutter speed or aperture you set.
In my opinion, it can sometimes cause a very subtle lag though and I was told it might require a tad more energy than if you use S-OVF.
The Night Vision can be found on the same menu tab as the LV Mode / S-OVF.
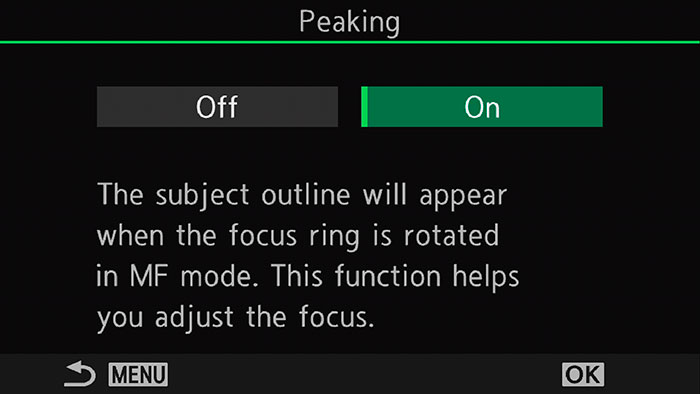
Focus Peaking
When focus peaking is enabled, the areas, that are currently in focus, will be highlighted by a colour of your choice.
While the standard setting highlights only while the focusing ring is being actively turned, it is also possible to assign focus peaking to a button.
If enabled via the programmed button, the focus peaking highlights will be visible all the time, even when the focusing ring is not being turned.
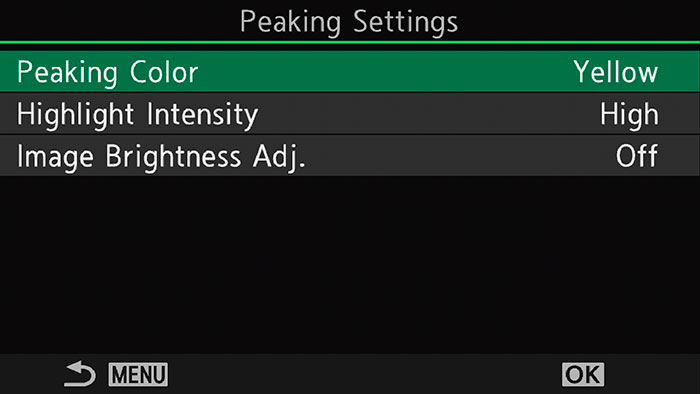
Activate Peaking in the MF Assist menu on tab 7 in the AF settings.
The peaking settings can be found one line below.

Flash settings
Mode: manual
Flash power: 1/32 or 1/16 – from here I increase/decrease power depending on a first test shot until my image is lit as I want it.
Zoom: widest zoom, 10mm or 12mm. Using the wide panel of the flash will scatter the light even better and improve diffusion, but it will cost you flash power.

If you are creating a focus stack manually by using the sequential shooting mode and then move the camera by hand to “scan” the subject and create the focus bracket, you can apply the same settings but you are not limited to the 1/100s of shutter speed that is forced in the automated focus stacking and focus bracketing mode of the OM cameras.
Whenever the scene and flash sync time allow for it, I would use the fastest shutter speed available – except I want to bring in the background and go for mixed lighting (available light and flash).
Please keep in mind, that these are my personal settings and there are various ways to get great results.
Play around with the settings and see what fits your personal approach best!
Sign up for the newsletter mailing list & free ebook

Did you enjoy these tips and want to learn more or improve your macro photography skills?
Stay up to date with new blog posts, reviews and tutorial- and ebook-releases.
Sign up below to get notified when the free edition of my ebook
‘How to master spider & insect macro photography’ is ready for download.
Virginia Huang
Posted at 18:34h, 05 MayThank you so much for a very helpful and detailed post on how to set up my OM1 for focus stacking and bracketing!
wildmacro-chris
Posted at 15:12h, 06 MayHi, glad it helped and thanks a lot for your kind feedback 🙂